Camp Crafts for Kids
How to Make Crafts and Activities for Camp
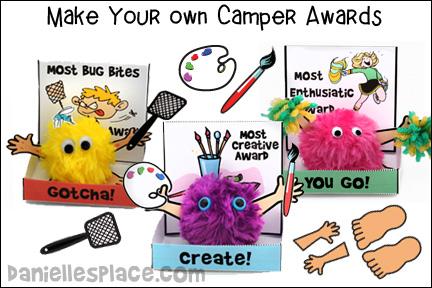
Camper Awards Paper and Pom Poms Crafts

Most Musical Award
Rocker with guitar
and headband
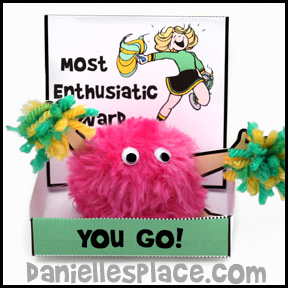
Most Enthusiastic Award
Critter holding yarn
pom poms
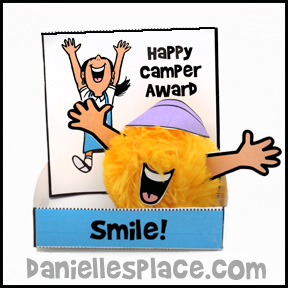
Happy Camper Award
Critter with big smile
and visor
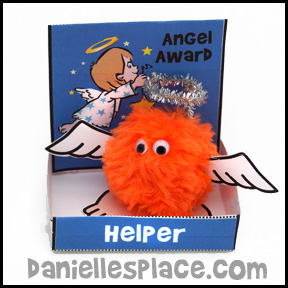
Angel Award
Critter with wings and halo
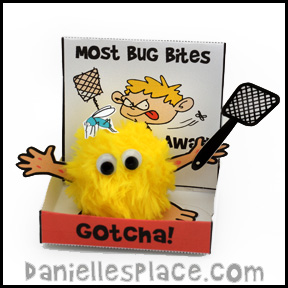
Most Bug Bites
Critter with flyswatter and mosquito
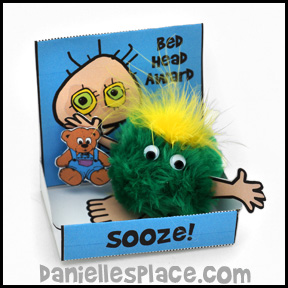
Bed Head Award
Critter with hair and
teddy bear

Best Boo-boo
Critter with bandage on head

Best Sunburn Award
Critter with sunglasses
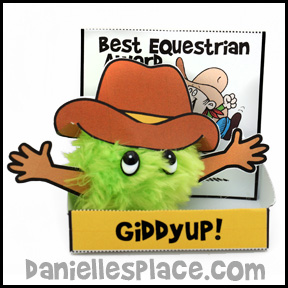
Best Equestrian
Critter wearing cowboy
hat and cowboy boots
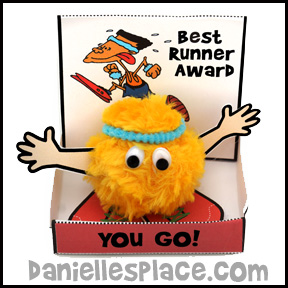
Best Runner Award
Critter wearing headband
and running shoes
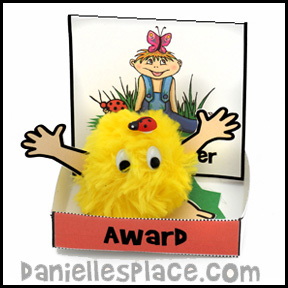
Nature Lover Award
Critter with ladybug
on its head
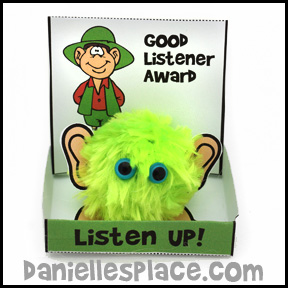
Good Listener Award
Critter with big ears
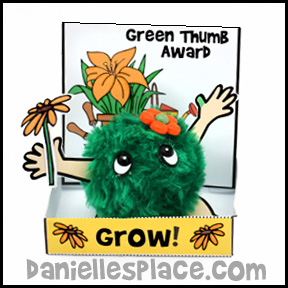
Green Thumb Award
Critter holding flower
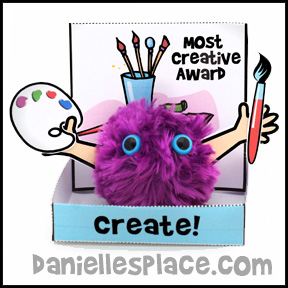
Most Artistic Award
Critter holding a pallet and paint brush
Member's ![]()
Instant Digital Download - ![]()
Are you looking for an award that isn't here? Let us know what kind of award you would like to see here, and we will try to make
it for you.
How to Make:
1. Print out the patterns onto cardstock and cut them out.
2. Fold all the dotted lines on the box back.
3. Glue the small side tabs to the sides of the box and then fold the front of the box with the words over the side tabs and glue it down. Fold the back of the box down and glue it to the back.
4. To finish glue the arms, feet and other objects to pompoms, and place them in the display boxes. (The pompoms used for these crafts were purchased from Hobby Lobby.)
How to Make Your Own Pom Poms Without a Pom Pom Maker:
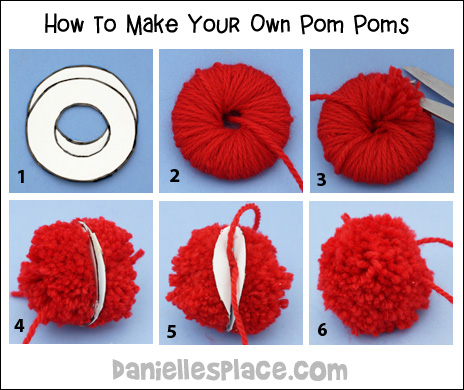
1. Draw two circles onto card board (Card board from cereal boxes work well.) the size you would like your pom poms. Then draws circles inside the two circles. The bigger the inside circle the thicker your pom poms will come out.
2. Cut out the inside circles to make donut shapes.
3. Place the two donut shapes together and wind long pieces of yarn through the holes in the donut shapes and around the outside until you have fill up the hole with yarn. To keep the yarn ends secure just wind the yarn around the ends until the ends are covered by the yarn. Add new lengths of yarn the same way.
4. When you have the hole filled up with yarn cut around the outside edge of the donut shape with sharp scissors all the way down to the card board.
5. Separate the two donut shapes and insert a piece of yarn between the shapes. Tie the yarn pulling it as tight as you can.
6. Cut the card board shapes and pull them away from the pom pom.
7. To save time you can cut the donut shapes so that they aren't complete circles. In this way you will just slip the yarn through the cut slit instead of inserting the yarn through the hole. See this YouTube Video for a demonstration of this technique.
You can buy plastic pom pom makers in several different designs.
The Clover Small Pom Pom Maker allows you to wind one half of the donut shape at a time so you don't have to poke the yarn through hole, but it does take some maneuvering. You can see a video on YouTube here: https://www.youtube.com/watch?v=d2Ma-hgQIDU.
The Susan Bates Easy Wrap Pom Pom Maker is a little easier to use because the two sides of the pom pom are wrapped separately. Wrapping only one half of the circle saves a lot of time because you don't have to poke the yarn through the hole in the center of the donut shape. You can see a demonstration using this pom pom maker on YouTube here: https://www.youtube.com/watch?v=HaSqTUgFHi4.
SUSAN BATES has another pompom maker that is just plastic circles with a ridge in the middle. They are used the same way as the directions above.
Sea Shell Paper Weight Crafts
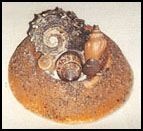
What you will need:
Small Sea Shells
White Glue
Sand
Paint
Wilson Tennis ball container - $1.88 at Wall-Mart, fun foam for base.
How to make:
1. To make the Plaster of Paris mold for the base cut the bottom off the plastic container about two inches from the bottom. Cut another inch off but leave two or three one inch tabs sticking up. This mold can be used over and over again.
2. Fill the base with Plaster of Paris according to the directions. Remove the plaster cast when it is dry by lightly tapping the the tabs of the mold on a table. The plaster cast should pop out.
3. Cut a three inch circle from fun foam and glue it onto the Plaster of Paris base with tacky glue.
4. Paint the base and let dry. If you use water colors you can add the sea shells and sand without waiting for the paint to dry.
5. Add enough white glue to some sand to make it moist. Press a small amount sand into the impression in the base.
6. Arrange the sea shell and press them into the sand.
7. Spray the entire paper weight with clear gloss paint.
Leaf and Flower Print Bandana Craft
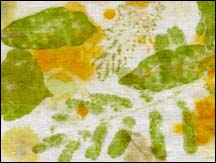
What you will need:
White Bandannas or Squares of White Cotton Material
An Assortment of Fresh Leaves and Flowers
Rubber Mallet
How to make:
1. Place waxed paper on a sturdy table. On top of the waxed paper place some fresh leaves and flowers. Place your bandanna on top.
2. Use a rubber mallet to pound (gently) on the bandanna over top of the areas where there are leaves and flowers until the color from the leaves or flowers come through the material. Continue this way with other leaves and flowers until the entire bandanna is covered. The bandannas will be washable, but don't use Clorox or a strong detergent when washing them.