Christmas Crafts for Kids -Page 3
Bible Christmas Crafts, Christmas Crafts for Sunday School
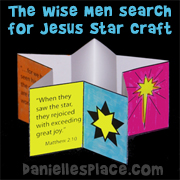
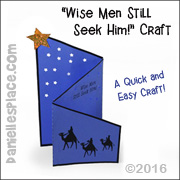
Layered Christmas Book
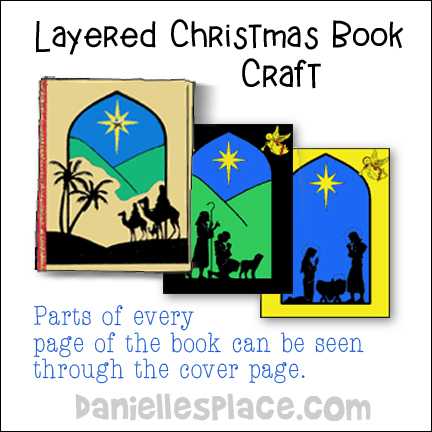
This layered Christmas book tells the story of Christmas with four biblical scenes: The wise men, the shepherds, angels (not shown), and Mary and Joseph with Baby Jesus.
What you will need:
Tan, Green, Dark Blue, Black, Red, and Yellow Computer Paper
Heavy Card Stock for the Back of the Book
Paper Glue
Shiny Star Sequin
Gold Trim (Optional)
Staples
How to Make the Layered Christmas Book:
1. Print out the patterns.
Member's Pattern 
Instant Digital Download - 
2. Print Pattern Page 1 onto tan paper and cut out the middle.
3. Print Pattern Page 2 onto green paper and cut out the middle.
4. Print Pattern Page 3 onto yellow paper. Cut out the middle, the star and the angels.
5. Print Pattern Page 4 onto dark blue paper. Use pattern Page 3 as a template to cut a frame from black paper. Glue the black frame on top of pattern Page 2. Glue the yellow angels from pattern Page 3 onto the top corners of the black frame.
6. Glue the yellow frame from pattern Page 3 on top of Pattern Page 4 (the blue page). Glue the yellow star in the center of the picture.
7. Place the pages together in order. Use a piece of card stock for the back cover. Staple the book together at the left side. Cut a one-inch strip of red paper and fold it in half long ways. Glue it onto the edge of the book to cover the staples. Cut a strip of gold trim and glue it on the edge.
8. You can also glue a shiny star sequin in the center of the yellow star.
9. You can also use gel pens to write Bible verses on the bottom of each page to match the pictures.
Comments:
I used the layered Nativity card in my class week before. I had 6 yr. olds one very industrious 3 year old! They turned out beautiful! The parents were very impressed and kept them as keepsakes to put on their trees. I did all the cutting ahead of time as it was too detailed for even the 6 year olds - especially the angels and star. We left off the binding and trim on the edge of the book. We added glitter to the star. Since putting them together was not a very long craft we read a children's book on the birth of Christ. For less mess gluing, I put the liquid glue on a scrap of card stock and have a big box of q-tips for the children to spread the glue. Works great - we can't afford the glue sticks. Thanks for a great craft.
I used the layered Christmas book craft for my class the Sunday before Christmas. The kids loved it. I have 7-11 year olds, I even had a couple of our younger youth that day, they loved it too. When they finished putting their book together they each used gel pens to put verses in them to give to their parents as Christmas cards. Thank you for having such creative ideas. Your friend, Sharron Flannery
My Pre-K class made the layered Christmas book a couple of weeks before Christmas. They turned out beautifully! I did all the cutting beforehand and let the kids glue everything in place. (I have a Xyron 150 sticker maker--very small and very inexpensive--that made it much easier for the kids to glue the angels and star and even the binding. All they had to do was peel and stick.) We talked about the part of the Christmas story that each page of the book represented. We also talked about giving and God's most precious gift to all of us. On the last page we wrote "Thank you, God, for the best Christmas present ever--our Savior, Jesus!" and had each child write his or her name on the back. The books caught the attention of several adults after class. They really are a nice keepsake. Thanks! Kim Eckels
Copyright 2000, Digital by Design, Inc. - See Copyright Information
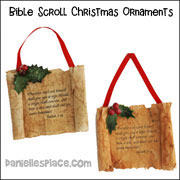
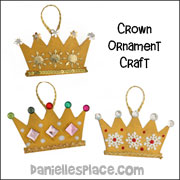
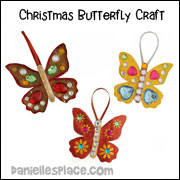
Paper Christmas Ornaments
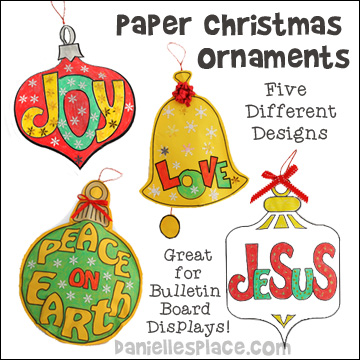
These large ornaments, 7.5" x 7.5", are great for bulletin board displays and make beautiful Christmas decorations.
What you will need:
Paper
Colored Paper
String for Hanging
Confetti Snowflakes
Ribbon, Bows, and Other Christmas Decorative Items
Low Temp. Glue Gun
Colored Pencils or Crayons
How to Make the Christmas Ornaments:
1. Print out the ornament patterns onto white or colored paper. (Patterns for this craft are available to members on The Resource Room.)
Member's Pattern
Instant Digital Download -
2. Cut out the patterns and color them.
3. Glue on string to hang them and decorate them with snowflake confetti or snowflakes cut with a snowflake paper punch, glitter, ribbon and bows.
4. You can also make the ornaments 3D by gluing two ornament shapes together around the sides and stuffing them with crinkled up grocery bags.
©2000, Digital by Design, Inc. -*See Copyright Information
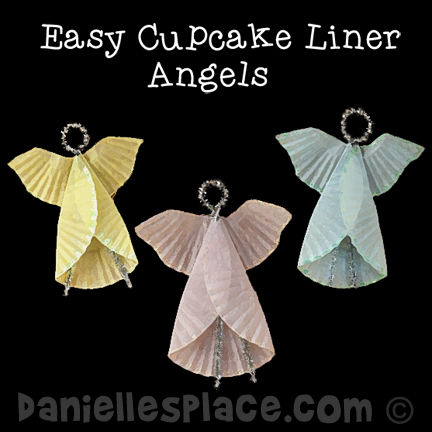
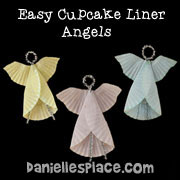
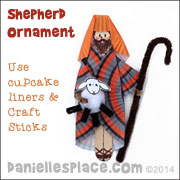
Angel Craft - Cupcake Liner Angel Craft
What you will need:
Cupcake Liners
Tinsel Chenille Stems
Glue
How to Make the Cupcake Liner Angels:
1. To make the angel body flatten out a cupcake liner and then fold in one side about one inch. Fold over the other side about one inch starting at the top of the fold of the other side so that it is overlapping the other side.
2. To make the angel wings flatten out another cupcake liner, fold it in half, and cut the halves apart. Shape the wings by cutting a dip out of the center of the half as shown in the diagram.

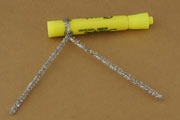
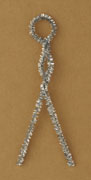
3. To make the head and legs wind a Chenille stem around the end of a marker and twist it to fit on the marker. Remove it from the marker.
4. Bring the two ends of the Chenille stem together making a loop. Twist the ends together about one inch below the first twist. Place the twisted Chenille stem inside the folded cupcake liner body piece and glue it to the liner.
5. To finish glue the wings to the back of the body.
Copyright 2014, Digital by Design, Inc. - See Copyright Information
The Christmas Story - 5 Lesson Series
Lesson 1 - The Prophets Tell About Jesus
Lesson 2 - An Angel Tells The Good News
Lesson 3 - The Shepherds Tell About Jesus' Birth

Lesson 4 - The Wise Men Search For Jesus
Lesson 5 - The Rest of the Story
Nativity Crafts
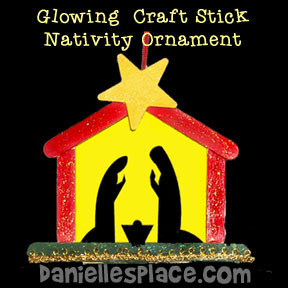
Glowing Craft Stick Nativity Scene
What you will need:
Mini Craft Sticks and Regular-size Craft Sticks
Wooden Stars or Stars cut from Paper
Acrylic Paint or Markers
Yellow Printer Paper
Trim (optional)
Glitter Glue
Oil (Optional)
Red String or Ribbon
How to Make the Glowing Craft Stick Nativity Ornament for Christmas:
1. Print out the pattern onto yellow paper or if you are going to make copies print it out onto white paper. If you don't have a lot of time in class paint the craft sticks ahead of time.
Member's ![]()
Instant Digital Download - ![]()
2. Cut out the patterns. In class have the children glue the craft sticks on the pattern starting on the sides first and then the roof and bottom.
3. To finish, glue a star and red string to hang the ornament to the top. Let the children 3. When everything is glued together show the children how to paint oil onto the back of the picture and wipe off the excess oil. You can use cooking oil or baby oil. This will make the yellow background slightly transparent. Decorate the ornament with glitter glue and decorative items such as ribbon and beads.
This craft goes with the Sunday School Lesson The Shepherds Tell About Jesus' Birth on The Resource Room.
3D Printable Standup Nativity Craft Kids Can Make for Christmas
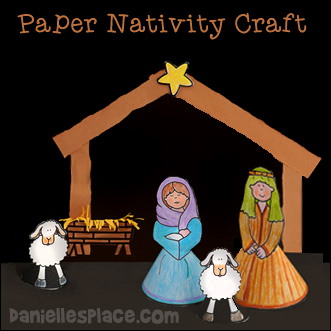
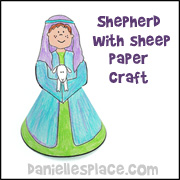
Children color and cut out paper patterns to make this adorable 3D nativity scene.
Go to the Christmas 3D Printable Craft Page for directions and links to the patterns.
Copyright 2000, Digital by Design, Inc. - See Copyright Information
Christmas Crafts on Other Pages
Bible Christmas Crafts Page 1, Christmas Crafts Page 1, Christmas Crafts Page 2, Christmas Crafts Page 3, Christmas Crafts Page 4, Christmas Crafts Page 5, Christmas Crafts Page 6, Winter Crafts Page