Bible Crafts for Children about The Bread of Life
Jesus is the Bread of Life
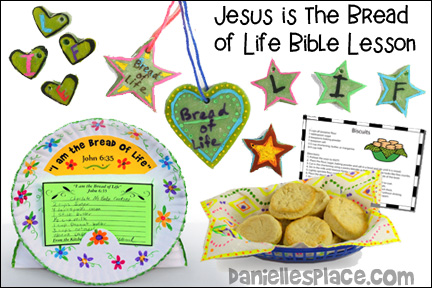
The following craft and Bible Games come from the Bible Lesson "Jesus is the Bread of Life" on The Resource Room. A complete lesson including all the crafts and activities on this page is available to members and as an instant download.
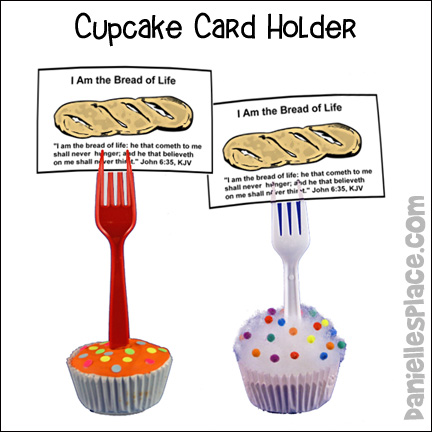
Cupcake Recipe Card Holder
What you will need:
Plaster of Paris (About 3/4 cup for each cupcake. Plaster from home improvement stores such as Home Depot or even Wal-mart, not in the craft section, is usually much cheaper than plaster from craft stores.)
Cup Cake Wrappers
Plastic Forks
Paint
Fiberfil
Tiny Pom Poms or other Decorative Items
Brightly Colored Paper
Paper Punch
How to Make the Cupcake Recipe Card Holder Craft:
Younger Children
1. If you have younger children make the cupcakes that are painted (below). Place cupcake wrappers in cupcake tins. Mix plaster of Paris in a plastic cup with a plastic spoon. Mix just enough plaster for one cupcake. Place a heaping cup of plaster of Paris in the plastic cup and add just enough water to make a thick paste. Spoon the mixture into the cupcake wrapper. The plaster should be like stiff egg whites. Pile it up over the top of the wrapper. If it gets sticky just wet a spoon or your fingers to smooth it out. Let the plaster dry for just a minute and then stick a fork in the middle. (Note: Throw away the plastic cup and spoon when you are finished. Never try to rinse the plaster down the sink.)
2. When the plaster has set remove it from the tins. Press on the bottom of the tins to pop them out.
3. In class have your children paint the top of the cupcakes and then sprinkle confetti on top of the wet paint.
To make confetti punch bright colored paper with a hole punch.
4. Print out the "Bread of Life" Verse Cards onto white card stock and cut them apart. Print out the Bread Recipe Cards onto bright colored card stock and cut them out.
5. Glue the cards back-to-back and stick them in the tines of the fork. Tell your children that they can use the card holder to holder their recipe cards and the Bible verse they are learning that week so the can feed their souls.
Older Children
1. This method is a little more difficult because the children are working with fiberfil and glue. They have to be very careful because it can get kind of messy. Provide wet paper towels so they can wipe the glue off their hands.
2. Prepare the same as above, but use only about 3/4 cup of plaster for each cup cake, and only fill them up to about 1/2" from the top of the wrapper. Let the plaster dry for just a minute and then stick a fork in the middle. If the fork won't stand up, you can use clothespins to hold them in place until the plaster hardens.
3. In class have your children glue fiber fill to the top of the cupcakes and then glue tiny pompoms or other decorative items to the top.
Decorate a Napkin to Place in a Breadbasket
This craft goes with the Bible Lesson Bread of Life from The Resource Room.
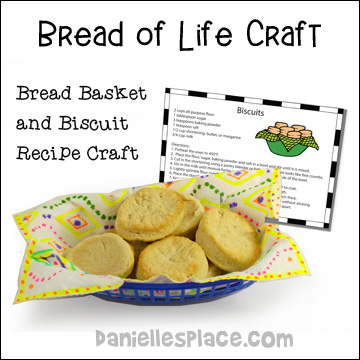
What you will need:
White Paper Towel or White Material
Breadbaskets (You can find these at second-hand stores for 25 to 50 cents apiece)
Markers
Pinking Shears
How to Make the Breadbasket Craft:
1. Have your children decorate strong paper towels with markers and cut the edges with pinking shears. Tell them they can write the memory verse on the napkin and use other Christian symbols.
2. Have them place their napkins in their baskets. Tell them they can place a piece of plastic wrap over the napkin and place bread in the basket.
3. Remind your children that when they or anyone else eats bread from the special basket this week they should share something about Jesus with others in their families.
4. A printable biscuit recipe card is available to members.
Paper Plate Recipe Card Holder
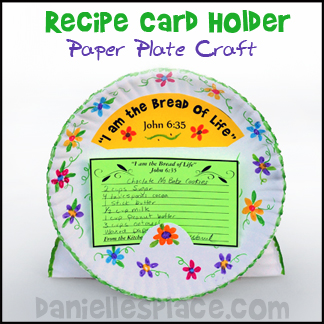
What you will need:
Paper Plates, Markers, Glue, Scissors and Card Stock
How to Make the Paper Plate Recipe Card Holder:
1. Before class print out the Bible Verse Pattern and the Recipe Cards, and write out a recipe card for each child. Print out extra black cards.
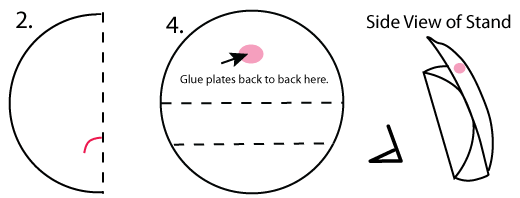
2. Fold the paper plates in half but try not to crease the plates too much and cut a small curve at the bottom fold of each plate to make the half-circle cutout as shown in the picture. This will hold the recipe card.
3. In class have your children glue the Bible verse on the top the center of the plate and decorate the paper plate with markers.
4. When your children are finished make a stand for the recipe card holders. Fold another paper plate in half and then fold one side in half again bringing the edge of the paper plate to the middle of the plate. Glue the edge of the paper plate to the paper plate at the fold.
5. Give your children the recipe cards you wrote and some blank cards. Encourage them to write some recipes for their friends.
Bread of Life Bible Verse Review Relay Game
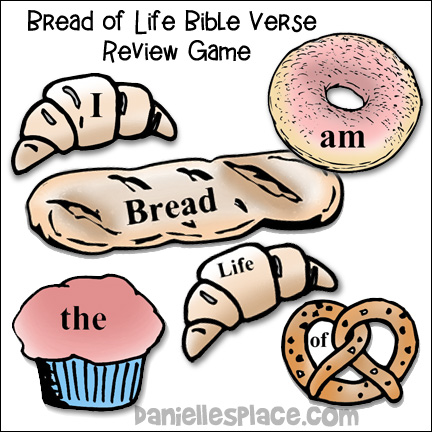
1. Before class place print out two sets of bread shapes and cut them out. Place each set in a breadbasket.
2. In class line two teams up at the end of one room and place the breadbaskets with the bread shapes in the front of the room.
3. Write the Bible verse on the board so that both teams can see the verse.
4. On the word "Go" one member of each team should run up to the baskets at the other end of the room, find the first word of the Bible verse and place it on at table to stick it to the wall and then run back to tag the next person in line. That person should then run up and find the next word of the verse and do the same thing as the first person. The team that gets the whole verse in order first wins.
Bread Clay Activity
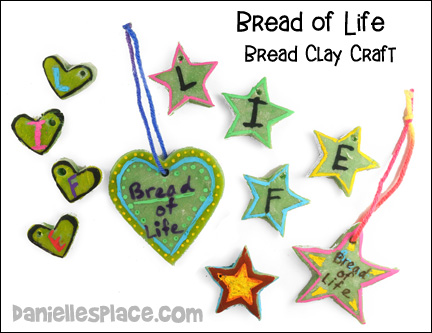
Children make clay out of white bread and then use it to form shapes or cut shapes with cookie cutters. As your children work tell them that they can use their creations to remind them that they can't live on bread alone and that Jesus is the Bread of Life.
Bread Clay Recipe
7 Pieces of (Fresh) White Bread.
7 tsp. of School Glue or Tacky Glue
1/2 tsp. of Water
1/2 tsp. of Cold Cream or Cooking Oil
Corn Starch
Acrylic Paint
1. Cut the crusts off of the bread. Have the children break the bread into small pieces and put them in a bowl.
2. Add the glue and mix thoroughly.
3. Add the water and cold cream (or glycerine) and mix until you get a clay consistency. If the mixture is too dry, you can add a little more water. Add about 1/2 tsp. of acrylic paint to the dough to color it.
4. Place a small amount of cornstarch on a piece of waxed paper. Remove the clay from the bowl and roll the clay around the cornstarch so it isn't too sticky. Have the children knead the clay until it is smooth and isn't' sticky anymore.
5. Let the shapes air dry for about 24 hours. When the shapes are dry the children can glue magnets on the back to put on their refrigerator. If they want to make a pendant, have them use a skinny drinking straw to punch a hole at the top of the shape.
John 6:35 Bible Verse Review Activity Sheet
Children circle the words that are associated with types of bread on the activity sheet to reveal the Bible verse. Available in both KJV and NIV.


