Needle Felting Crafts for Kids
How to Make Crafts Relating to Felting
Supplies Needed for Needle Felting

Felting Needles and a Felting Needle Holder
Felting needles are very sharp with barbs that should only be used by older children with supervision from an adult. They come in different sizes, the larger needles are for beginning work, and the smaller needles are for detail work.
Block of 2" foam about 6 Inches Square
The foam block protects the felter from being stabbed. You can buy the foam pad or make your own from an old couch cushion or foam pillow.

Wool Roving
Wool roving is fleece that has been combed into strands and rolled into a bundle. When a bundle of wool roving is poked with felting needles the barbs on the needles twist the fibers together to form the wool into solid shapes. You can buy it dyed or natural.
Needle Felted Pink Bear
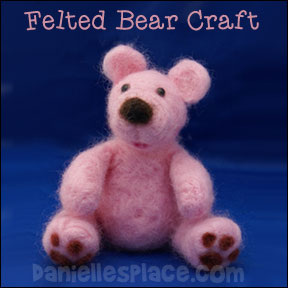
What you will need:
About 1 oz. Pink Wool Roving
Brown Wool Roving
Tiny Black Bead for theEyes or Animal Eyes
Block of 2" Foam about 6" Square
Felting Needles
Note: This craft is for older children only with adult supervision. The needles are very sharp.
How to Make Needle Felted Pink Bear:
1. Start by making the body.
Cut 4 inches of pink wool roving and pull the fibers apart down the middle to make two pieces that are four inches each.
Pull the fibers apart on one 4" length and roll them up into a ball shape.
Spread out the fibers on the other 4" length to make a wider piece.
Place the ball shape on the spread out fibers and roll the fibers around the ball shape pulling them tight to make a larger oval shape.

2. Place the wool oval shape on your foam square and start stabbing it with your felting needle, shaping it as you go. (You can use a bigger needle to start and end with a smaller needle for the details.)
At first it doesn't seem like you are doing much, but soon the fibers will begin to stick together and the shape will become firmer. Stab the shape more in areas in which you want it to be smaller or thinner. It's a lot like working with clay except you are molding with the needle. Make sure you are stabbing it with the needle straight up and down so that the needle doesn't break.
3. Once you have the body close to the shape you would like, you can start making the head.
4. Use about 2 inches of wool roving for the head. Shape it the same way you did the body. Felt it with the needle as described above. Once it is close to what you would like it to be, felt it to the body by placing in against the body and stabbing all around the edge of the head into the body.
5. If a part comes out too small or you would like to add more detail, you can always add more wool to the area you would like to change. Just place it over the area and felt it in.
6. Next make the legs and arms in the same manner and felt them to the body.
Making The Ear

7. To make the ears cut off a very tiny piece of wool and wind it into a circle shape. To do this pinch one end of a length of roving in between your thumb and pointer finger and then wind the rest of the yarn around the pinched part. See pictures to the right. Needle felt the wool together and attach them to the head.
8. To make the nose and pads of the feet and hands just cut off small amounts of brown roving and roll them up into tiny balls like you would clay. To make it even easier wet your hand before rolling. Attach them by felting them.
9. Glue on eyes.
Needle Felted Duck Craft
This cute little duck is about 3 inches long from tip of the beak to the end of its tail.
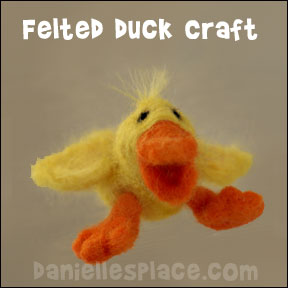
What you will need: .
3 oz. Yellow Wool Roving
3 .oz Orange Wool Roving
Felting Needles
Black Wool Roving or Tiny Black Bead for the Eyes
Block of 2" Foam about 6" Square
Note: This craft is for older children only with adult supervision. The needles are very sharp.
How to Make Needle Felted Duck:
1. Start by making the body. Start with about 8 inches of yellow wool roving. Pull the fibers apart and then roll them up into a teardrop shape. The smaller end will be the duck tail feathers. See the Needle Felted Pink Bear for general directions on how to felt.
2. Place the wool tear-drop shape on your foam square and start stabbing it with your felting needle, shaping it as you go. (You can use a bigger needle to start and end with a smaller needle for the details.)
At first it doesn't seem like you are doing much, but soon the fibers will begin to stick together and the shape will become firmer. Stab the shape more in areas in which you want it to be smaller or thinner. It's a lot like working with clay except you are molding with the needle.
3. Once you have the body close to the shape you would like, you can start making the head.
4. Use about 4 inches of wool roving for the head. Pull it apart and form it into a ball shape. Felt it with the needle as described above. Once it is close to what you would like it felt it to the body by placing in against the body and stabbing all around the edge of the head into the body.
5. If a part comes out to small or you would like to add more detail, you can always add more wool to the area you would like to change. Just place it over the area and felt it in.
6. To make the webbed feet use about 4 inches of orange roving, pull the fibers apart, mix them up, and form them into a triangle shape. Felt them into the feet shape and then felt it onto the body. Do the same for the bill and wings.
7. To make the eyes cut off a very tiny piece of wool and roll it into a ball. (If you wet your fingers first, it will roll easier. Felt the eyes into the head. If you don't want to use the wool, you can use tiny black beads.
8. To finish cut a few strands of yellow roving and felt them into the top of the head.
Copyright 2008, Digital by Design, Inc. - See Copyright Information
Needle Felted Blue Bird Craft
This cute little bird is about 3 inches long from tip of the beak to the end of its tail.
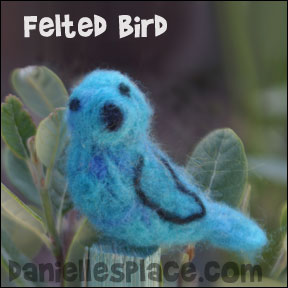
What you will need:
Blue Wool Roving
Black Wool Roving
Felting Needles
Tiny Black Bead for the Eyes
A Block of 2" Foam about 6" Square
Note: This craft is for older children only with adult supervision. The needles are very sharp.
How to Make Needle Felted Blue Bird:
1. Start by making the body. Start with about 8 inches of blue wool roving. Pull the fibers apart and then roll them up as tight as possible into a teardrop shape.
2. Place the wool tear-drop shape on your foam square and start stabbing it with your felting needle, shaping it as you go. (You can use a bigger needle to start and end with a smaller needle for the details.) At first it doesn't seem like you are doing much, but soon the fibers will begin to stick together and the shape will become firmer. Stab the shape more in areas in which you want it to be smaller or thinner. It's a lot like working with clay except you are molding with the needle.
3. Once you have the body close to the shape you would like, you can start making the head.
4. Use about 4 inches of wool roving for the head. Pull it apart and form it into a ball shape. Felt it with the needle as described above. Once it is close to how you would like it felt it to the body by placing in against the body and stabbing all around the edge of the head into the body.
5. Roll a thin strand of black roving into a snake shape like you would using clay. Felt it to the bird's body into the shape of wings as shown in the picture. If you want the wings to stand out from the body, felt the wings first and then felt them to the body.
6. To make the eyes cut off a very tiny piece of wool and roll it into a ball. (If you wet your fingers first, it will roll easier. Felt the eyes into the head. If you don't want to use the wool, you can use tiny black beads.
7. To make the beak roll a piece of black roving into a cone shape, felt it to make it stiff, and then felt it to the birds head.
Copyright 2008, Digital by Design, Inc. - See Copyright Information
Needle Felted Hedgehog Craft
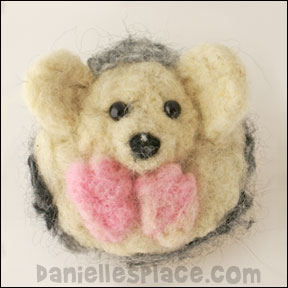
What you will need:
Gray, Pink, Black, and White Wool Roving
Animal Eyes
How to Make Felted Hedgehog:
1. Start by making the body. Roll a piece of white roving into a ball and felt it until it is somewhat firm. Add more roving if the body is too small. When you have the body the size you want, felt one side so that there is an indentation where you want to add the head and feet. You can also add indentations for hands if you would like.
2. To make the head roll some more roving into a ball that is pointy on one side. Felt it until it is firm and then felt it to the body.
3. Make ears by rolling more roving into a circle. Felt the ears to the head.
4. Felt pink roving into feet shapes and attach them to the body by felting them.
5. Felt two indentation where you want the eyes and glue them in the indentation. Felt a small piece of black felt on for the nose.
See the Needle Felted Pink Bear for general directions on how to felt.
Created by Danielle Warvel - Copyright 2008, Digital by Design, Inc. - See Copyright Information
Needle Felted Giraffe Craft
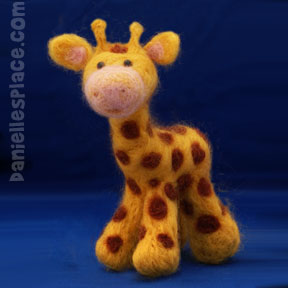
What you will need:
Yellow Wool Roving
Pink Wool Roving
Black Wool Roving
Felting Needles
Tiny Black Beads for the Eyes
Block of 2" Foam About 6" Square
Note: This craft is for older children only with adult supervision. The needles are very sharp.
How to Make Needle Felted Giraffe:
1. Start by making the body. Start with about 6 inches of yellow wool roving. Roll it up as tight as you can into a cylinder shape.
2. Place the wool shape on your foam square and start stabbing it with your felting needle, shaping it as you go. (You can use a bigger needle to start and end with a smaller needle for the details.) At first it doesn't seem like you are doing much, but soon the fibers will begin to stick together and the shape will become firmer. Stab the shape more in areas in which you want it to be smaller or thinner. It's a lot like working with clay except you are molding with the needle.
3. Once you have the body close to the shape you would like, you can make the four legs, neck, and head the same way.
4. To connect the shapes just place them together where you want them to connect and stab one piece all the way through the other piece. Stab all around the edges until the pieces are secure.
5. If a part comes out too small or you would like to add more detail, you can always add more wool to the area you would like to change. Just place it over the area and felt it in.
6. To make the eyes cut off a very tiny piece of wool and roll it into a ball. (If you wet your fingers first, it will roll easier. Felt the eyes into the head. If you don't want to use the wool, you can use tiny black beads.
7. To finish felt a thin layer of pink roving over the muzzle area of the giraffe. To make the tail roll the roving like you would clay to make a snake shape then poke it on all sides. See the Needle Felted Pink Bear for general directions on how to felt.
Copyright 2008, Digital by Design, Inc. - See Copyright Information
Needle Felted Guinea Pig
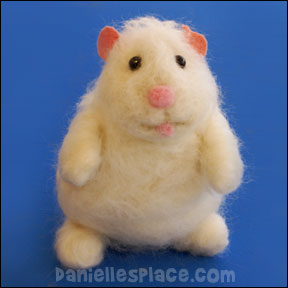
What you will need:
About 1 oz. Pink Wool Roving
White Wool Roving
Felting Needles
Tiny Black Bead for the Eyes or Animal Eyes
A Block of 2" Foam about 6" Square
Note: This craft is for older children only with adult supervision. The needles are very sharp.
How to Make Needle Felted Guinea Pig:
1. Follow the general directions for the Pink Bear above, except cut ears from pink felt squares and glue them on.
2. Glue on eyes.
Copyright 2008, Digital by Design, Inc. - See Copyright Information
Felted Scottie Dog
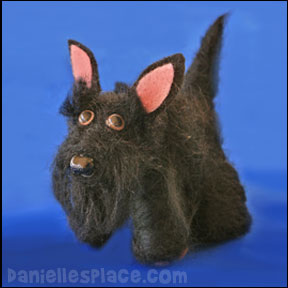
What you will need:
About 1 oz. Black Wool Roving
Felting Needles
Eyes
Dog Nose
Black and Pink Felt Sheets
A Block of 2" Foam about 6" Square
Glue Gun
Note: This craft is for older children only with adult supervision. The needles are very sharp.
How to Make Felted Scottie Dog:
Follow the general directions for the Pink Bear above, except cut the scottie dog's ears from black and pink felt sheets. When you have finished felting the dog, felt on some long pieces of felt for the beard, eyebrows, and long hair on the body.
Copyright 2008, Digital by Design, Inc. - See Copyright Information
Felted Gingerbread Man Christmas Tree Ornament
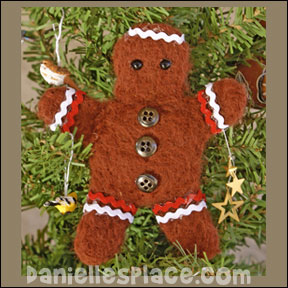
What you will need:
About 1 oz. Brown Wool Roving
Felting Needles
Tiny Black Bead for the Eyes
Gingerbread Man Cookie Cutter
Rick Rack
You Will Also Need a Block of 2" Foam about 6" Square
Note: This craft is for older children only with adult supervision. The needles are very sharp.
How to Make Felted Gingerbread Man Christmas Tree Ornament:
1. Place the cookie cutter on the foam block. Place brown wool roving inside the cookie cutter to cover the entire area. If you don't have a cookie cutter, you can cut a gingerbread man shape from a piece of cardboard.
2. Needle felt the roving until it becomes thick. Add more wool roving if your gingerbread man isn't thick enough. Needle felting is very easy. All you do is poke the wool roving with a felting needle over and over until the roving begins to stick together to make felt.
3. To finish glue on eyes, buttons, and Rick Rack.
See the Needle Felted Pink Bear for general directions on how to felt.
Copyright 2008, Digital by Design, Inc. - See Copyright Information
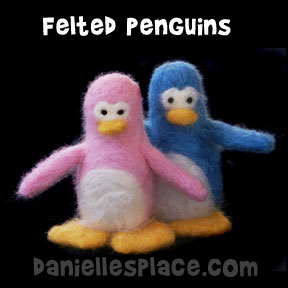
Needle Felted Penguins
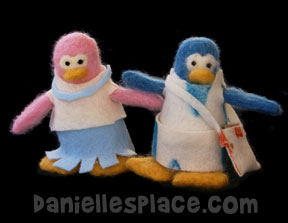
Needle Felted Penguins
Copyright 2008, Digital by Design, Inc. - See Copyright Information
Felted Lion Finger Puppet Craft
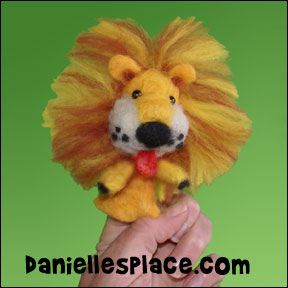
What you will need:
.3 oz. Yellow Wool Roving
Brown
Red
Black Wool Roving
and White Wool Roving
4" Foam from a Cushion
Tiny Eyes
Felting Needles
How to Make Felted Lion Finger Puppet:
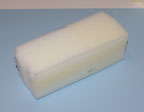
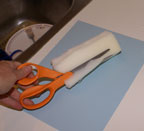
1. To make the body of the lion, you will need to make a tube in which a finger can be inserted. Cut a piece of foam 1 1/2" x 1 1/2" x 7" with a knife from the foam cushion. You can find cushions very cheap at a second-hand store.
2. Cut the corners off the long side of the foam piece to form it into a cylinder shape. It doesn't have to be really smooth.
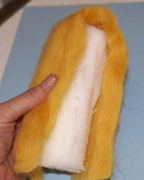
3. Place a piece of wool roving over the tube, long wise. Bring the sides of the wool roving around so that the wool covers the whole cylinder as shown in the picture below. Then wind another piece of yellow wool roving around the cylinder the opposite way covering the piece of wool you just put on. The whole cylinder should be covered except for the bottom.
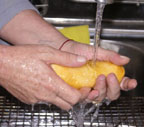
4. Turn on your tap water and let it run until it is the hottest it will get. Place the foam piece with the wool on it under the water and wet it thoroughly. Squirt some soap on the wool to make it slippery. Press in on the wool and turn the cylinder around (the opposite way the wool is wound so it doesn't come off) and around in your hands, squeezing slightly, so that the wool fibers begin to stick together. Once the fibers begin to stick together, you can add more wool if you have any holes. Keep working with the wool until it feels firm.
5 - 6. You can also roll the wool on a bumpy surface such as a cooling rack to help felt the wool. You don't have to worry about the top and bottom of the tube because you will be cutting the bottom off even, and the top you will needle felt together.
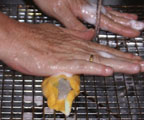
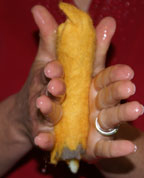

7. Once the wool is firm and you don't have any holes you can start to dry your piece. Squeeze it between some towels and/or use a hair dryer. Once it is fairly dry, you can start to remove the inside foam piece. Carefully pull the felt away from the foam. You can use a dinner knife to separate the foam from the felt. Slowly pull the foam out. Cut one end of the wool tube even. This is where the finger will be inserted in the puppet.
8. Stick a clothespin inside the tube to make it firm when you are felting. Just don't stick it in all the way. Felt the top of the tube closed with a felting needle. The top part is the head.
9. Needle felt on a white ball for the muzzle. Felt it to the tube about 1/2" down from the top. Poke the needle into the ball to make the mouth.
10. Felt on a yellow rectangle shape in the center of the muzzle and forehead for the top part of the nose. Felt on a black nose. Read the instruction for making the Pink Bear above for more information about needle felting.
11. Add ears, arms, and a tongue.
12. To finish cut 3" pieces of yellow and brown wool and felt them all the way around the side of the head to make the mane.
Copyright 2008, Digital by Design, Inc. - See Copyright Information


