Back to School Crafts 4
Back to School Crafts for Children
Monster Tabletop Garbage Bags – Make Back-to-School Clean-Up Fun!
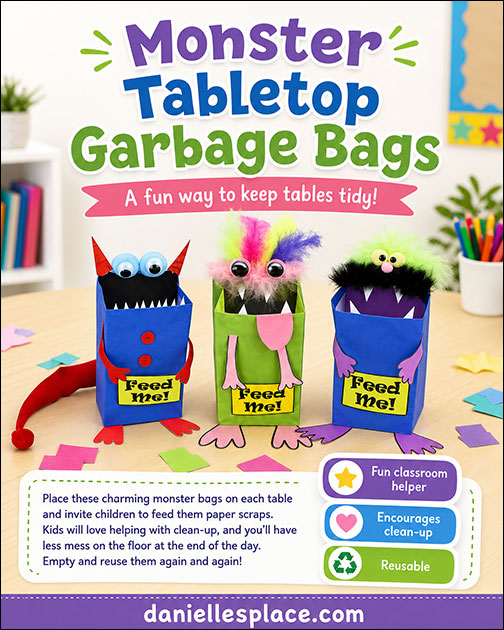
Kick off the new school year with a classroom helper your students will actually want to use! These silly monster bags sit right on the table, ready to gobble up paper scraps, cuttings, and other small bits of classroom mess.
Just tell your students to “Feed the Monster!” as they work. Children will love helping to keep their tables tidy, and teachers will love having less mess on the floor at the end of the day.
This activity is more than just a clean-up tool—it’s also a fun and creative back-to-school craft! Students can design and decorate their own monster bags, giving each table a unique classroom monster with its own silly personality.
Use them as a first-week-of-school craft, a classroom management helper, or both. When a monster’s tummy is full, simply empty it into a larger trash can and put it right back to work.
A creative, reusable, and kid-approved way to make back-to-school clean-up part of the fun!
You can prepare these ahead of time, or have each group of children at a table help design one for their table.
You can also make these tabletop garbage containers out of recycled materials such as oatmeal canisters and milk jugs. See directions to make these below this craft.
What you will need:
White Craft Foam or Construction Paper for the Teeth
Aleene's Tacky Glue or other Tacky Glue
Scissors, Paper Glue and/or Low Temperature Glue Gun, Black and other Colors of Construction Paper.
Other supplies you might use: Wiggle Eyes, Feathers, Feather Boas, and Buttons
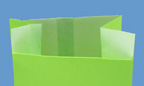
How to make Monster Desktop Garbage Bags:
1. To form the mouth cut a one-inch slit down the two front corners on the top of the bag and fold down the flap to the inside of the bag. (See diagram) Glue or tape down the flap.
2. Fold down both sides from the bottom of the slits to the top of the back corners and then glue the flaps down on the inside. (See diagram on the left.)
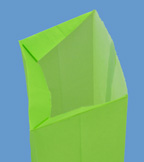
3. Glue a piece of black construction paper to the inside back of the bag so that the mouth looks dark inside. This will also help the teeth to show up better.
4. The two monsters on the right side of the picture have feather boas and feathers glued to the top, back of the bag to make the monster's head. The monster on the left just has two pompoms glued on the back, top of the bag for eyes. The horns were made from rolled up fun foam. The tail was made out of rolled up red felt with a pompom glued to the end.
5. The teeth were made from white fun foam. The hands and feet were just drawn on construction paper with a black Sharpie and then cut out, and glued to the bag. The tongue was made from pink paper.
6. When you have finished your monster glue a sign that reads, "Feed Me!" to the Monster's hands.
©2010, Digital by Design, Inc - See Copyright Information
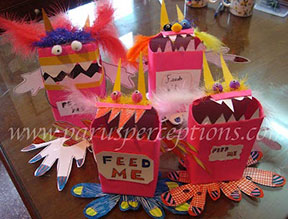
These monster bins were made by Paru's Preceptions.
Oatmeal Box Monster Tabletop Garbage Can Craft
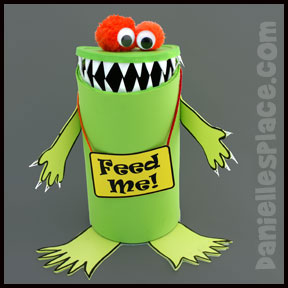
This monster tabletop garbage can is sturdier than the paper bag monsters above. If you use fun foam instead of construction paper for the feet and arms, it will last even longer.
What you will need:
Empty Oatmeal Canister
Construction Paper
Glue, Sharpie Marker, Printer Paper, Yarn and Scissors
How to Make Tabletop Monster Garbage Cans:
1. Cover the oatmeal canister with fun foam or construction paper.
2. Paint the lid with matching acrylic paint. When the lid is dry glue the lid to the canister at the back so that it leaves a crack in the front for the mouth.
3. Draw monster hands and feet on construction paper or fun foam with a black Sharpie, cut them out, and glue them to the canister.
4. Cut triangle shapes from white fun foam and glue them to the inside rim of the lid and top of the canister as shown in the picture.
5. Glue pompoms to the top of the lid and then glue googly eyes to the pompoms.
6. Print out the "Feed Me! Sign Pattern above, cut out a sign and glue yarn onto the top corner. Hang the sign on the monster.
©2010, Digital by Design, Inc - See Copyright Information
More Back to School Crafts!