Bee Crafts Kids Page 2
Bee Crafts, Bee Projects, Bee Unit Study Ideas for Homeschool, Preschools and Daycares
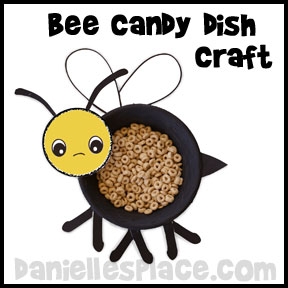
Free Bee Candy Dish Craft for Kids
This craft is great to use at a party with a bug or bee theme. Place sweet honey candy, Honey Nut Cheerios, or Honey Comb Cereal in the bowl.
What you will need:
7 3/8" Plastic or Paper Bowls
Card Stock (Thick Paper)
Crayons
Black Paint
Scissors
Glue
How to Make a Bee Candy Dish:
1. Print out the pattern onto white card stock. Color the bees face, and cut out the patterns.
2. Paint the paper or plastic bowl or use one that is already black or yellow. Glue the antennae to the head and the head onto one side of the bowl. Glue on the legs and feet. Cut a stinger from black construction paper and glue it to the bowl.
©2008, Digital by Design, Inc. - *See Copyright Information
Foam Bee Pin Craft for Kids
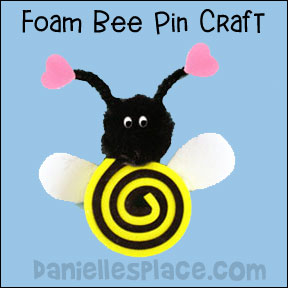
How to Make a Foam Bee Pin Craft:
1. Cut 1/4" x 6" strips from the black and yellow craft foam sheets. Place one strip on top of the other and roll them together. Glue them together as you go. Use straight pins to hold the strips in place as you roll. Stick the straight pins through the layers from the sides to hold them together until they dry or use a low temp. hot melt glue gun.
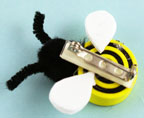
2. Once the glue on the body is dry, glue a black pompom to the side of the circle where the strips end. Glue on googly eyes and chenille stems for the antennae.
3. Cut two wing shapes from white craft foam and glue them to the back of the body.
4. To finish stick a self-sticking pin back to the back of the bee.
©2009, Digital by Design, Inc. - *See Copyright Information
More Bee Crafts and Activities from Bug Buddies Study
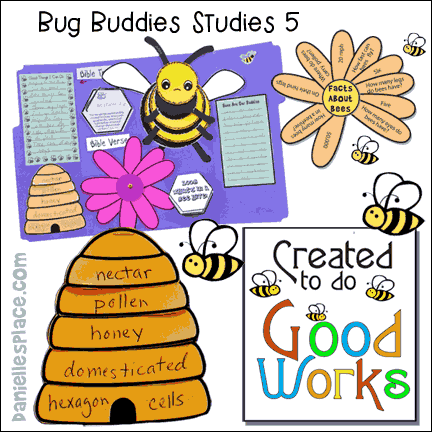
This Christian-based set of studies introduces children to variety of amazing insects. Each lesson emphasizes a Biblical concept relating it to a specific insect, and encourages children to dig deeper and learn more about insects. They are child-directed, designed to get them questioning and digging for the answers, and encourages them to use their creativity. These studies do not throw out a lot of facts which your child is expected to memorize. Children learn through investigation, hands-on activities, games, repetition, and creating. Children can create file folder books for each study to help them remember and categorize what they have learned. Children will enjoy looking back at what they have learned, and sharing it with others.
©2009, Digital by Design, Inc. - *See Copyright Information
Craft Spoon Bee Refrigerator Magnet Craft for Kids
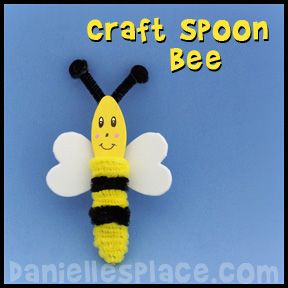
How to Make a Craft Spoon Bee:
1. Paint a craft spoon yellow and let it dry.
2. Cut a pipe cleaner about two inches long and fold it in half. Glue it onto the back of the craft spoon with a low temperature glue gun.
3. Glue tiny black pompoms on to the ends of the antennae, or just fold the ends down.
4. Wind pipe cleaners around the craft spoon to make the body.
5. Cut heart-shaped wings from craft foam and glue it to the back of the bee.
6. To finish draw a face on the bee with a permanent marker and glue on wiggle eyes.
7. To finish glue a magnet to the back of the bee.
©2013, Digital by Design, Inc. - *See Copyright Information
Other Bee Crafts from "God's Masterpiece" Sunday School Lesson on The Resource Room
Bee Balloon Party Decoration Craft for Kids
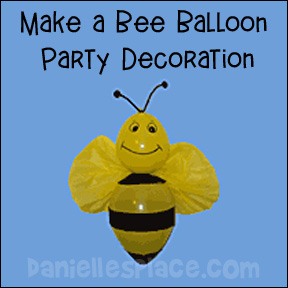
What you will need:
Two Large Yellow Balloons
Yellow and Black Tissue Paper
Paper Glue (Rubber Cement)
Black Permanent Marker
Black Pipe Cleaner
Small Black Pompoms
Tape
Black Heavy Duty Thread
How to Make a Bee Balloon:
1. Blow up the two yellow balloons, one half the size of the other. Glue them together using rubber cement pressing the two rounded ends together. To glue together paint the rubber cement on each of the balloons and let dry for a few seconds and then press together.
2. Cut a strip of black tissue paper about 4" wide and tape around the center of the body. Cut two large circles of black tissue paper. Use a plate to trace around. Cut into the circles and cut out the center. Place one circle around the neck of the bee like a collar. Cut off any extra tissue paper and tape the tissue paper down. Do the same at the bottom of the bee.
3. Crinkle up a sheet of yellow tissue paper bringing the long side of the tissue paper together to form wings. Tape at the center. Cut the wings to the right size. Tape them to the back of the bee at the neck area.
4. Fold a black pipe cleaner in half, glue a pompom to each end of the pipe cleaner, and wrap it around the knot on the top of the bees head.
5. Draw on eyes and a mouth with a black permanent marker.
6. Tie a piece of thread to the top of the head to hang the bee.
©2004, Digital by Design, Inc. - *See Copyright Information
Pompom Bee Craft for Kids
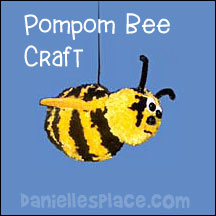
What you will need:
Black and Yellow Yarn
Poster Board or Card Board from a Cereal Box
Pom Pom Maker - (Optional)
You can buy plastic pom pom makers in several different designs.
The Clover Small Pom Pom Maker allows you to wind one half of the donut shape at a time so you don't have to poke the yarn through hole, but it does take some maneuvering. You can see a video on YouTube here: https://www.youtube.com/watch?v=d2Ma-hgQIDU.
The Susan Bates Easy Wrap Pom Pom Maker is a little easier to use because the two sides of the pom pom are wrapped separately. Wrapping only one half of the circle saves a lot of time because you don't have to poke the yarn through the hole in the center of the donut shape. You can see a demonstration using this pom pom maker on YouTube here: https://www.youtube.com/watch?v=HaSqTUgFHi4.
How to Make a Pom Pom Bee:
How to Make Your Own Pom Poms Without a Pom Pom Maker:
1. Draw two three-inch circles onto card board (Card board from cereal boxes work well.) or the size you would like your pom poms. Then draws circles inside the two circles. The bigger the inside circle the thicker your pom poms will come out.
2. Cut out the inside circles to make donut shapes.
3. Place the two donut shapes together and wind long pieces of yarn through the holes in the donut shapes and around the outside until you have fill up the hole with yarn. To keep the yarn ends secure just wind the yarn around the ends until the ends are covered by the yarn. Add new lengths of yarn the same way.
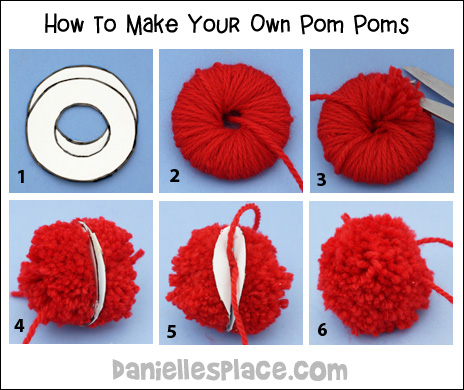
Cover the entire donut shape with yellow yarn and then cover the yellow yarn with black yarn. Alternate the colors until you fill in the hole.
4. When you have the hole filled up with yarn cut around the outside edge of the donut shape with sharp scissors all the way down to the card board.
5. Separate the two donut shapes and insert a piece of yarn between the shapes. Tie the yarn pulling it as tight as you can.

6. Cut the card board shapes and pull them away from the pom pom. Trim any pieces of yarn that are sticking out too far. Trim the ball to be a little pointy at one end. This is the bees tail where his stinger is located.
7. To save time you can cut the donut shapes so that they aren't complete circles. In this way you will just slip the yarn through the cut slit instead of inserting the yarn through the hole. See this YouTube Video for a demonstration of this technique.
8. Make the bee's head in the same manner using yellow yarn except use a two-inch donut instead of a 3-inch donut. I added a little bit of black, but it isn't necessary.
9. When the head is finished hot melt glue it onto the body. Glue on eyes and pipe cleaner antennae. Glue on a nose and mouth if desired.
10. See how many other creatures you can make using pompoms in this manner.
©2009, Digital by Design, Inc. - *See Copyright Information
Good Books About Bees
Read "The Bee Tree" by Patricia Polacco
A little girl, tired of reading, wants to go outside and play. Her grandfather uses the opportunity to teach his granddaughter the importance of reading by taking her on a hunt for a bee tree.
The little girl learns that just as there is sweetness in honey, there is sweetness inside a book too.
Her grandfather says, "Adventure, knowledge, and wisdom don't come easily. You have to pursue them. Just like we ran after the bees to find their tree, so you must also chase these things through the pages of a book!
The Bible has many verses about the advantages of gaining wisdom and knowledge. You can use this book to open a discussion about the important of studying God's Word and relate it to the sweetness of honey.
"Know also that wisdom is sweet to your soul; if you , there is a future hope for you, and your hope will not be cut off." Proverbs 24:14
"More to be desired are they than gold, yea, than much fine gold: sweeter also than honey and the honeycomb." Ps. 19:10
Bee Games and Activities
"Beeline" Game (Learn the Names of Common Flowers)
You will need different kinds of flowers cut from paper (use clip art) or artificial silk flowers. You can use more than one of each kind of flower. Before the game review with the children what each type of flower is called. Place the flowers all over the room. Have the children buzz around the room acting like bees. When you call out the name of a flower the bees look for that type of flower, grab it up, and make a "beeline" to the hive (finish line). The first child to make it to the hive with the right kind of flower wins. (Learning moment. After a bee locates nectar and fills itself up with it, he takes off in a straight line back to the hive or makes a "beeline" to the hive.)
©2009, Digital by Design, Inc. - *See Copyright Information
Carry Nectar Back to the Hive Relay Game
Talk about how bees and other insects have a special mouth called a proboscis that is very long and helps them to get down into the cup of the flower and suck out the sweet nectar. Demonstrate how this is done by using a straw and a pitcher of Kool-Aid. Set the children up into teams with a pitcher of Kool-Aid for each team. Give each child a straw. When you blow a whistle the first person on each teams runs up to the pitcher and drinks as much as he can until you blow the whistle again. When the child taps the next person in line he runs up to the pitcher and starts to drink until the whistle is blown again. Continue until every child has had a turn or one pitcher is empty.
©2009, Digital by Design, Inc. - *See Copyright Information
Secret Smells
Tell the students that bees recognize each other by using their sense of smell. Try this out by playing a game of secret smells. Spray or dip cotton balls in the following scents making two of each: perfume, lemon juice, liquid spices, vinegar, or any other smell that is easily recognizable. Place these cotton balls in a plastic bag. Give one to each child making sure that another child has the match. Have them go around the room using their noses to find their secret partner. If you have a small group or a younger group, just make one of each scent and set them on a table. Have the children try to guess what the scent is.
Bee Crafts on Other Pages

