Christmas Nativity Peg Doll Scene Craft
Nativity Christmas Craft for Kids - Wooden Peg Doll and Craft Sticks, Easy-to-make Craft!
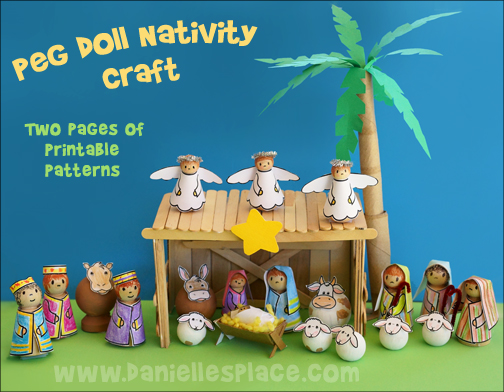
The craft patterns for this craft are available to members and as an instant download.
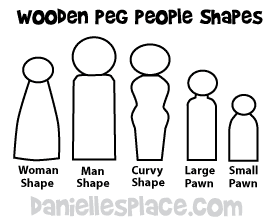
What you will need:
One-inch Wood Ball Knobs for the Sheep
1 1/2" Wooden Balls and Caps from Water Bottles
1 1/2" Wood Star Shape or Star Shape Cut from Paper
Prismacolor Premier Colored Pencils (I love these because they have very soft lead and work well on the wood shapes.) You can also use markers but the color may bleed a little.
Brown, White, and Yellow Acrylic Paint
Low Temp Mini Glue Gun or All Purpose Tacky Glue
Silver and Brown Chenille Stems
Shoe Box or Other Box for the Stable
Regular-sized Craft Sticks and Mini Craft Sticks
How to Make the Peg People Nativity Set:
1. Print out the two pattern sheets and color the patterns.
Mary and Joseph Peg Dolls
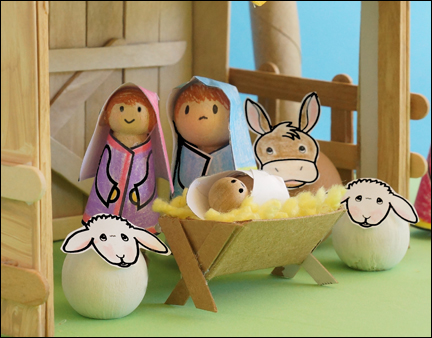
1. Color the Mary and Joseph outfits and head coverings and cut them out.
2. Glue the Mary outfit on the women-shaped peg and the Joseph outfit on the man-shaped peg.
3. Draw the face and hair on the pegs.
4. To make the head covers fold the patterns on the dotted lines and then place glue on the folded tab. Bring the sides of the head dress over the tabs to make darts. Glue the head coverings on the peg dolls.
Baby Jesus in a Manger
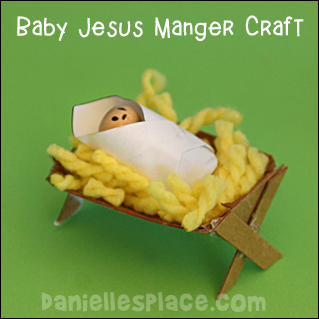
1. Use the manger and manger leg patterns as a templates to cut the patterns from cardboard. (Available to members and as an instant download above.)
2. Fold the manger in half lengthwise and then fold the tabs up. Fold the end tabs over top of each other and glue them together.
3. Glue the legs on the manger as pictured above.
4. Cut up yellow yarn into small pieces and place in the manger.
5. Cut out the baby blanket and place a small pawn-shaped peg in the center of the blanket so that the head is just below the top of the blanket. Glue the pawn to the blanket. Fold up the bottom of the blanket over the bottom of the peg and glue it to the peg. Press up on the bottom sides of the blanket so that the blanket is up against the side of the peg. Fold over the sides of the blanket and glue them to the top of the peg.
6. Place the Baby Jesus peg in the manger.
Angels Peg Dolls
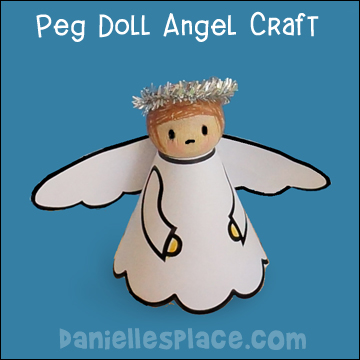
1. Cut out the angel dresses and wing patterns.
2. Glue the dress patterns to the women-shaped pegs, and then glue the wings to the back of the angel.
3. Use colored pencils or markers to draw in the eyes and hair.
4. Cut short pieces of silver Chenille stems and form them into circles for the halos. Glue them to the angels' heads.
Wise Men Peg Dolls
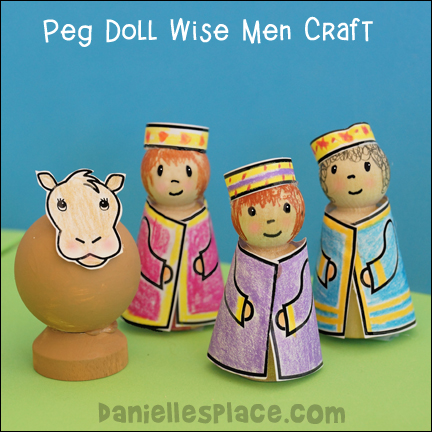
1. Color the wise men outfits and crowns and then cut them out.
2. Glue the outfits on the man-shaped pegs.
3. Draw the face and hair on the head of the pegs.
4. Glue the crowns into circles and glue them to the heads of the wise men.
Shepherd Peg Dolls
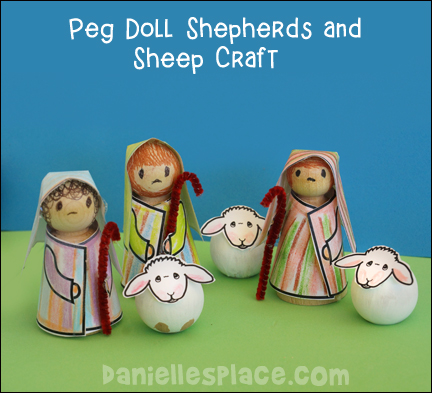
1. Cut out the shepherd clothes and arm patterns and glue the head piece at the darts.
2. Glue the outfits on the man-shaped or curvy-shaped pegs and then glue on the arms.
3. Draw the face and hair on the head of the pegs with a black Sharpie.
4. Cut short lengths of Chenille stem to make the shepherds staffs and then glue them to the hand.
Cow, Donkey, Camel, and Sheep
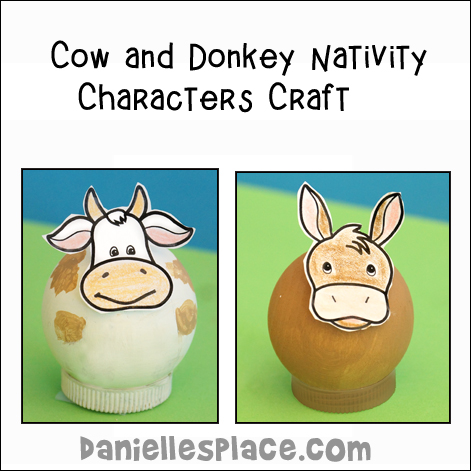
1. To make the sheep paint the one-inch wood ball knobs white and let them dry. Glue the sheep heads to the balls.
2. To make the camel and donkey glue the 1 1/2" balls onto a water bottle cap and paint them brown. (You can also use the wooden stands that come with clothe pins.)
3. When the paint is dry glue on the head patterns.
4. To make the cow glue a bottle cap to the bottom of a 1 1/2" ball. Paint the ball and cap white and add brown spots. Glue the cow head pattern to the ball.
Craft Stick Stable
What you will need:
Craft sticks (Regular-sized and other sizes)
Glue Gun and Glue
Heavy Duty Scissors to cut the cardboard and craft sticks
How to Make the Stable:
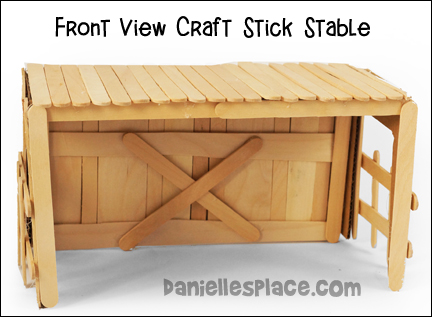
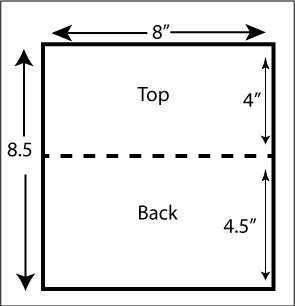
1. Cut a piece of cardboard 8" x 8.5". Measure down on the 8.5" side 4" and draw a line across to the other side making the top 4" and the bottom 4.5". Use a sharp object to score the cardboard and fold it down on the score line.
2. Cut and glue craft sticks to cover the back of the stable. Make sure you can still fold down the top into a 45 degree angle.
3. Glue craft sticks around the edge of the back and then one across the middle. Glue two more craft sticks in an X shape.
4. Place glue on the fold and hold the top down to form a 45 degree angle and hold it until the glue dries.
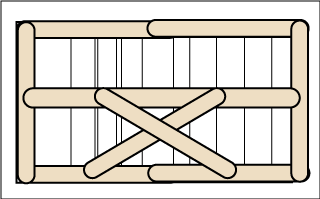
5. Glue craft sticks across the top of the stable and then glue crafts around the edge of the underside of the top of the stable. Glue two craft sticks to the front, top of the stable.
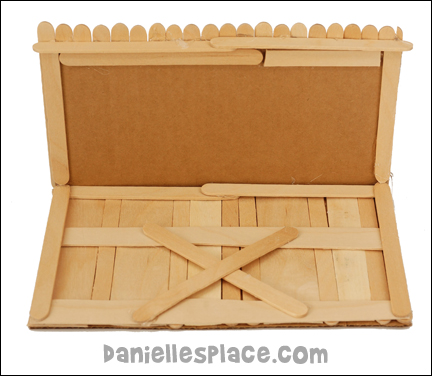
4. Cut the sides of the stable 4" x 4.5". Cut out an inside rectangle to leave only 3/4" on the top and the sides. Glue the sides to the sides of the stable.
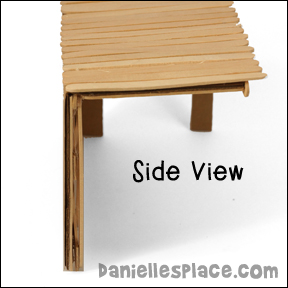
Side View of Stable
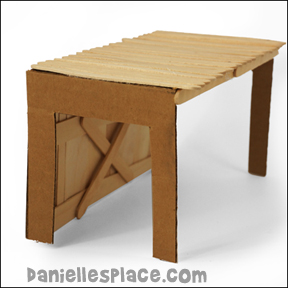
Side View of Stable with Sides Glued on.
5. Cover the sides with craft sticks. You can cut them with heavy-duty scissors to make them fit.
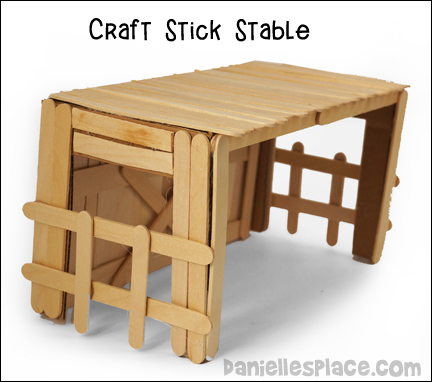
6. Glue two craft sticks across the sides of the stable and then two perpendicular to the two craft sticks.
©2014, Digital by Design, Inc. - *See Copyright Information


