Beatitudes Crafts and Activities - Blessed Are The Persecuted
Bible Crafts and Activities for the Beatitudes
The following crafts and activities come from the Bible lesson "Blessed Are the Poor in Spirit". In this lesson children learn from Jesus' example what it means to be poor in spirit. Children are introduced to the story of the Pharisee and the publican, Luke 18:10-13, and the story of Jesus and the children, Mark 10:13.
This lesson is available to members on The Resource Room and as an instant digital download.
Member's ![]() - Available in both KJV and NIV
- Available in both KJV and NIV
Instant Digital Download ![]() - KJV
- KJV
Instant Digital Download ![]() - NIV
- NIV
Bee Paper Lunch Bag Craft Holding a Bible Verse Sign
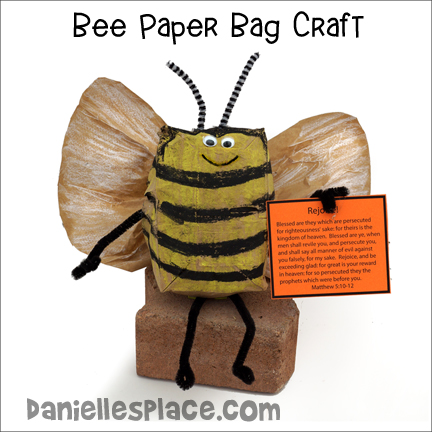
What you will need: Paper Lunch Bags, Crayons, Markers, or Paint, Google Eyes, Chenille Stems, Colored Paper, Low Temperature Glue Gun, and Plastic Grocery Bags
What to do:
1. Before class print out the Bible verse cards onto card stock.
Member's ![]() - Available in both KJV and NIV
- Available in both KJV and NIV
Instant Digital Download ![]() - KJV
- KJV
Instant Digital Download ![]() - NIV
- NIV
2. Make a sample craft before class. Color or paint the bottom of a lunch bag to look like a bee.
3. When the bag is dry stuff about three plastic grocery bags or wrinkled scrap paper in the lunch bag so that it fills the bottom of the bag.
4. Cut slits on both sides of the bag down to about four inches from the bottom of the bag.
5. Gather the bag together just above the stuffing pushing the top of the bag to the sides to form the wings. Tie off the wings with a Chenille stem. Shape the wings with scissors.
6. Cut Chenille stems in half, punch tiny holes in the bag where you want the legs, arms, and antenna. Place glue on the end of Chenille stems and stick them in the holes. Form the other ends of the Chenille stems into hands and feet.
7. Place a Bible verse card in one of the hands of the bee.
(To make this craft even easier you can just color a bag to look like a bee, stuff it, and then roll down the top of the bag, and glue it closed. Make wing shapes from construction paper and glue them to the bag.)
Color or Paint a Flower and Bee Color Sheet
1. Before class print out the Flower and Bee Coloring Sheets. If you are going to have your children paint the color sheet with water color paint, print the sheet out onto card stock (heavy paper).
Member's ![]() - Available in both KJV and NIV
- Available in both KJV and NIV
Instant Digital Download ![]() - KJV
- KJV
Instant Digital Download ![]() - NIV
- NIV
2. In class have your children color or paint the picture. As they work talk about flowers, specifically morning glory flowers.
You can also use the Color Version of this Sheet to display in your classroom.
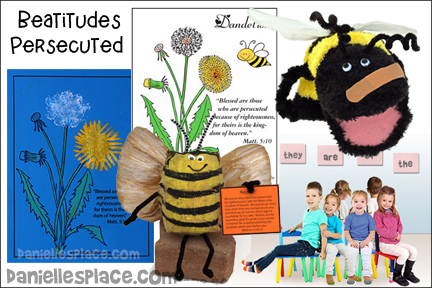
Paint a Dandelion Picture with Chenille Stems and Plastic Forks
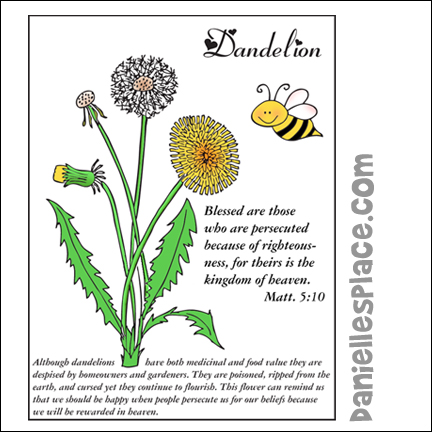
What you will need:
White and Yellow Opaque Paint
Plastic Forks
Chenille Stems
Dark Colored Paper
What to do:
1. Before class print out the dandelion pattern onto white paper and make copies onto dark paper.
Member's ![]() - Available in both KJV and NIV
- Available in both KJV and NIV
Instant Digital Download ![]() - KJV
- KJV
Instant Digital Download ![]() - NIV
- NIV
2. Make a sample picture using the rolled up end of a Chenille stem to make the white dandelion flower and a plastic fork for the yellow dandelion flower. Dip the rolled up end of the Chenille stem in white paint and dab it onto the paper. (If you don’t have Chenille stems, you can just have your children use their fingertips.) Place a plastic fork in yellow paint and press it around the middle of the flower to make the petals. You can also paint a yellow blob for the flower and then use the tip of the fork to make the petals. Remove the paint on the blob with the top of the fork.
Beatitudes Folding Craft Sticks Patterns
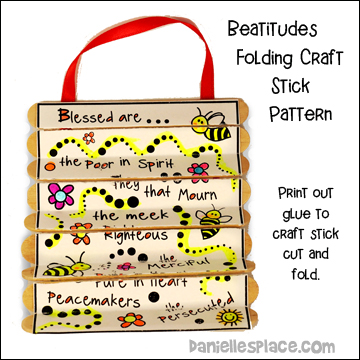
You can buy this Beatitudes printable pattern that can be glued to the craft stick canvas and then cut. Watch a video on how to make the No-tape, Folding Craft Stick Craft on the Father's Day Crafts Page.
Instant Digital Download ![]() - KJV
- KJV
Instant Digital Download ![]() - NIV
- NIV
![]() -Separately $2.00 - Available for both Jumbo and MIni-Jumbo Craft Sticks, or you can just fan-fold the papers.
-Separately $2.00 - Available for both Jumbo and MIni-Jumbo Craft Sticks, or you can just fan-fold the papers.
How to Make the No-tape, Folding Craft Stick Cards:
1. Print out the pattern that matches the size of your craft sticks.
2. Line up nine jumbo crafts sticks or mini-jumbo craft sticks one on top of the other.
3. Spread glue on the back of a cardstock square and stick it to the middle of the craft sticks pressing down and out from the middle of the paper.
4. Turn the craft sticks over and glue another piece of cardstock to the back.
5. Let the glue dry completely. This could take up to an hour. When the glue is completely dry use an Exacto knife or box cutter to cut the paper. On one side carefully cut the paper in the space between the first and second craft stick.
Do not cut all the way through to the paper on the other side. Skip the next space and cut the space between the third and fourth craft sticks. Skip the next space and the top paper between the fifth and sixth craft sticks.
6. Turn the card over and cut the paper in the space between the second and third craft sticks, the fourth and fifth, and the sixth and seventh.
7. Carefully fold up the craft sticks.
8. In class have your children color and decorate their folding cards. They can also draw their own designs on the back of the sticks.
Little Bee Puppet Skit
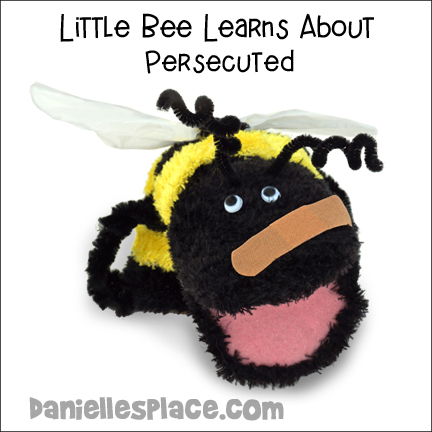
This series of lessons uses a bee puppet to introduce each learning concept. (You can use the paper bag puppet from Lesson 2, make a sock bee puppet, or purchase a bee puppet.) Place another Band-aid on Little Bee’s head.
Teacher: Good morning class! I’m so glad to see you here today. This is the last lesson in our Beatitude series, and I’m sorry to say, the last day Little Bee will be visiting us.
Little Bee appears with Band-Aid on her head.
Teacher: Hi, Little Bee! How are you today?
Little Bee: Not so good.
Teacher: I see you have another Band-Aid on your head. Did you get hurt again? Did you get in another fight with Buster Bee?
Little Bee: No, it was even worse.
Teacher: Worse? Well, do you mind telling us what happened?
Little Bee: I got in a fight with my friends.
Teacher: Your friends?
Little Bee: Yea, they were very mean to me.
Teacher: Do you mind telling us what happened?
Little Bee: No, I don’t mind. We were hanging out down in the pasture. We were buzzing around and pretending to be super bees when little Timmy Bee showed up. My friends started making fun of him because he has one antenna that is a little crocked. They called him mean names and he started to cry. I felt really bad and I told them to stop, and that they were being mean. Then they started making fun of me saying I was a goody two-shoes.
I said, “No, I’m not. How would you like it if someone called you mean names?” They said that I wasn’t any fun and that they weren’t going to be my friends anymore because I acted better than them. They told me to go away, but I wouldn’t leave. I just wanted to play pretend. Then one of them threw a stick at me that scratched my face. That made me really sad and I didn’t want to play with them anymore. But now I don’t have anyone to play with.
Teacher: That is a very sad story Little Bee, but it is also a happy story.
Little Bee: I don’t understand. How can it be a sad story and a happy story?
Teacher: Jesus told us that we should rejoice and be very glad when people make fun of us, say mean things about us, or hurt us when we do the right thing because we will be greatly rewarded in heaven.
(A complete lesson is available to members and as an instant download.)
Member's ![]() - Available in both KJV and NIV
- Available in both KJV and NIV
Instant Digital Download ![]() - KJV
- KJV
Instant Digital Download ![]() - NIV
- NIV
Flower Musical Chairs Bible Verse Review Game

1. Before class find pictures of different kinds of flowers and glue them to pieces of construction paper. (Use the printable flowers pictures if you can’t find any at home. Make sure you know the names of the flowers. To save time, just print the words of the Bible verse on pieces of paper without the flower pictures.)
1. Rose, 2. Morning Glory, 3. Poppies, 4. Hydrangea, 5. Peach Blossom. 6. Cosmos, 7. Sunflower, 8. Passion Flower, 9. Cone Flower, 10. Yellow Rose, 11. Cactus Flower, 12. Parakeet Heliconia, 13. Red Hibiscus, 14. Plumeria, 15. Yellow Hibiscus 16. Queen Ann’s Lace
Member's ![]() - Available in both KJV and NIV
- Available in both KJV and NIV
Instant Digital Download ![]() - KJV
- KJV
Instant Digital Download ![]() - NIV
- NIV
2. Print one word of the verse on the back of each flower. (You don’t have to use the whole verse if you have younger children.)
3. In class set up your chairs in the middle of the room and place one flower picture on each chair so that flowers are face up. If you only have a few students, you can place more than one flower per chair.
4. Play like musical chair, except have enough chairs in the middle for all the children.
5. Before you start each round call out the name of one of the flowers that is on a chair, then start the music. When the music stops the child who is sitting on the flower that was named should pick up the flower and read the word on the back of the flower, and then tape the word on the bulletin board in the order of the verse. Have the child say the Bible verse. If you have children who can’t read, write the Bible verse on the board and have them match the word on the flower paper to the word on the board.
6. Keep playing until all the words are on the board.
Beatitudes Matthew 5:10-12 Bible Verse Review Activity Sheet
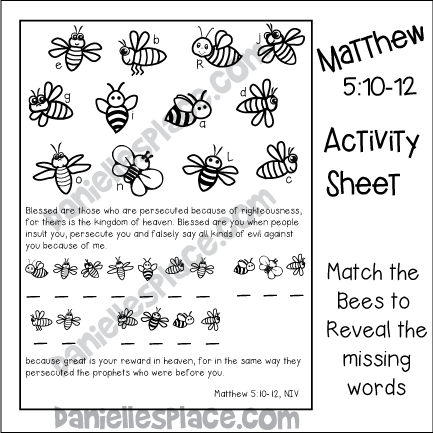
Children match the bees in the Bible verse with the bees at the top of the page and write letters from the matching bees in the spaces to reveal the missing words in the Bible verse.
Member's ![]() - Available in both KJV and NIV
- Available in both KJV and NIV
Instant Digital Download ![]() - KJV
- KJV
Instant Digital Download ![]() - NIV
- NIV


