Joshua Bible Crafts and Games
"Can Do Kids " Bible Lesson on The Resource Room
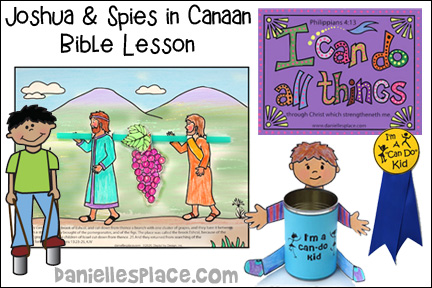
Joshua trusted God; he believed that he could do anything with God's help. Your children will learn that God wants them to be like Joshua, to be "Can- do kids." A complete lesson with early arrival activities, crafts, Bible verse review games, etc. is available to members of Danielle's Place or The Resource Room and as an instant digital download. Following are some crafts and activities from the lesson.
Instant Digital Download - ![]() - Complete Lesson, KJV and NIV
- Complete Lesson, KJV and NIV
Joshua and Spies Bring Grapes Back from Canaan 3D Picture and Activity Sheet
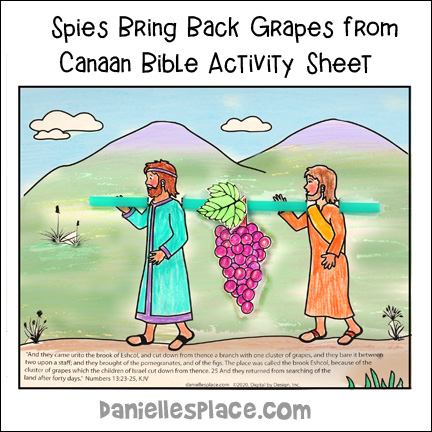
Use this interactive activity sheet to review the Bible lesson about spies bringing back grapes from Canaan. Children color the picture and then insert a drinking straw in the slots to make the pole that the spies used to carry the grapes. A cluster of grapes are hung on the "drinking straw" pole and a leaf is attached to the grape cluster. A Bible verse describing the event is included on the sheet in either KJV or NIV.
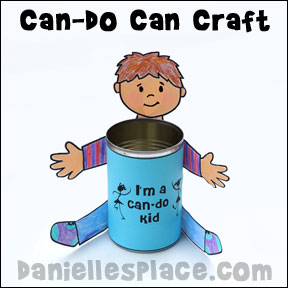
Make a "Can Do Can"
What you will need:
Tin Cans
Card Stock
Green Pipe Cleaners
Glue
Markers or Crayons
Tape
Different Colors of Construction Paper and Scissors
How to make:
1. Make sure there are no sharp edges on the cans. (You can buy can openers that open cans so that there are no sharp edges on the can or the lids.) Before class cover each can with construction paper. Cut flower shapes from different colors of construction paper.
2. Draw a kid pattern that will fit around the can as shown in the picture or use the pattern for this craft. (This pattern is available to members only, below.) If you don't have a lot of time in class, cut out around the body of the kid but not the face. The children will be drawing hair on the face so you need to leave room for it.
3. Print out the Bible verses and a paper that says, "My Can Do Can" or use the patterns provided.
Instant Digital Download - ![]() - Complete Lesson
- Complete Lesson
4. In class have the children draw a face and hair on their kid pattern. Cut out the rest of the face around the hair and help them glue and tape it to the can as shown above. Have them glue the Bible verse to the back of the can and the "My Can Do Can" title to the front of the can.
5. Give each child at least three green pipe cleaners. Bend them at the bottom to give them strength. You can place a small bit of play dough or Styrofoam at the bottom of the can to help keep the flowers in the can. Help the children think of things that they need God to help them do. Write one thing on each flower. Have the children tape the pipe cleaner to the flower and place it in the can.
You can send home the award ribbons (below) and a letter telling the parents to give their child an "I'm a Can Do Kid" award ribbon when they have accomplished one of the things written on their flowers in their "Can Do Cans"
©2006, Digital by Design - See Copyright Information
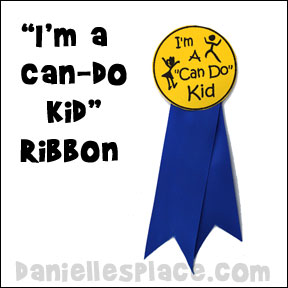
Make an "I'm a Can Do Kid" Award Ribbon
How to Make the Ribbon:
1. Cut circles from card stock and write "I'm a 'Can Do Kid'" in the center. Or use the pattern. This pattern is available to members only.
Instant Digital Download - ![]() - Complete Lesson
- Complete Lesson
2. Cut strips of ribbon 12" long. Fold the ribbon in half and tape to the back of the badge.
3. Use another piece of tape to stick on the child.
This craft can be used with any lesson having to do with trusting God. The memory verse that goes on the back of the can is "I can do all things through Christ, because he gives me strength." Philippians 4:13
©2006, Digital by Design - See Copyright Information
4. “I Can Do All Things” Bible Verse Coloring Sheet
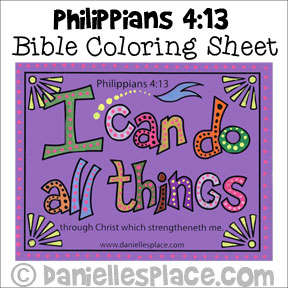
What you will need:
Colored Pencils or Posca Paint Pens
Color Paper
How to make:
1. Before class print out the Bible verse activity sheets on different colors of paper.
Instant Digital Download - ![]() - Complete Lesson
- Complete Lesson
2. In class have your children color the sheets and add doodle details.
"Can-Do" Can Holders Sunday School Craft
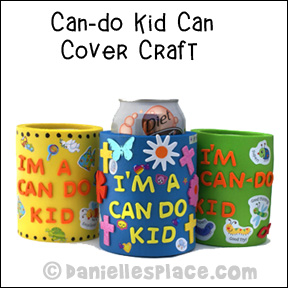
How to make:
1. Cut the craft foam to fit around the can so that it overlaps about an inch.
2. Glue the craft foam around the can so that it fits tight, but can still be removed.
3. In class have your students stick craft foam shapes and letters to the can.
©2006, Digital by Design - See Copyright Information
"When You Think You Are Beet" Bible Craft
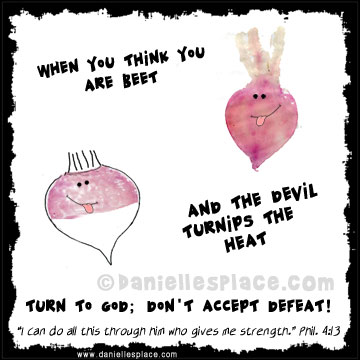
Children use real beets and turnips to make this fun craft for home school!
What you will need:
Two-inch Beets
Two-inch Turnips
Paper
Markers
How to Make the Beet and Turnip Craft:
1. Before class cut a beet in half and boil it in water until it starts to get soft.
2. Cut the turnip in half.
3. Print out the pattern and make copies.
Instant Digital Download - ![]() - Complete Lesson
- Complete Lesson
4. In class have your children press beet halves onto their papers to make imprints of the beets. If you don't want to use cooked beets, you can have them trace around the outside of the beet. Have them trace a turnip half and then color it to look like a turnip.
5. Write "When you think you are beet", next to the beet print. "And the devil turnips the heat", next to the turnip drawing. And then "Turn to God; don't accept defeat!" and the Bible verse “I can do all this through him who gives me strength.” Phil. 4:13 at the bottom of the page. ©2014, Digital by Design, Inc.
©2014, Digital by Design - See Copyright Information
Play a Bible Verse Game
(This game is for children who can read)
Before class write the Bible verse "I can do all things through Christ, because he gives me strength." Philippians 4:13 on lids from cans, one per lid (if you don't have any lids just cut circular shapes from cardboard.) Bring in a timer. Have the children take turns seeing who can put the lids in order the fastest.
I LOVE the Resource Room. I use it weekly! I am director for our children's church (age 5-8). It is so wonderful to be able to have a new lesson each week and the crafts or coloring sheets to go with each lesson. The children are also excited each week to see what new lesson we are going to talk about. Our children's church is growing and I feel it is because the children are interested in what we are doing each week. I love how you put "seasonal" crafts and lessons out a few weeks ahead of time. I Again, thank you for this web site- I was almost ready to give up children's church until I found you. Tammy
Memory Verse Review Activity
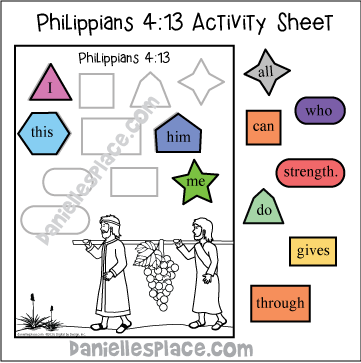
(This activity is for both children who can and cannot read.)
What you will need:
Typing Paper, Scissors, and Glue Sticks
What to do:
1. Before class print out the Bible verse pattern and activity sheets. Make a sample sheet.
Instant Digital Download - ![]() - Complete Lesson
- Complete Lesson
2. In class give each child a set of words to make the Bible verse, a glue stick, and paper. If you have older children, you can place all the words in the middle of a table in random order and have the children search through the words to find the right words.
3. Instruct your students to glue the words to the matching shape on their sheet to reveal the Bible verse.
A pattern for this activity is available on The Resource Room.
Alternative: Before class write the Bible verse on a piece of adding machine paper. Put all the words in a tin can. As a child arrives have him pick a word from the can and place it over the word on the banner and glue it down.
Play "Can You Find the Verse?" Can Game
1. Before class print out the Bible verse sheet, cut the verses apart and fold them up. (Use verses that have to do with the Bible lesson.) A printable sheet with Bible verses is available to members.
Instant Digital Download - ![]() - Complete Lesson
- Complete Lesson
2. In class place three cans upside down next to each other. Place a folded up memory verse under one of the cans. Tell your students to keep their eyes on the can with the verse in it. Quickly mix up the cans by sliding them around on the table. When you think the children are confused, ask one of the children to pick the can he thinks the verse is under. Pick up the can to see if he is correct. If he is, have him take the verse out and read it. If not, start the game again and let another child try. Keep going until all the verses have been used.
Practice Walking on Can Stilts
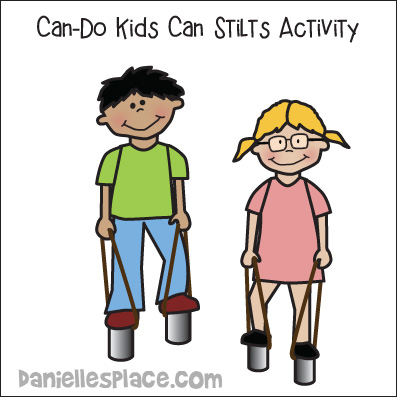
What you will need:
Aluminum Cans
Bottle of Can Opener to Punch Holes
String or Nylon Cord
What to do:
1. Before class make some stilts out of aluminum cans. To make a stilt turn a can upside down and drill or punch holes in the side of the cans so that the holes are on opposite sides at the top edge of the can.
2. Thread nylon cord through the holes and tie the ends together so that the loop is about two feet long. Pull on the cord so that the knot end is inside the can.
3. Make two stilts for each child or have them share. In class have the children place their feet on the stilts holding onto the cord. When they lift up their foot they pull up on the rope so that the stilt comes up with their foot. Have the children practice walking around the room on the stilts.
©2006, Digital by Design - See Copyright Information
Act out the Story
Preparation: Make a grape cluster using small purple balloons tied together with strings. Find a pole such as a broom handle to tie the grape cluster to.
Tell your children that you are going to be Moses, and you are going to pick four (there were really twelve) children to be the spies that sneak into Canaan to spy on the people there. You are going to call one of the four Joshua and one Caleb. The children that are picked as Joshua and Caleb should come back with a positive review of the land. The other two should come back with a negative view. Tell your “spies” that they should walk around pretending to be spies. After spying, two of the men should pick up the grapes on the pole and all of them should come back to Moses and report what they saw, saying things like, “It flows with milk and honey. Here is the fruit. The people who live there are powerful. The cities are well fortified and very big.”
At some point Caleb should silence the people and say excitedly, “We should go up and take possession of the land, for we can certainly do it.”
Then the other men should complain and say the can’t do it because they are stronger, and that the land devours those living in it. And that there are giants that would crush them like grasshoppers.
Pick four more students to be the spies and act out the story again. Let your children be creative in how they want to portray the spies.
Today we did your lesson on “Can Do Kids”. The lesson went well until we got to the craft. It was hard to get the kids started on things they felt they couldn’t do. They didn’t seem to want to admit to the others that there are things they can’t do. So we changed it just a bit. Instead of using pipe cleaners, we told the kids we would give them bubble gum sticks to use as their stems for each flower they made. The bubble gum sticks we found were shaped like straws. We taped them to the flowers. They came up with so many things they couldn’t do, we ran out of flowers. Some of the ideas were so far out the kids will probably be adults before they achieve them, but others were right on and really good. They came up with everything from building a treehouse to tying their shoes or learning to tell time. The bubble gum was the ice breaker and though it may seem like a case of bribery, it did work. The kids were anxious to get started on their goals when they left class, probably more for the gum than the challenge. We also could have used other long candies or suckers. Despite telling them the purpose of the blue ribbons, I had to laugh when I saw that everyone of them had pinned one to their shirts by the time they got upstairs to the church service. I knew then the lesson was a success. They already had a “can do” attitude. Thanks again. Kandy
My Wednesday night Bible class of K-1st graders were so excited last night! I have had a busy week and hadn’t taken the time to plan for class – I knew that our Bible story was about Joshua and Caleb, the spies who were sent to “spy out” the land ahead of the Israelites. I searched many sites for a suitable craft and finally figured one out on my own. We made attaché cases out of manila folders. If you have the center tab folders, you can cut a handle out right under the tab. I then found on a clip art program pictures of a notebook, pencils, and a magnifying glass. I printed those in black and white so the children could color them, the they cut them out and glued them to the inside of their folders. We talked about the tools you would use today, compared to Bible times. The children then drew pictures inside their folders of other items you might use…a cell phone, keys, a credit card to use as a key. We did have to curb some of our boys – they wanted to draw guns. We were able to talk about the difference between the 2 spies and the 10 spies and whether the 10 would have felt more confident with tools like we have today. The walked around with their cases and were very pleased to be spies for the rest of the night! Darla – Davis Park Church of Christ, Modesto, CA

