The Last Supper Bible Crafts
Bible Crafts and Activities for Sunday School Relating to The Las Supper
The Last Supper 3D Paper Bible Display and Learning Activity
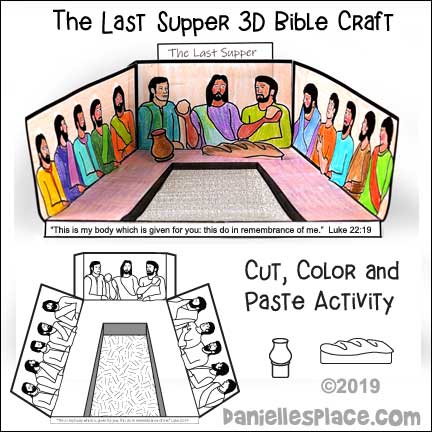
Use this craft to review your Bible lesson about the Last Supper. Children color the pictures and then cut them out. They glue the pattern together to make a 3D display of The Last Supper. Cut out the bread and wine pictures and glue them to the table.
You can have older children write the names of the disciples next to each picture to review the names of the disciples. Or you can have them make conversation bubbles with the words Jesus and some of the disciples said at The Last Supper and have them glue them above the pictures of the men.
The patterns for this craft are available to members on The Resource Room and an instant digital download..
©2019, Digital by Design, Inc. - See Copyright Information
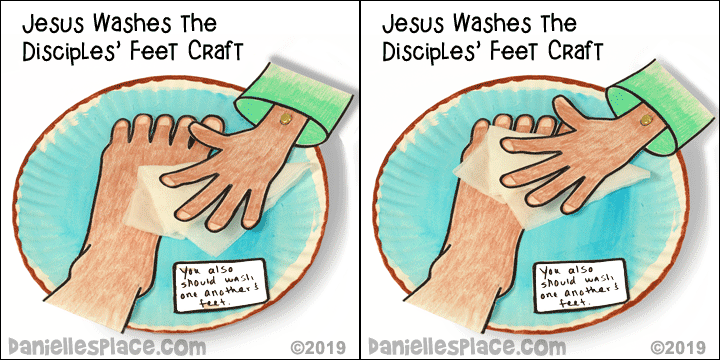
Jesus Washes the Disciples' Feet with Movable Hand Paper Plate Craft
What you will need:
Nine-inch Paper Plates, Card Stock (Heavy Paper), Crayons, Colored Pencil, Water Color Paint, Brass Brads, Hole Punch, Tissue Paper or Paper Towels, and Scissors.
What to do:
1. Before class print out the patterns and make copies. Cut out the patterns.
2. In class have your children color the foot and hand pattern. Have them write the Bible verse on the soap.
3. Have them color or paint the paper plate blue.
4. When they are finished coloring and painting, punch a hole in the hand pattern and glue a piece of tissue or paper towel to the bottom of the hand. Punch a hole in the paper plate and attache it to the paper plate with a brass brad so that it moves up and down.
5. Glue the foot pattern under the hand pattern and the soap pattern onto the paper plate.
©2019, Digital by Design, Inc. - See Copyright Information
The Last Supper 3D Paper Display Craft for Kids
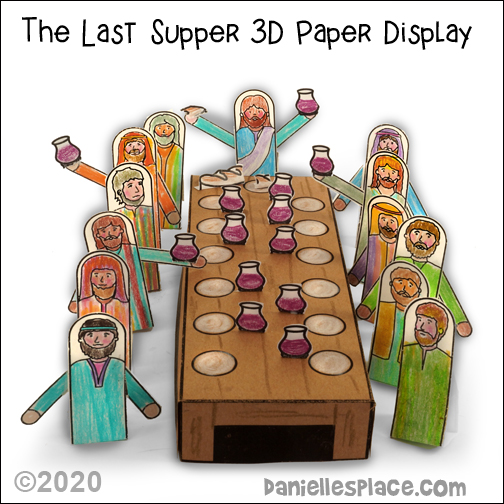
What you will need: Cardstock (Heavy Paper), Colored Pencils, Glue and Scissors
This pattern is available to members and as an instant download. It contains both colored and black and white patterns of Jesus and the disciples.
Children cut out and color the disciples, table, plates, glasses, and bread patterns.They fold up the backs of the pattern to make them stand up. They also glue on the disciples arms, and glue the wine glasses and bread to the table.
This would make a great classroom project. Give each student one of the standup figures or display items to prepare for the display. Use the display to retell the story of the last supper.
Instant Digital Download ![]() - Also include The Last Supper 3D Pool Noodle Display patterns below. (Wine glasses, Bread, and Plates)
- Also include The Last Supper 3D Pool Noodle Display patterns below. (Wine glasses, Bread, and Plates)
©2020, Digital by Design, Inc. - See Copyright Information
The Last Supper 3D Pool Noodle Display Craft for Kids
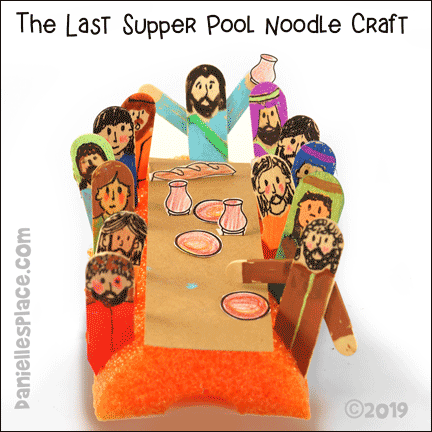
What you will need:
Jumbo Pool Noodles (3.5" diameter), Jumbo Craft Sticks, Glue, Serrated knife, Ruler, Markers, Paper, and Card stock.
How to Make The Last Supper Display:
1. Before class cut a pool noodle into six-inch lengths, and then cut it in half lengthwise.
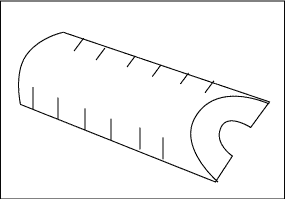
2. Use a permanent marker to draw six lines on each side of the cut pool noodle evenly spaced. Use the knife to cut the slits.
3. Cut card stock into a 2-inch by 6-inch rectangle to make the table top. Glue the rectangle to the top of the pool noodle.
4. Cut the ends off the jumbo craft sticks with heavy duty scissors into 2 1/2" to 3" lengths. Vary the lengths so that all the disciples will not be the same height.
5. Print out the wine and bread patterns color and cut them out.
Instant Digital Download ![]() - Also include The Last Supper 3D Display patterns above. (Disciples, Table, Wine glasses, Bread, and Plates)
- Also include The Last Supper 3D Display patterns above. (Disciples, Table, Wine glasses, Bread, and Plates)
6. In class give each student one of the cut jumbo craft sticks and have them draw a face and clothes on the sticks to make a disciple. (Make some sample figures before class.)
7. To make the Jesus figure glue two mini crafts sticks on the sides for arms. Glue a wine glass on one hand.
8. Use the display to present your lesson on The Last Supper.
©2019, Digital by Design, Inc. - See Copyright Information


