Isaac Keeps the Peace
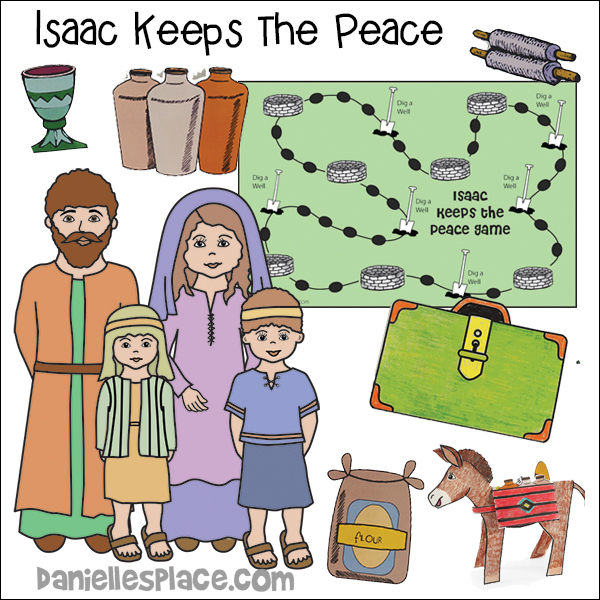
The following crafts and activirties come from the Bible lesson "Isacc Keeps the Peace" on The Resource Room. This material is also available as an instant digital download.
Instant Digital Download - KJV 
Instant Digital Download - NIV 
Make Suitcases and Draw Pictures
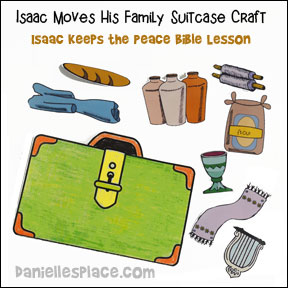
Children's creativity takes flight as they design and decorate their own suitcases, imagining what Isaac and his family might have packed for their journey to their new home.
This activity not only fosters a sense of artistic expression but also sparks a lively discussion about what it must have felt like for Isaac's family to pack up and move to new place.
Children can draw picture of things they think Isaac and his family might have taken on their journey or paste the items that are included with the craft. This craft includes both color and black and white patterns.
Alternative Craft - Tell your children to pretend that they have to move to a new home and that they are only aloud to take five things with them. They must decide what they would take, and then draw pictures of those things inside the suitcase. At the end of the lesson, ask them to share what they drew inside their suitcases.
Instant Digital Download - KJV 
Instant Digital Download - NIV 
Talk About Moving
Ask the children if they have ever had to move into a new house. Ask them how they felt about moving and what they remember about that day. Tell them that today we are going to talk about a family that had to move several times.
Donkey with Pack Craft and Activity
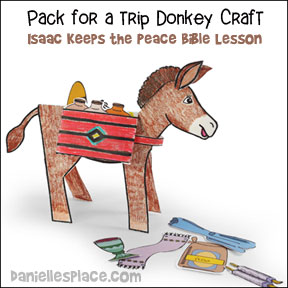
What you will need:
Cardstock (Heavy Paper)
Crayon or Colored Pencils
Glue
Scissors
How to Make the Donkey:
1. Before class print out the donkey pattern on to cardstock and cut them out.
2. Print out the pack items and pack pattern onto paper and cut them out. (Printable patterns available to members on The Resource Room.)
3. In class have your children color the donkey patterns.
4. When they are finished coloring fold the donkey pattern in half along the back.
5. While the donkey is still folded in half, fold the neck of the donkey on all the dotted lines both backward and forwards.
Instant Digital Download - KJV 
Instant Digital Download - NIV 
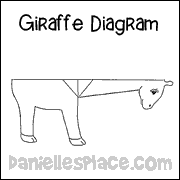

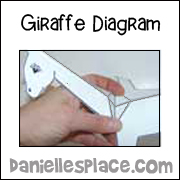
7. Glue on the ears and mane, and then glue the top of the head together just above the eyes. Glue on the tail and spread out the legs so the donkey stands up.
8. To make the donkey's pack fold the top and bottom rectangles up on both sides. Fold the side tabs on the two rectangles back and glue them to the back of the pattern. Then fold the center line down. Place the pack on the donkey and glue the strip around the neck and to the pack to keep it on the donkey.
9. Let your children pick what they would like to put in the donkey's pack. As they work, ask them what they think Isaac's family might have packed and what they would pack if they had to move.
Donkey Envelope Craft
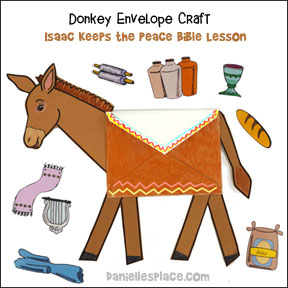
What you will need:
Cardstock (Heavy Paper)
Invitation Envelopes 4 3/8" x 5 3/4"
Brown Construction Paper
Brown and other Colors of Crayons
Glue or Tape
How to Make:
1. Before class print out the donkey patterns onto brown construction paper and household objects onto white paper and cut them out. (Printable patterns available to members on The Resource Room and as an instant digital download below.)
Instant Digital Download - KJV 
Instant Digital Download - NIV 
2. In class have your children color an envelope to look like a pack that might be placed on a donkey to help it carry a heavy load.
3. Glue the head, tail and legs to the back of the envelope.
4. Place the household objects.
Play a Memory Game
Have your children take turns sharing what they decided to put in their suitcases. Then see how many things the children can remember. I had the boys share what they put in their suitcases first and then gave the girls candy rewards for everything they remembered. Then I had the girls share what they packed and gave the boys candy rewards for everything they remembered.
Play a Board Game
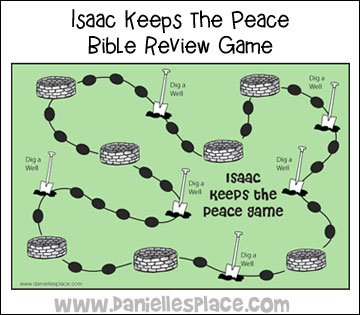
In this game children pretend they are Isaac and travel around the board claiming wells when they land on them. The child who has the most wells wins.
What you will need:
Cardstock
Tape
Scissors
Game Markers
Stickers (At least seven stickers for each player)
A Die
What to do:
1. Before class print out the game board patterns and tape them together.
Instant Digital Download - KJV 
Instant Digital Download - NIV 
How to play:
1. To start have your children place their markers anywhere they want on the board except on a well or "Dig a Well" space.
2. Have them take turns rolling a die and then moving the amount of spaces rolled. They can move backward or forward depending on which way they think is better. If they land on a well, they can claim the well by placing one of their stickers on it. No other player can claim that well.
If they land on a "Dig a Well", they try to answer a questions. If they answer the question correctly, they get to take another turn. They can only take two turns in a row even if they land on another "Dig a Well" space. When all the wells are claimed the game is over. The player who has the most wells wins.
Make a Well Pencil Holder with the Bible Verse Written Around the Top
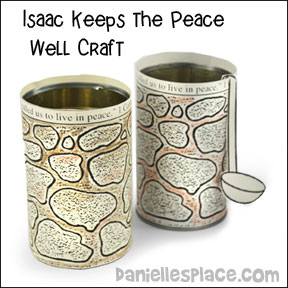
What you will need:
Clean Empty Cans
Tape or Glue
Scissors
What to do:
1. Before class print out the well patterns.
Instant Digital Download - KJV 
Instant Digital Download - NIV 
2. In class have your children color and tape onto an empty tin can.
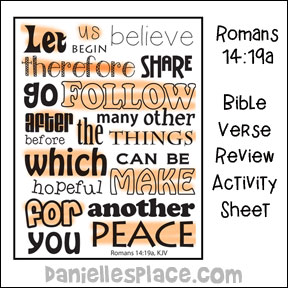
Work on a Bible Verse Review Sheet (Older Children)
What you will need:
Paper
Highlighter Markers
What to do:
1. Before class print out the sheets and make copies.
Instant Digital Download - KJV 
Instant Digital Download - NIV 
2. In class go over the Bible verse several times and ask your children if they think they remember it.
3. Pass out the sheets and tell them to highlight every word to spell out the Bible.
Guess Which Well Has Water Game
This game is not appropriate for Sunday school because the children get wet, but it would work great for an after school kids club. Make three of the well pencil holders above and laminate the patterns before you tape them to the can. Put a small amount of water in one can, fill the other can half full, and leave one can empty. Also make markers with the numbers 1, 2 and 3 written on them. Tape them to the table. Place the cans on the table one behind each number. Have the children take turns sitting in front of the table with the cans on it so that they are facing away from the table. Have someone mix up the cans. The child sitting in front of the table guesses which can has the water in it, or not, and says a number. The person who is taking care of the cans then picks up that can and pours it on the head of the guesser without the guesser turning around to see which can he has picked. Keep playing until all the children have had a chance to guess.
Copyright
Copyright © 2000, Digital by Design Inc.
Danielle's Place of Crafts and Activities
https://www.daniellesplace.com
All rights reserved. No part of this publication may be reproduced or transmitted in any form or by any means, electronic or mechanical, including photocopying and recording, or by any information or storage retrieval system, except for local church or school use only. This copyright notice must be included on all copies. Requests for permission to copy this material for any other uses should be addressed to Carolyn Warvel, 588 Duran Street, Henderson, NV 89015 or e-mail me at care@daniellesplace.com


