God Made Me Bible Lesson 2
My Helping Hands
Bible Lesson about the Good Samaritan - Helping Hands Bible Lesson with Bible Crafts and Games for Children's Ministry
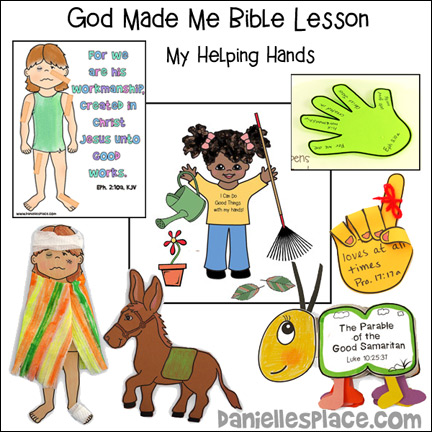
The following Bible crafts, games, and activities come from the Sunday School Lesson "The Good Samaritan". It is available to members on The Resource Room and as an Instant download. The instant download includes everything you see on this page.
Instant Digital Downloads
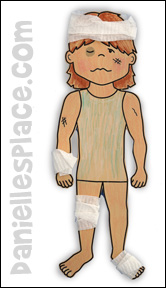
Children Pretend to be the Good Samaritan Using a Paper Doll
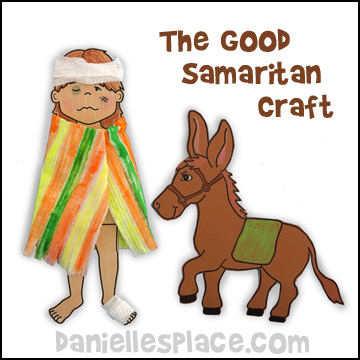
Paper Doll Craft - Children can pretend to be a good Samaritan using the hurt man paper doll. They color the paper doll and donkey and then wrap paper towel or material bandages on his arms, legs, and head. They can also make a blanket by coloring a piece of paper towel or material with markers and wrap them around the paper doll.
Instant Digital Downloads
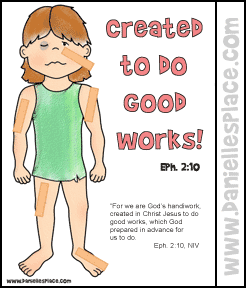
Hurt Man Activity Sheet
Children color the picture and words and then glue on paper bandages.
Instant Digital Downloads
Helping Hands Activity Sheet
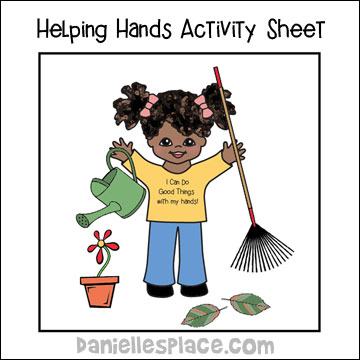
This activity includes two coloring sheets, both a boy and girls, and two pages of things used to help others.
After coloring the picture children color and glue the "good things" pictures to child picture.
Instant Digital Downloads
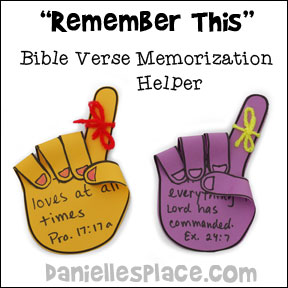
Remember the Memory Verse or Remember to Help Craft and Bulletin Board Display
The following activity comes from the lesson "Helping Hands". You will find a complete lesson with more crafts and activity ideas on The Resource Room a members only section of Danielle's Place.
Explain to the children that sometimes when someone wants to remember something important they tie a string on their finger to help them remember.
Have the children write some things they can do to help others on the fingers of the hands, and then tie a string on one of the fingers to remind them to do them.
What you will need: Colored Paper, Scissors, Glue and Yarn
How to make:
1. Before class print out and cut out hand shapes with the Bible verse. You can also buy hand shapes from a learning store or have your children trace their hands, cut them out.
Instant Digital Downloads
2. In class give each child a piece of paper and a hand. Help them glue the hand to the piece of paper by just putting glue on the palm area of the hand. Help your children come up with five different things they can do with their hands to be helpful. Write the ideas on the fingers. Or you can have them write the Bible verse on the palm of the hand.
3. Curl down the fingers leaving the index finger sticking up. Tie a piece of yarn on to the pointer finger. Children can decorate the rest of the pictures anyway they would like.
4. Tell your children to take their hands home to help them remember to do these things. They will get to place a hand on the bulletin board next week for each thing they remember to do during the week.
©2000, Digital by Design, Inc. -*See Copyright Information - Do not copy and publish on another web site.
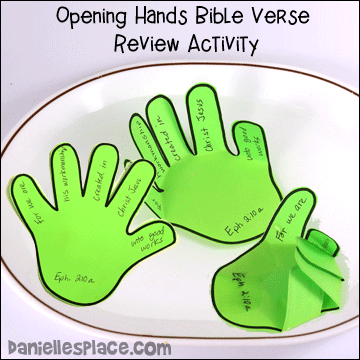
Helping Hand Bible Verse Review Activity
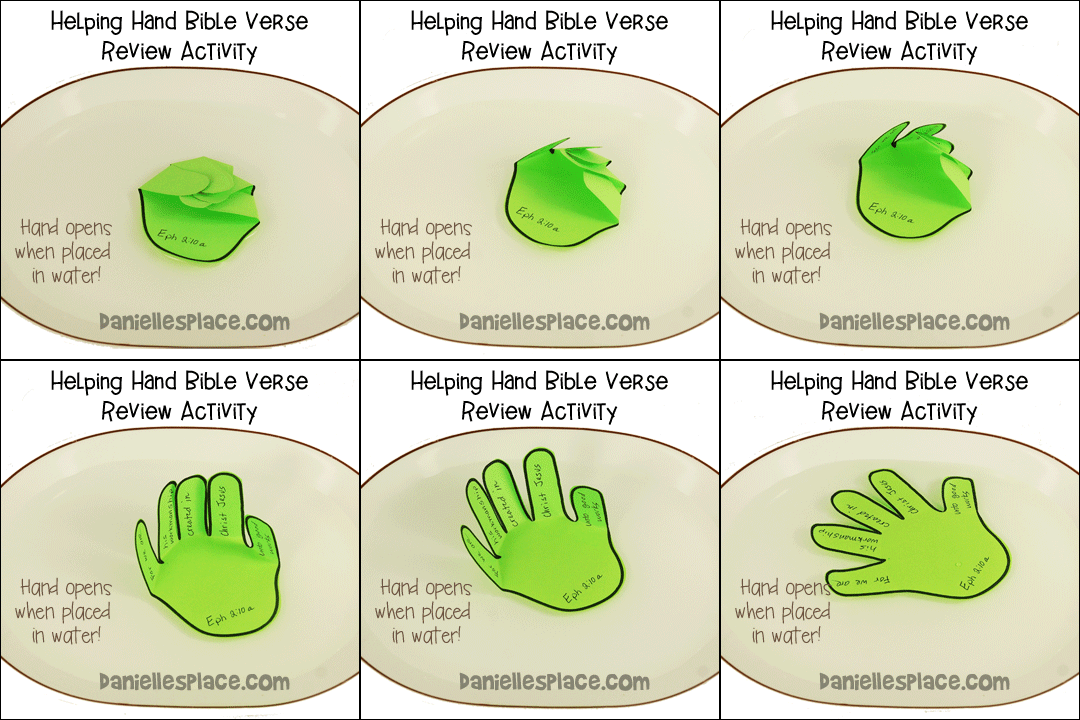
1. Before class print out the hand patterns and make copies. (Do not use water soluble ink.) Cut out the hand patterns. (Make extras so your children have patterns to take home with them and practice at home.)
Instant Digital Downloads
2. Have your children write the Bible verse on the fingers of the hand starting with the pinky finger and going towards the thumb. Use permanent ink pens, crayons or pencils.
3. Have your children fold the fingers down towards the palm of the hand starting with the thumb and going towards the pinky. The pinky finger should be on top.
4. Place a large bowl of water on the table. Place one of the hands on the water so it is floating with the folded fingers facing up. It will only take a few seconds for the fingers to start unfolding. When a finger pops up and reveals a part of the verse, have your children read it. Read each finger as more words are revealed. Keep playing until all the hands have been used.
Share Helping Hand Pictures
Let each of your children show the pictures they made in the opening activity and explain what they drew or picked as something good they can do with their hands.
Make Rainbow Hands
Have your children trace their hand several times with different colors of crayons. Have them place a Band-Aid in the center of the hand outline to remind them that God wants us to do good things with our hands. Write the memory verse at the bottom of the page.
Helping Hands
Trace your children's hands or make photocopies of them. Let them color the hands and then glue a Teddy Graham in one hand and a Band-Aid in the other. Tell them that this will remind them to be helpful.
Caterpillar Parable of the Good Samaritan Sequencing Book
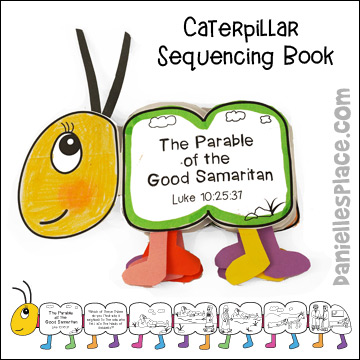
Children glue pictures representing the Parable of the Good Samaritan to a strip of paper to make a caterpillar story book. To finish they glue on feet and antennae. This pattern is available to members on The Resource Room.
Instant Digital Downloads
Good Samaritan Lesson Sample
Preparation:
Before you start your lesson pick two children to be the robbers, one to be the priest, one to be the Levite, and the other to be the Samaritan. Have them act out the story as you tell it. If you have very young children, have older children or adult helpers act out the story. You will need at least two helpers. One helper can play the part of the hurt man, while the other plays all the other parts. Your helper can put a bandana over his mouth to play the robber, a piece of cloth over his head to be the priest, wear a hat for the Levite, and wear his own clothes for the Samaritan. While the actor is changing outfits, have your children repeat the verse.
The Good Samaritan Lesson:
Once there was a man who was walking down the road. All of the sudden some robbers jumped out from behind some bushes and grabbed the man with their hands. They punched him, and slapped him, and threw him down to the ground, and snatched his money, and ran away. The poor man was hurt very bad. He lay at the side of the road and he couldn’t get up.
You can use your hands for good.
The Bible says you should.
If you use them to do bad,
You will make God very sad.
Awhile later a priest (religious man) walked by. He saw the poor, hurt man laying there along side the road. He stopped to look from a distance. He thought to himself, “Yuck, he is all dirty and stinky. There is no way I’m going to touch him. I will get dirty too." He put one hand to his nose and used his fingers to plug his nose and shoved the other hand in his pocket and crossed to the other side of the street . . .
Play a Guessing Game and Review the Story
Tell your children, "Our hands are amazing. They can do so many wonderful, good things, but they can also be used to do bad things. I am going to show you some things I can do with my hands and I want you to see if you can tell me what I am doing and how it can be used for good things or for bad things.
1. OK Sign - This is telling someone that they did something good. It can be used for good because it would make a person feel good about himself.
2. Twiddling Your Thumbs - You twiddle your thumbs when you are bored. It would not be a good thing to do when someone is talking to you because it shows that you don't care about what they are saying.
3. Waving - When you wave you are saying good-bye, or hello, or come here. This is a good thing because you are telling the person you will miss them, or you are glad to see them, or you would like to talk to them.
4. Praying - Praying for others is a good thing. It shows you care about them.
5. Praising God by Raising Our Hands - This is a good thing. It shows that you want to be close to God, that you want him to be in control of your life.
6. Make a Fist - This could be bad because you are warning someone that you want to fight. It could also be good if you want to play a guessing game with someone to see if they can guess what is in your fist.
7. Pointing - Pointing at something to show someone you see something can be good, but pointing in someone's face is not very nice.
8. I Love You - (The thumb, forefinger, and pinky are up, the other fingers are down.) This means I love you. This is a good thing to tell someone.
9. Pounding Your Fist - Shows that you are mad. This is not a good thing, you should find another way of expressing your anger.
10. Clapping - Clapping shows that you like something. It's a good thing.
11. Thumbs Up Sign and Thumbs Down Sign - These are use to say yes and no.
12. Others: shaking hands, holding hands, high five, making a number one sign, sign to be quiet, I can't hear you sign, and stop.
©2000, Digital by Design, Inc. -*See Copyright Information - Do not copy and publish on another web site.
Songs
The following songs come from the lesson "Helping Hands". You will find a complete lesson above with more crafts and activity ideas on The Resource Room a members only section of Danielle's Place.
Hands for God
Written
by Nancy Foss
(Sing to the tune "A Hunting We Will Go".)
Use your hands for God.
Use your hands for God.
We'll show our Love and care for you
By using our hands for God.
Use your hands to pray.
Use your hands to pray.
Asking God to heal us
By using our hands to pray.
Keep your hands quiet.
Keep your hands quiet.
Knowing when to stop your hands
Is knowing the word of God.
©2000, Digital by Design, Inc. -*See Copyright Information - Do not copy and publish on another web site.
Do Your Hands Do Right?
Written
by Nancy Foss
(Tune to "Do Your Ears Hang Low" or "Turkey in the Straw".)
Do your hands do right?
Do you hug and not fight?
Can you pray and not stray from the Lord today?
Can you clap them on your knees and promise not to tease?
Do your hands do right?
©2000, Digital by Design, Inc. -*See Copyright Information - Do not copy and publish on another web site.
More Parable to the Good Samaritan and Helping Hands Bible Crafts
You can find more Good Samaritan Bible Crafts and the Good Samaritan Bible Crafts Page. This craft is not included in the God Made Me - My Helping Hands Bible Lesson.
I am so thankful I joined the Resource Room you have written excellent material for us to use, I know the children will learn a lot and have fun at the same time. Thank you again and God Bless you. Sincerely, Patti Paisley
I am the director for children's ministry at The Orange Park Vineyard Church in Florida, which my husband pastors. Thank you so very much for the interesting resources that you have available for us. I have brought in your curriculum for my 4 and 5 year old children and the teacher that is working with them for this 1st quarter has been so excited about working with these lessons. Thank you once again for making it so interesting and easily accessible for us. We appreciate all your devotion in making this a wonderful and helpful program. Janet (Orange Park Vineyard Church)
I did this lesson with my first grade class. They really enjoyed acting out the lesson as I read it. They liked playing the forward and backward game and reviewing the lesson with the thumbs up and thumbs down activity and identifying who did what in the story. They also came up with other good and bad things we can do with our hands. This lesson was very easy to prepare and the bulletin board display came out great. Carolyn
Thank you so much for the lessons and crafts. They have been a blessing to both myself and the children I teach (ages 3-6). One thing I did when I taught this lesson was to go to the thrift store and get stuffed teddy bears and other animals. I put blue, purple and green blush on them to make bruises. I also made scratches with red paint. I took bandages, Band-Aids and gauze tape. The children had a wonderful being good Samaritans for the stuffed animals. I got many comments from the parents about how much the children learned from this lesson. Shelia
I used the Helping Hands Pictures from Created to do Good Things Lesson for 3-4 year olds. The kids enjoyed the many different pictures and thinking of what they could do to help others. Thanks! Jenni Yee
I used the bulletin board activity as part of our lesson on Elisha helping the widow. I have about 20 preschoolers on Wednesday night. After the story we talked about ways they can help. This age child does not cut things out well, so I had precut a boy and girl for each and put their name on them. I had precut the other pictures, and as I held each suggested item, I had them raise their hand if they had ever helped in that way. When they went to the table, they were to glue their boy or girl on their large sheet of paper, then choose and paste several of the pictures of things they can do to help. After glueing them on, they could color them. I tried to get them to color the hair of each one in their own hair color, but of course some did not. They had fun with that.
Just finished the helping hands lesson with my group of 2-4 year olds They really enjoyed it. When we did the craft, in addition to the Bible verse on it, I also cut out the little verse that was used in the lesson, and tacked it at the base of the hand, just below the Bible verse. This way, when the kids try to remember how it goes, in order to share the day with parents, it's right there. Suzanne
Thank you so much for the helpful lessons, crafts and activities on your site! We have a small group of little ones (preschool) and every lesson I have prepared for them has been wonderful! They grasp the "point" of each lesson and are so proud of their crafts and verses to take home.
When we did the "Helping Hands" lesson, I also took a glove for a mini-lesson. I had them look at the glove when it was "empty". This is us when we try to do good things without Christ. When we are filled with Christ and His love (I slipped my hand inside) we can do the good things we were created to do: Shake a hand, pat on the back, give, etc.


