Firefly, Lightning Bugs Crafts Page 2
How to Make Crafts with a Firefly or Lightning Bug Theme
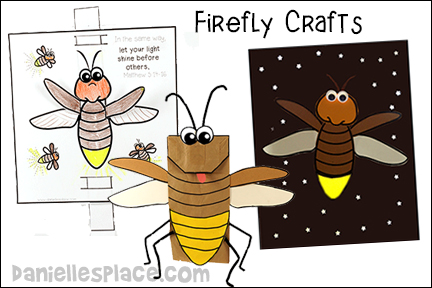
The following crafts and activity sheets are available to members on The Resource Room and as an instant digital download.
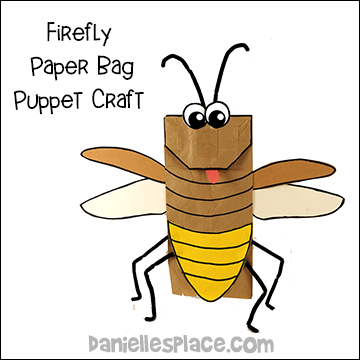
Firefly Paper Bag Puppet
What you will need:
Brown Paper Lunch Bags
Brown, Yellow, and White Cardstock
Chenille Stems
Large Googly Eyes (Optional)
Glue and/or Tape
Black Marker or Crayon
Scissors
How to make:
1. Print out the wings, body, and eye patterns and cut them out.
This craft pattern is available to members on The Resource Room and as an instant digital download.
Instant Digital Download - ![]() - Includes all the crafts and activities on this page.
- Includes all the crafts and activities on this page.
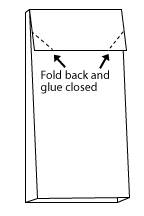
2. Fold the two corners of the bottom of the bag back and glue them shut. (See Diagram)
3. Cut the Chenille stems in half. Fold them into leg shapes and glue them to the front of the bag on the bottom half. Glue the bottom of the abdomen over the legs.
4. Glue the upper and lower wings to the back of the bag.
5. To finish glue on the eyes, antennae, and tongue. Use a black marker or crayon to draw the lines to show abdomen segments.
Firefly with Moveable Wings Activity Sheet
This activity sheet comes with two different sayings: "Let Your Light Shine!" Matthew 5:14-16 or You Were Meant to Shine!
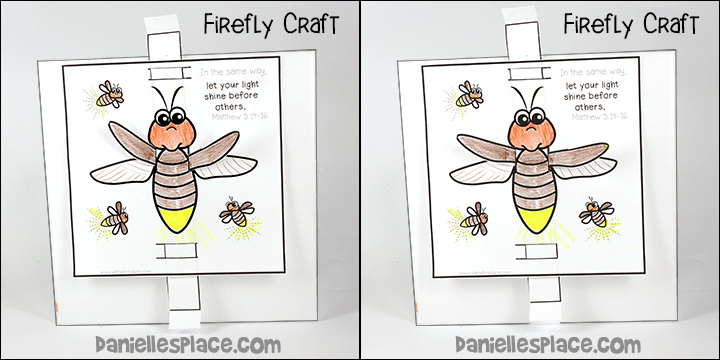
What you will need:
White Paper - Cardstock works best.
Crayons or Colored Pencils
Tape
Scissors
Exacto Knife
Brass Fasteners
Hole Punch
How to Make:
1. Print out the patterns onto cardstock and cut them out.
This craft pattern is available to members on The Resource Room and as an instant digital download.
Member's ![]()
Instant Digital Download - ![]() - Includes all the crafts and activities on this page.
- Includes all the crafts and activities on this page.
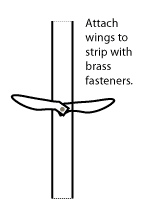
2. Cut out around the sides of the background pattern. Do not cut the slit at the dotted lines. Leave the strip as long as possible.
3. After the children have colored the picture use an Exacto knife to cut slits where indicated on the pattern, above and below the firefly, and where the wings will be inserted.
4. Attach the wing patterns to the strip using a brash fastener. Place tape over the prongs of the brass fasteners.
5. From the back of the firefly pattern, insert the wings on both sides of the firefly and then insert the bottom of the strip into the slit closest to the bottom of the firefly and then back down through the slit on the bottom of the page. Insert the top of the strip into the slit closest to the top of the firefly's head and then back up through the slit at the top of the background page. Fold the ends of the strip up to keep it from being pulled out.
Glowing Firefly Craft
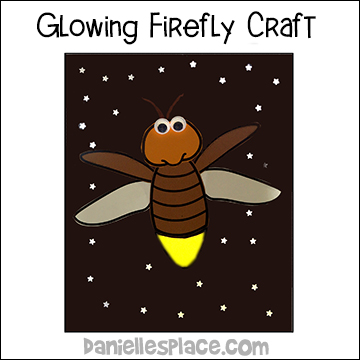
What you will need:
Black or Dark Blue Paper or Cardstock
Yellow, Orange, Brown, and White Paper
Star Hole Punch
15 mm Googly Eyes
Glue
Scissors
Exacto
Opaque Paint Marker
What to do:
1. Print out the firefly background pattern and cut out the lower abdomen shape with an Exacto knife.
Member's ![]()
Instant Digital Download - ![]() - Includes all the crafts and activities on this page.
- Includes all the crafts and activities on this page.
2. Print out the firefly parts patterns and cut them out.
3. Have children glue the wing patterns to the background page.
4. Glue the abdomen pattern to the page to cover the end of the wing patterns.
5. Glue on the head and googly eyes. Use a paint marker to draw on the antenna.
6. To finish glue the yellow paper to the back of the background paper. You can paint oil on the yellow abdomen to make the paper translucent. Dab the paper with a paper towel so that the paper is not too oily.
7. Use a star hole punch to add star shapes to the background.
"You Were Meant to Shine" Activity Sheet
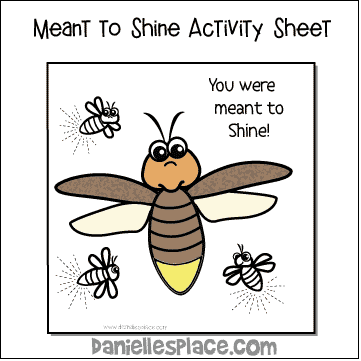
Children color the picture of the firefly with colored pencils and then paint the lower abdomen with cooking oil to make it glow when taped to a window or glass door.
Member's ![]()
Instant Digital Download - ![]() - Includes all the crafts and activities on this page.
- Includes all the crafts and activities on this page.
You can find more Firefly or Lightning Bug Crafts on the Firefly Crafts Page 1.


