Snowflake Crafts and Learning Activities for Children
How to Make Snowflake Crafts and Learning Activities for Children
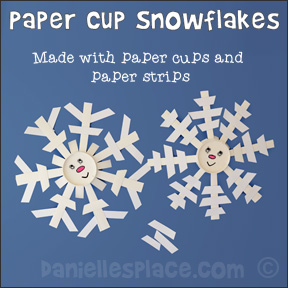
Paper Cup Snowflake Craft
What you will need:
White Paper Cups
White Card Stock
White Glue
Scissors
What to do:
1. Cut off the top rolled edge of the paper cup.
2. Cut slits about 1/2-inch apart down the length of the cup to make rays.
3. Fold down the rays and cut off every other ray either at the bottom of the cup or at a specified length from the bottom.
4. Cut strips of card stock 1/2-inches wide, and then cut the lengths into smaller pieces angling the ends as shown below.

5. Glue the card stock pieces onto the rays either at angles or perpendicular to the rays. Experiment with different designs.
Our Knowledge is Piling UP! Snowflake Bulletin Board Display Incentive for Learning
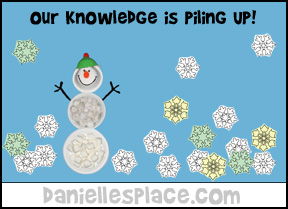
This bulletin board display can help keep your home school from falling into the winter blahs. Children will get excited about seeing how much they are learning when they see all the snowflakes piling up.
Use the snowflakes as review cards by writing your child's spelling words, math facts, test questions, etc. on the back or
front of the snowflakes. When your child learns a fact on one of the snowflakes let him staple it to the display. Soon you will have a display full of knowledge.
You can also use the snowflakes as note cards. When your child is researching a new subject have him write new facts that he h as learned on the snowflakes and then staple them to the display.
You can also use the display to review what you are learning. Have your child pick a different snowflake each day and review the fact on the snowflake.
Print out the title "Our Knowledge is Piling UP" onto transparencies so you have a clear background.
You can make a 3D Snowman (below) for your display out of paper plates and paper bowls. Glue cotton balls to the plates to make them fluffy.
©2010, Digital by Design, Inc. - See Copyright Information - Do not link to the snowflake pattern pages - link to this page only.
Craft Stick Snowflakes Christmas Ornaments Kids Can Make

What you will need:
LowTemp Mini Glue Gun or Aleene's Tacky Glue
Natural Items such as Feathers, Dried Flowers, (See How to Preserve Flowers) Sea Shells, Acorn Caps, Dried Leaves, Sticks, Bark, Moss, Seeds, etc.
Fishing Line to Hang the Ornaments or Clear String
Clear Acrylic Spray Paint - Optional
How to Make the Craft Stick Snowflakes:
1. Print out the snowflake template pattern and use it as a guide to glue the craft sticks together.
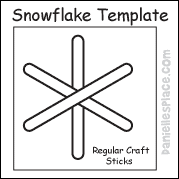
2. Place one craft stick on the template and place a dot of glue in the middle of the stick. Place another craft stick on top of that one matching the placement on the template.
3. Place a dot of glue on that stick and then place the last craft stick on top matching the template.
4. Decide what you would like to place on the snowflake and try to place them on the craft stick snowflake to see how it will look before you start gluing them down.
5. Once you have decided what you would like to use, glue everything on the craft sticks.
6. To finish tie a piece of fishing line on the snowflakes so you can hang them.
7. To help preserve your snowflakes you can spray them with a clear acrylic spray paint. This will make them a little stronger and help keep them from fading over time.
Copyright 2010, Digital by Design, Inc - See Copyright Information
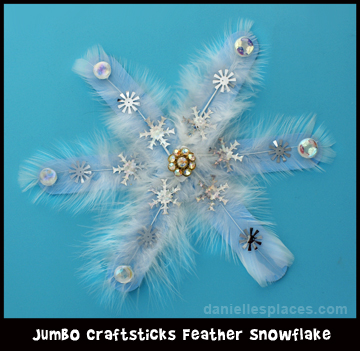
Craft Stick Feather Snowflake Craft for Kids
What you will need:
LowTemp Mini Glue Gun or Aleene's Tacky Glue
Sequins, Creativity Street Sequins & Spangles Gems, Buttons, and other Decorative Items
How to Make the Craft Stick Feather Snowflake:
1. Paint the jumbo craft sticks with acrylic paint and let them dry. I used a light blue color.
2. Print out the jumbo craft stick snowflake template and use it as a guide to glue the craft sticks together.
3.Glue three craft sticks together to make the snowflake shape, one on top of the other. Paint the snowflake a light color and let them dry. I used a light blue.
4. Cut the feathers to fit on the craft stick and then glue them on with tacky glue.
5. Glue gems and sequins on to decorate.
6. To finish tie a piece of fishing line on the snowflake so you can hang them.
Copyright 2010, Digital by Design, Inc - See Copyright Information
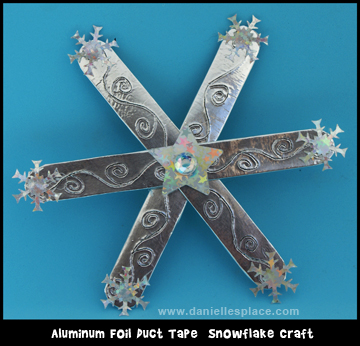
Aluminum Duct Tape Craft Stick Snowflake Craft for Kids
What you will need:
LowTemp Mini Glue Gun or Aleene's Tacky Glue
Aluminum Duct Tape (You can find this tape at a Lowe's or other home improvement store in the heating and air conditioning section. It costs about $7.00 for 120 yards. It is not Duck tape. Also make sure it isn't the tape with the words on it.)
White Iridescent Snowflake Sequins or Silver Snowflake Sequins, Gems or other Decorative Items.
How to make the Craft Stick Snowflakes:
1. Cover three jumbo or larger craft sticks with the aluminum duct tape. Cut the tape a little bigger than the craft sticks and then peel off the back of the tape and stick it to the craft sticks, smoothing out any wrinkles as you work. Press the sides of the tape around the edges of the craft sticks. The snowflake template pattern is available as a free digital download above.
2. Draw designs on the taped craft sticks using a sharp object such as a pen or pointed stick. You can also use a permanent marker to trace your lines so they stand out better.
3. Glue three craft sticks together to form a snowflake.
4. Glue sequins, beads, and/or gems onto the snowflake to add decoration.
5. To finish tie a piece of fishing line on the snowflake so you can hang it.
Copyright 2010, Digital by Design, Inc - See Copyright Information
What you will need:
Skill Craft Sticks or Regular Craft Sticks
Acrylic Paint
Glue Gun with Low Setting
Low Temp. Glue Sticks
Buttons or Different Colors and Sizes
Fishing Line
How to make:
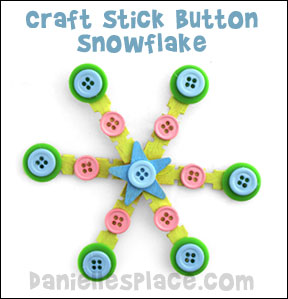
1. Glue three craft sticks together to make the snowflake shape, one on top of the other. Paint the snowflakes and let them dry. The snowflake template pattern is available as a free digital download above.
2. Decide where you would like to place the buttons on the snowflake, and try to place them where you want them to go. Once you have decided what you would like, glue them on the snowflake.
3. To finish tie a piece of fishing line on the snowflake so you can hang them.
Copyright 2010, Digital by Design, Inc - See Copyright Information
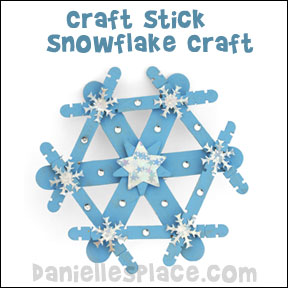
Craft Stick Snowflakes
What you will need:
Skill Craft Sticks
Jumbo Craft Sticks
Glue Gun with Low Setting
Low Temperature Glue Gun and Glue Sticks
Acrylic Paint
Wooden Star Shape
Sequins or Gems
Fishing Line
How to make:
1. Glue three large craft sticks together to make the snowflake shape, one on top of the other. The snowflake template pattern is available as a free digital download above.
2. Glue six Skill craft sticks between the large craft sticks joining the ends of the large craft sticks as shown in the picture. Glue the wooden star to the middle of the snowflake.
3. Paint the snowflake and let it dry.
4. Glue on gems, and sequins to decorate the flake.
5. To finish tie a piece of fishing line on the snowflake so you can hang them.
Copyright 2010, Digital by Design, Inc - See Copyright Information
Craft Stick Noodle Snowflake
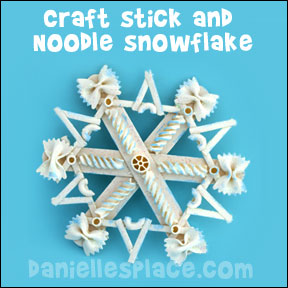
What you will need:
Medium-sized Craft Sticks
Uncooked Noodles of Different Shapes and Sizes
Glue
Spray Paint
Glitter Glue
Fishing Line
How to make:
1. Glue three medium craft sticks together in the centers to form a snowflake shape. The snowflake template pattern is available as a free digital download above.
2. Glue noodles on the craft stick to make interesting designs.
3. When you are done with your design, spray paint the snowflake and paint on glitter glue.
4. Tie fishing line onto the snowflake to hang it up.
Copyright 2010, Digital by Design, Inc - See Copyright Information
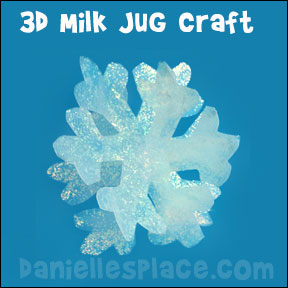
3D Milk Jug Snowflakes Craft
These look great on Christmas trees. You can just set them on the branches and they will reflect all the colors of the lights.
What you will need:
Plastic from a Milk Jug
Scissors
Fishing Line
Glitter Glue
How to make the 3D Milk Jug Snowflake Craft:
1. Print out the snowflake pattern and use it to cut snowflake shapes from plastic milk jugs or other plastic bottles. You will need cut two snowflake shapes for each 3D snowflake. Cut the line in the middle of the snowflake that goes halfway to the middle of the snowflake.
2. Paint the cut snowflakes with glitter glue and let them dry.
3. Place two snowflakes together by matching up the middle cut lines and inserting one snowflake into the cut line of the other snowflake. Use a little glue to keep them in place.
4. Tie fishing line on the snowflakes to hang them. Make different sizes and tie them together to make a mobile.
©2010, Digital by Design, Inc. - See Copyright Information - Do not link to the pattern page of this craft. Link to this page.
Snowflake Activity Sheet Printables
These printable snowflakes sheets can be used for many things.
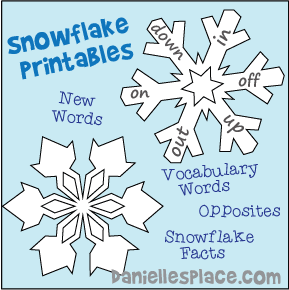
Writing Activities:
1. Write words on the snowflakes that describe snowflakes.
2. Write words all from the same word family on each snowflake.
3. Write opposite words on opposite arms of the snowflakes.
©2010, Digital by Design, Inc. - See Copyright Information - Do not link to the snowflake pattern pages - link to this page only.
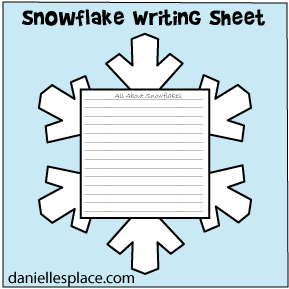
Snowflake-shaped Writing Sheet
Great Books About Snowflakes
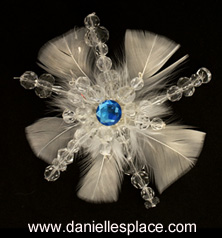
Beaded Feather Snowflake Craft for Kids
What you will need:
White Feathers
Clear Faceted Beads in Three Different Sizes
Hot Melt Glue Gun
Gems
Thin Wire
How to Make the Snowflake Craft:
1. Cut two pieces of wire a little bit bigger than the size snowflake you want to make. Cut another wire twice that length. Bend the first two wires together in the center. Bend the third longer wire into the first two but leave one side of the wire longer to make a loop to hang the snowflake. You should have a snowflake shape with one ray longer than the rest.
2. String beads onto the rays until they are entirely covered and then bend back the ends to keep the beads on the rays.
3. Glue feathers to the back of the snowflake between each ray. Glue a gem to the middle of the snowflake.
4. You can add shorter rays in between the larger rays.
©2012, Digital by Design, Inc. - See Copyright Information - Do not link to the snowflake pattern pages - link to this page only.


