Apostle Paul Bible Crafts and Activities for Sunday School
Teach children about the early life of Paul with this Sunday school Bible lesson about Saul as a Pharisee. The lesson covers Paul’s childhood in Tarsus, his education in Jerusalem, his tentmaking trade, and his persecution of Christians before his conversion.
Paul's Early Life as a Pharisee
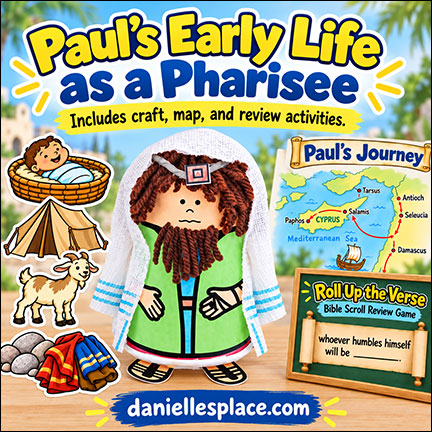
The Pharisees looked important and holy on the outside and said all the right things, but on the inside, they were filled with pride and greed. In this lesson, children learn about Paul’s early years and how God used him to do his work even though he started out working against Christianity.
The following craft and activities are including in the Bible lesson designed for children second through 5th grade The lesson is available to members on The Resource Room and as an instant digital download.
Member's 
Instant Digital Download  - Coming Soon!
Paper Cup Pharisee with Forehead and Arm Phylacteries Craft
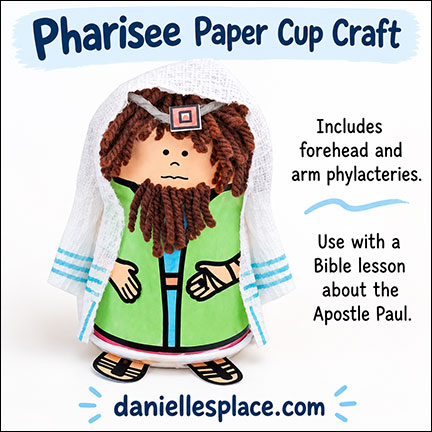
The purpose of this craft is to help children understand how the Pharisees placed great importance on religious rituals and outward practices, sometimes allowing those practices to become more important than truly obeying and following God.
Rather than having every child make the craft individually, you may want to use it as a group project. As you assemble each part, discuss its meaning and how it relates to the Pharisees. You can also print pictures of actual phylacteries from the Internet using the links below so children can see what they looked like.
What you will need:
9-oz. Party Cups, Yarn for Hair and Beard, Paper, Colored Pencils, Glue, Scissors, 5" x 5" Pieces of Cardboard, and White Paper Towels or Cloth
What to do:
A Pharisee was one of the three major Jewish religious groups at the time of the New Testament. The word Pharisee means "separated ones". They were also known as chasidim which meant "loyal to God or loved by God". They sought to obey God, but they eventually became so extreme in some parts of obeying the laws that they didn't realize they were missing other parts. They also added many laws of their own. Their rituals became more important to them than serving God. When they saw how much power Jesus had they were very jealous of him, and when Christianity starting spreading, they became one of its biggest opponents. Paul was a pharisee.
1. Glue the body pattern onto the cup and then glue on the arms and feet. Explain what the phylacteries were and why the Pharisees used them.
Member's 
Pharisee took Deut. 6: 8 literally and tied boxes filled with God's words on their foreheads and arms. Phylacteries are cube-shaped leather cases with scripture verses in them. The phylactery that was tied on the inside of the left arm was placed near the elbow so that when the arm was bent the phylactery would rest over the heart. The knot fastening it to the arm was in the form of the Hebrew letter yodh (Y) and the end of the sting wound around the middle finger.
2. Make the Hair and Forehead Phylactery - To make the hair loosely wind yarn around the 5" x 5" pieces of cardboard about 25 times and then pull it off. Tie the yarn together in the middle with another piece of yarn. Cut the looped ends to make a pompom. Glue the pompom to the bottom of the cup for the hair, and then give the Pharisee a haircut. Children may also want to glue pieces of yarn to the beard.
Explain that the Jewish people only wore their hair long if they were carrying out a vow. A few had a lifelong vow, but most would only let their hair grow for a short period of time, weeks or a month. Some religious groups would not cut their beards, but some would.
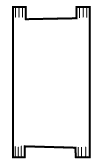
3. Make the prayer shawl or tallit - Cut five inches off the end of a paper towel. Use the entire length of the paper towel. Cut fringes at each end of the shawl. To do this cut a rectangle shape out of each end leaving about 1/2" of paper towel on each end. (See diagram below) Have your children draw blue lines through each tassel. (Numbers 15:37-41) (See the link below to read about why the Jews don't put the blue line in the tassels today.) (Deut. 22:12)
The Talmud contains Jewish law, ethics, philosophy, customs, and history, and gives detailed explanations of how the tassels should be made (Manmade law). They were supposed to use four strands folded in half to make eight. Those four strands were supposed to be made of eight fine threads. They also had detailed instructions on how to tie the knot to make the eight strands. They were also supposed to include a strand that was dyed blue with a specific dye (God's instructions), but the source of the dye has been lost so they no longer use the blue strand. Pointing out these facts will help your children understand how the religious leaders made the laws so complicated to follow that following the made-up laws became more important than following God's laws. Check out Wikipedia under Thread and Knots - https://en.wikipedia.org/wiki/Tzitzit
The fringes on the Pharisees robes were supposed to be a constant reminder of God's commandments (Number 15: 38-41), but the Pharisees made the fringes extra-long, putting on a show wanting to look more spiritual than others. In Matt. 23:5 Jesus scolded the Pharisees for making their fringes longer to look more important.
Map of Paul's Life
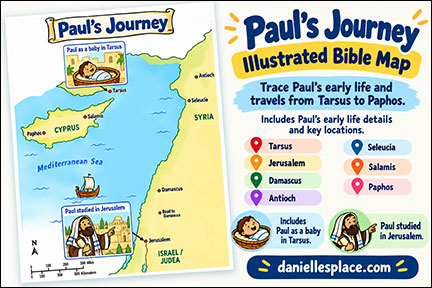
In this lesson the teachers use a printable map of places the Apostle Paul lived in or visited. Each week new things are added to the map. The first map shows the Paul's birthplace and where he received his education.
Use Pictures to Review the Story
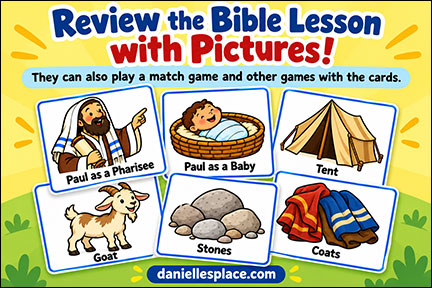
Use these fun picture cards to review the Bible lesson. Each card represents part of the lesson about Paul's Early life. Hold up the cards and ask your students how each picture relates to the story.
Use these picture review cards for even more fun review actities below:.
- Which One Is Missing? - Display all six cards. Have the children close their eyes while you remove one. They identify the missing card and explain how it relates to the lesson.
- Story Order Challenge - Give children or teams the cards and have them put them in the order the ideas appear in the lesson. Some, such as the goat and tent, may belong together because they relate to tentmaking, so you could allow children to explain their reasoning rather than requiring one rigid order.
- Pass the Picture - Children sit in a circle and pass a card while music plays. When the music stops, the child holding the card explains how it relates to Paul. Then start again with another card.
- Run to the Picture - Place the six cards around the room. Read a clue such as, “Paul learned a trade that involved making these,” and children move to the tent card. Or, “People laid these at Saul’s feet when Stephen was killed,” and they move to coats.
- True or False Picture Challenge - Hold up a card and make a statement. For example, show the goat and say, “Paul raised goats for a living.” Children answer true or false, then explain the correct connection. This would work especially well for grades 2–5.
- Draw a Card, Act It Out - A child draws a card and acts out the idea without speaking while the others guess. A tent could be formed with arms overhead; stones could be pretended to be picked up; coats could be laid down; a Pharisee could pretend to read a scroll.
- Find Your Partner - Make two copies of each card. Give one card to each child. Without showing their cards, children give clues until they find the person with the matching picture. This is more active than a standard table match game.
- Picture Toss Review - Lay the cards on the floor. Children toss a beanbag onto a card, then explain how that picture relates to Paul. You could give two points if they add a Bible fact or location connected to it.
Bible Scroll Bible Verse Review Game

Children learn the Bible verse using this large Bible scoll with the Bible verse hidden with in.
The teacher unwinds the scroll revealing the complete Bible lesson and reviews it with the class. She then asks a student to pick which side to roll up. She rolls it up cover a word, and then the children say the Bible verse again. Keep playing until the Bible verse is completely rolled up and the students can say the whole verse without reading it.
The Life of Paul 2 - Paul Sees the Light
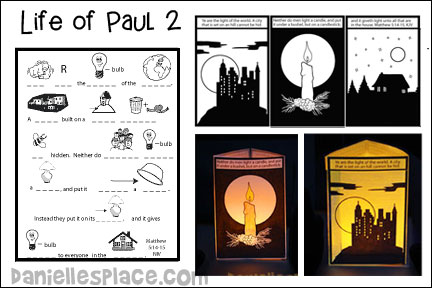
See The Life of Paul Bible Lesson - 2
Life of Paul 3 - Paul Escapes Over a Wall
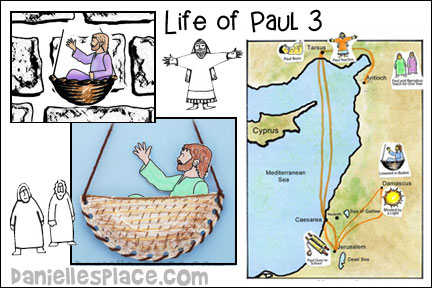
See The Life of Paul 3 - Paul Escapes OVer a Wall
I just used your resource room materials for the first time this month. So far I found it very helpful. I am the SS Superintendant for my church and I really find it time consuming the other way I used to prepare for the prek/kindergarten class. Your site helps me save time. I loved the stories and the craft ideas, well, I never would have thought of such cute ideas. The kids love it too. We started this year with the stories of God creating the world, then, animals (even spiders..yuck). We have had a great time with them and we like to keep their lessons simple and crafts simple as well. Thank you for sharing your talent God has given you, I'm very happy with everything I find on your website. Peace, Blessings and Joy, Laura J.
Life of Paul - 5 - The Good News is For Everyone
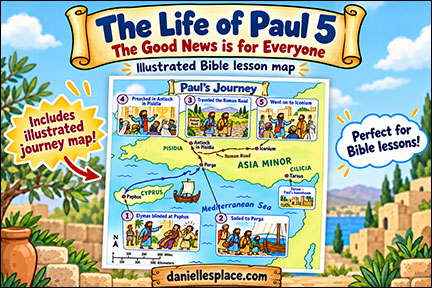
See The Life of Paul 5 - Bible Lesson Page
Paul Shipwrecked Sunday School Snack Craft
Give each child a plastic banana split bowl and have them put a pre-sliced banana inside. Used canned whipped cream to spread whipped cream on to of the banana. Place two teddy grahams in the whipped cream; one for Paul and the other for Silas. You can also put half of a straw down into the banana with a sail attached to it. This makes a really cute craft for the 2's through 5 year olds. They can close the top of the bowl and float it or eat it first. Either way, they have a boat and a sail to play with and it is very inexpensive. This went over really well ! Yum !!! Sent in by Connie
Paul Bitten by a Snake Sunday School Craft
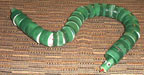
Make a snake with plastic bottle caps from soft drink products and two corks for the head and tail.
Drill a hole in the center of each cap and the corks. String red plastic cord through one small cork then 25 plastic caps per snake and end with the other small cork.
Tie off at the tail end. Leave some of the cord hanging out for the tongue on the other end. I spray painted the caps green. When it dried I put wiggly eyes on the tongue at the head end. Also, if you want to, you can assembly the first two caps open side to open side and put a couple of beans in it, then hot glue them together. This way the snake rattles. We used this craft for VBS when Paul was bitten by the viper. The 5th and 6th graders enjoyed making their snakes and painting them. Connie
For other snake crafts go the the Snake Crafts Page.
©2007, Digital by Design, Inc. -* See Copyright Information
Paul and Silas Rejoice
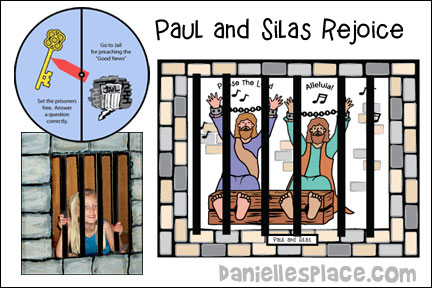
Bible Lesson Including: