Hippopotamus Crafts and Learning Activities
Hippo Crafts and Educational Activities for Children
Paper Plate Hippo, Science and Writing Activity
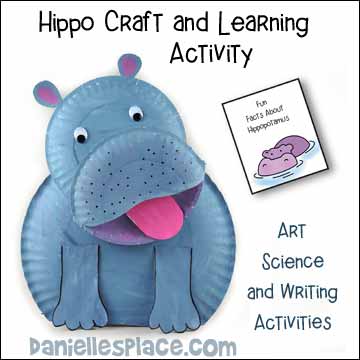
What you will need: Snack-sized Paper Plate, Dinner-sized Paper Plate, Card Stock (Heavy Paper, Printer Paper, Pink Paper, Paint and Paint Brushes, Scissors, Glue, Stapler, Googly Eyes
How to Make the Hippopotamus Paper Plate Craft:
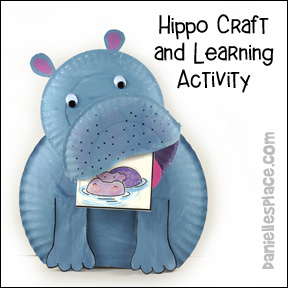
3. Glue the muzzle to another lunch-sized paper plate.
4. To make the body place two dinner-sized paper plates together and cut off one-inch from one side to make them flat. Place the two paper plates together top-to-top and glue them together.
5. Glue the head to the body and then glue on the ears.
6. Cut legs from card stock and paint them.
7. Paint the hippo and let it dry.
8. Cut out a tongue shape from pink paper and glue it inside the mouth. Glue on the legs.
9. Print out the Hippopotamus Book Pages, cut them apart, and assemble them. For directions on how to assemble the books go to the Instructions Page.
10. Have your children research hippopotamuses and write fun facts on the pages of their books. Tape the books inside the hippo's mouth.
© 2017, Digital by Design, Inc. - See Copyright Information
How Far Can a Hippo Open Its Mouth? Math Activity Sheet
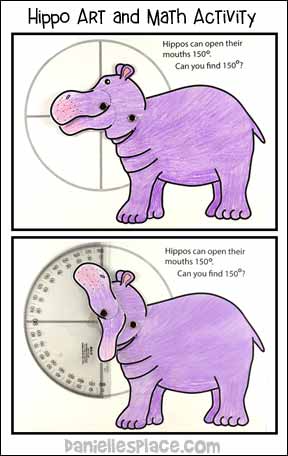
Children discover what it looks like for a hippo to open its mouth 150° using a protractor.
What you will need:
Paper
Colored Pencils or Markers
Brass Fasteners
Protractor to Measure Angles
Hole Punch
What to Do:
1. Print out the patterns.
2. Cut the upper and lower muzzle from lunch-sized paper plates and glue the top muzzle to the bottom muzzle.
3. Have your students color the body parts and then cut them out.
4. Attach the upper and lower jaws to the head with a brass fastener and then attach the head to the body pattern.
5. Tell your students to move the hippo's jaws to what they think is 150° then give them a protractor to discover how close they were.
© 2017, Digital by Design, Inc. - See Copyright Information
Hippo Crafts on Other Pages


