Christmas Crafts for Kids - Page 4
How to Make Christmas Crafts and Activities for Children
Merry Christmas! Christmas Lights Thumbprint Craft
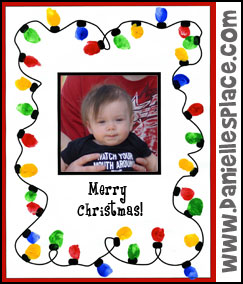
What you will need:
Paper
Red, Green, Yellow and Blue Paint
Pictures of Your Children (Optional)
What to do:
1. Print out the pattern sheet and make copies.
Member's ![]()
Instant Digital Download ![]()
2. Glue the pattern sheet onto a piece of construction paper.
3. Place small amounts of paint on paper plates and have your children dip their fingers into the paint and press them on that paper near the black marks to make the Christmas lights.
4. You can glue a picture of the children in the center of the sheet or have your children draw a picture in the center.
Bed Spring Christmas Tree Craft
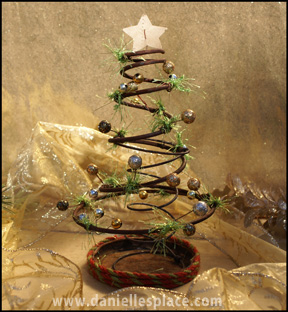
What you will need:
Old Rusted Bed Springs
Rusted Lid
Thin Wire
Jute Ribbon
Brown Bag
Large Star Punch
Christmas Spray with with wired Beads and Glitter balls
Green Yarn
How to Make the Bed Spring Tree:
1. Two different types of bed springs were used to make this tree. The outer spring is larger and bigger and comes from a better quality box spring. The inside spring is thinner and is more of a cone shape instead of the triangular shape of the larger, outside spring.
2. Attach the thinner spring to the inside of the larger spring with thin wire so that it is sticking out the bottom of the larger spring a few inches.
3. Pull apart the spray separating the little wired balls. Attach the balls to the large bed spring by winding the wires around the bed spring. If you don't want to use a spray, you can just string beads onto wires and then attach them to the spring.
4. Cut short lengths of green yarn and tie them to the spring covering the wires that you wound around the spring.
5. Cut a star shape from a brown bag using a star punch and then use a thin wire to attach it to the large spring.
6. To finish glue the jute ribbon around the edge of the lid and place the bed spring tree in the lid.
©2012, Digital by Design, Inc. -*See Copyright Information
Puzzle Piece Christmas Ornament Craft for Kids
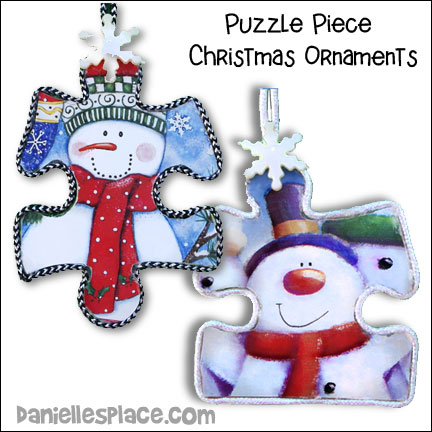
What you will need:
Christmas Pictures from Christmas Cards, Wrapping Paper, or Magazines
Elmer's Rubber Cement or Scotch Craft Stick Glue
Exacto Knife
Puzzle Pieces from Old Children's Puzzles
Decorative Items
Round Ribbon
How to Make the Puzzle Piece Ornament:
1. Find Christmas pictures that will fit on the puzzle pieces. The entire picture doesn't have to fit on the puzzle piece completely, just the important parts of the picture.
2. Lightly trace around the puzzle piece to make sure the picture will be in the correct place and it will look okay on the piece.
3. Cut around the traced outline of the puzzle piece on the picture leaving about 1/2" extra paper around the outline.
4. Glue the picture onto the puzzle piece. If you are using gift wrap, use the craft stick glue instead of the rubber cement. The paper is too thin for rubber cement. The rubber cement will seep through the picture. If you are using pictures from cards or thicker paper, you can use the rubber cement.
5. After the glue dries turn the puzzle piece over to the back and cut away the extra paper. Use regular scissors to cut away the straight edges. Use an Exacto knife to cut away the curved edges.
6. Glue ribbon around the edge of the puzzle piece using a low temperature glue gun. Leave two inches of ribbon at the top of the puzzle piece at the beginning and end of the ribbon. Tie the ribbon ends together to make a loop.
7. To finish glue decorative items the ornament.
©2012, Digital by Design, Inc. -*See Copyright Information
Shine! Reindeer Printable Writing Activity Sheet
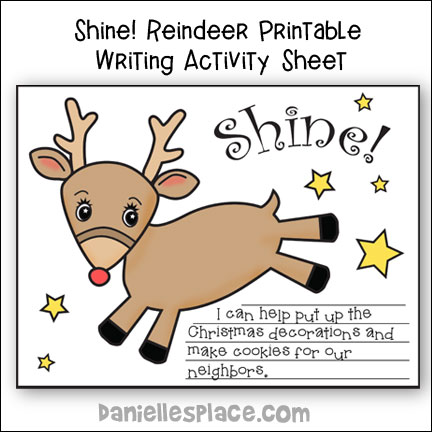
Rudolph the Red-Nosed Reindeer has been the longest-running holiday special. The movie has entertained millions of children since 1964 and presents the meaning of Christmas and other life lessons. Through a shy, depressed reindeer’s example children can learn they can use their unique abilities to shine just like Rudolph.
What you will need:
Printer Paper, Crayons or Colored Pencils, Glitter or Glitter Glue and Rudolph the Red-nosed Reindeer Movie
What to do:
1. Watch the move Rudolph the Red-nosed Reindeer. Talk about how Rudolph used his talents to help Santa and make Christmas successful. Tell your children that they can also shine like Rudolph by using their talents to help others. Ask them to think of something they would like to do to spread the Christmas spirit this year and write it on the activity sheet.
2. Have them color the picture and add glitter glue to Rudolph's nose and the stars.
Member's ![]()
Instant Digital Download - ![]()
©2011, Digital by Design, Inc. -*See Copyright Information
Shine! Christmas List
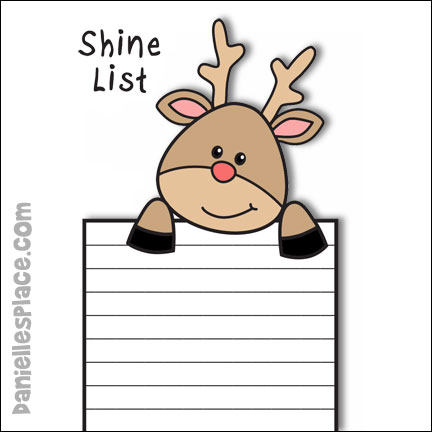
What you will need:
Printer Paper, Crayons or Colored Pencils, Glitter or Glitter Glue and Rudolph the Red-nosed Reindeer Movie
What to do:
1. Watch the move Rudolph the Red-nosed Reindeer. Talk about how Rudolph used his talents to help Santa and make Christmas successful. Tell your children that they can also shine like Rudolph by using their talents to help others. Ask them to think of things they would like to do to spread the Christmas spirit this year and write them on the Shine list.
2. Have them color the picture and add glitter glue to Rudolph's nose and the stars.
Member's ![]()
Instant Digital Download - ![]()
©2011, Digital by Design, Inc. -*See Copyright Information
Shine! Printable Reindeer Christmas Gift Tags

What you will need: Printer paper, Crayons or Colored Pencils, and Glitter or Glitter Glue, Rudolph the Red-nosed Reindeer Movie
What to do:
1. Watch the move Rudolph the Red-nosed Reindeer. Talk about how Rudolph used his talents to help Santa and make Christmas successful. Tell your children that they can also shine like Rudolph by using their talents to help others. Ask them to think of things they would like to do to spread the Christmas spirit this year and write them on the back of the cards.
2. Have them color the pictures and add glitter glue to Rudolph's nose and the stars. This Pattern comes in both color and black and white.
Member's ![]()
Instant Digital Download - ![]()
©2011, Digital by Design, Inc. -*See Copyright Information
Reindeer Star Poster for Bulletin Board Display
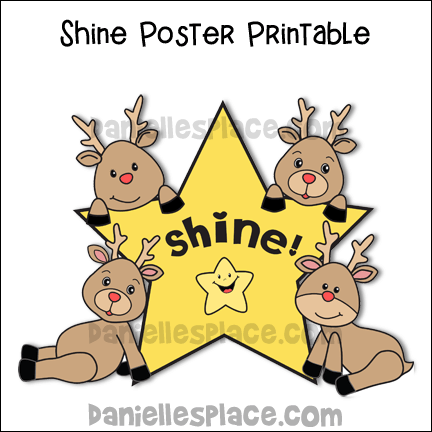
This 13" x 10" poster is great for bulletin board displays.
This poster is available in color or black and white and with the words pictured or blank.
Member's ![]()
Instant Digital Download - ![]()
©2011, Digital by Design, Inc. -*See Copyright Information
Star Garland
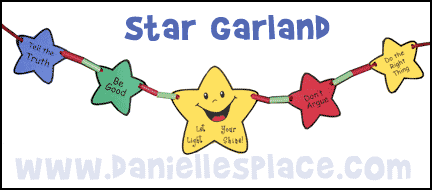
What you will need: Colorful Card Stock (Heavy paper), Scissors, Hole Punch, Yarn or String, and Plastic Drinking Straws
How to make star garland:
1. Cut star shapes from different colors of paper.
Member's ![]()
2. Punch holes in the stars so you can string them together.
3. Cut plastic straws into one-inch lengths.
4. String the stars onto the piece of yarn and place two or three pieces of cut straws in between each star.
5. Write things on the stars if you wish such as: Our Class Shines (On the middle Star) and then your children's names on the smaller stars.
Paper Star Christmas Tree Craft for Kids
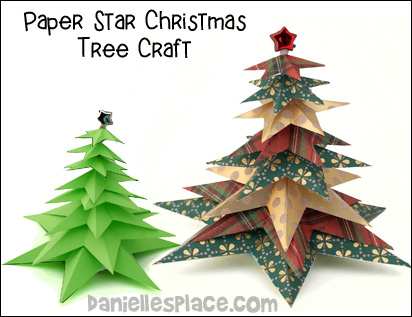
What you will need: Colorful Christmas Scrap Booking Paper, Scissors, Star Beads, and a Pipe Cleaner
How to make a paper Christmas Tree:
1. Print out the star patterns onto colorful Christmas paper.
Member's ![]()
Free ![]()
2. Cut out the stars.

3. Fold and then unfold the stars in half from every point to the opposite point and from every corner to it's opposite corner so that the print of the paper is always showing when you fold.
4. Punch a pipe cleaner through the center of the smallest star and keep adding bigger and bigger stars to the pipe cleaner making sure all the stars are facing in the same direction with the print facing up. If you want to hang the tree on a Christmas tree leave about two inches of pipe cleaner at the top of the tree to form a hook.
5. Place some glue at the top of the tree above the smallest paper star and then string a star bead onto the pipe cleaner pushing down over the glue.
6. Wind up the end of the pipe cleaner and tuck it underneath the tree or add a rectangle shaped piece of paper for the trunk of the tree.
More Christmas Craft Links
Christmas Craft Page 1
Christmas Crafts Page 2
Christmas Craft Page 3
Christmas Crafts Page 4
Christmas Crafts Page 5
Christmas Crafts Page 6
Winter Crafts Page
Bible Themes - Christmas Crafts
Bible Themes - Christmas Crafts Page 2
Bible Themes - Christmas Crafts Page 3