Christmas Crafts
Christmas Crafts and Learning Activities for Children
Craft Stick Puzzle Piece Ornaments
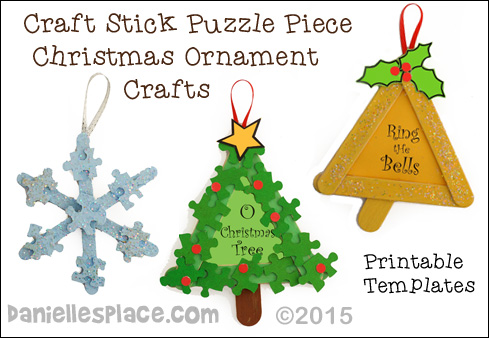
Printable templates for the snowflake, tree, and bell craft are available to members and as an instant download. The patterns include the star, holly leaves, "O Christmas Tree", and "Ring the Bells" patterns.
What you will need:
Regular-sized Craft Sticks
Mini Jumbo Craft Sticks
Jumbo Craft Sticks (Optional)
Yellow, Red, and Green Paper
Glitter
Small Puzzle Pieces from Old Puzzles
Ribbon
Yellow, Green, White, Brown, and Light Blue Paint or Liquid Paint Markers
Hole Punch
How to Make the Christmas Tree Ornament:
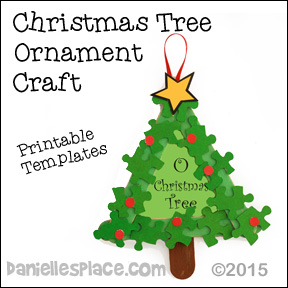
1. Use the Christmas tree template to glue three mini-jumbo craft sticks together in a triangle shape. Paint the triangle green. (A printable template available to members and as an instant download. See above.)
2. Place the triangle on a piece of green paper and trace around the inside of the triangle. Cut the triangle out about 1/2 from the drawn shape. Print "O Christmas Tree" on the paper and glue it to the back of the triangle. (Printable pattern available to members and as an instant download, see above.)
3. Cut 1 1/2" off the end of a jumbo craft stick and paint it brown. (You could use cardboard or construction paper instead.) Glue the craft stick to the triangle tree.
4. Paint small puzzle pieces green and glue them to the tree shape.
5. Punch small dots from red paper with a hole punch and glue them to the puzzle pieces.
6. Cut a star shape from yellow paper and glue it to the top of the tree.
7. To finish glue a ribbon to the top so you can hang the tree ornament.
©2015, Digital by Design, Inc. - See Copyright Information
How to Make the Christmas Bell Ornament:
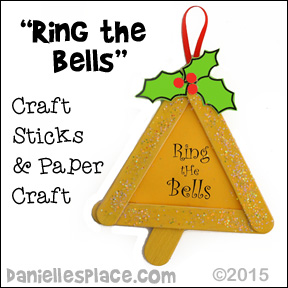
1. Glue three mini jumbo crafts sticks together to form a triangle shape. (A printable template available to members and as an instant download. See above.)
2. Cut two inches off the end of a jumbo craft stick at an angle. Glue the piece to the bottom of the triangle.
3. Pain the bell shape gold or yellow. When the paint is dry spread glue over the craft sticks and sprinkle glitter on the glue.
4. Place the bell shape on a piece of yellow paper and trace around the outside of the shape. Cut the piece out inside the lines you drew. Write "Ring the Bells" on the center of the paper and glue it to the back of the bell shape. (A printable pattern is available to members and as an instant download. See above.)
5. Cut holly leaf shapes from green paper and use a paper punch to punch berry shapes from red paper. Glue the pieces to the top of the bell. (A printable pattern is available to members and as an instant download. See above.)
6. To finish glue a ribbon to the top of the bell.
©2015, Digital by Design, Inc. - See Copyright Information
How to Make the Christmas Bell Ornament:
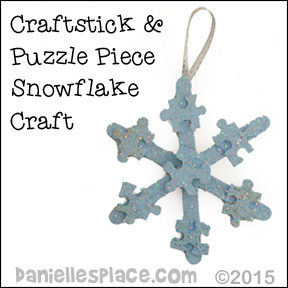
1. Glue three craft sticks together to make the snowflake shape. (A printable template is available to members and as an instant download. See above.)
2. Glue small puzzle pieces on the rays and in the center of the snowflake shape.
3. Paint the snowflake white or a light blue color.
4. When the paint is dry spread white glue over the snowflake and add glitter.
5. Fold a piece of ribbon in half and glue it to the back of the snowflake.
©2015, Digital by Design, Inc. - See Copyright Information
Acrylic Cabochon Christmas Ornaments
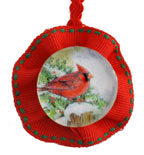
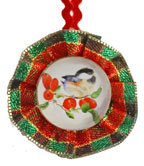
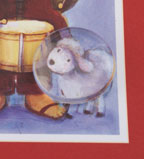
What you will need: Acrylic Cabochons from local craft store, Old Christmas Cards, Christmas Pictures, Artwork, etc. Elmer's Glue-All Multi-purpose glue (Glue that dries clear), 7/8" Christmas Ribbon, 1/4" Rick Rack, Glue Gun, Needle, Thread, and Scissors.
How to Make Acrylic Cabochon Christmas Ornaments:
1. Find small picture from cards or other artwork that will fit behind the cabochon. Place the cabochon over the picture and trace around it, and then cut out the picture.
2. Glue the picture to the back of the cabochon. Smear glue evenly over the whole picture and press it to the back of the cabochon. Press down hard with your fingers until you get all the bubbles out. Let dry.
3. Cut six inches of ribbon and gather one side with a needle and thread. Tie the end so the gather doesn't come apart.
4. Glue the gathered ribbon to the back of the ornament.
5. To make the hanging loop cut about 4" of rick-rack, make a loop and glue it to the back of the ornament with a hot melt glue gun.
You can also make these ornaments into a broach by adding a stickpin to the back, or make a refrigerator decoration by adding a magnet.
©2009, Digital by Design, Inc. - See Copyright Information
Sitting Elf Paper Craft for Kids
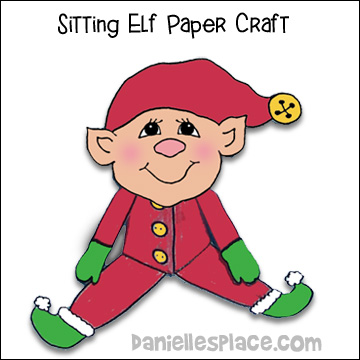
What you will need:
Card stock or Construction Paper, Colored Pencils, and Tape
How to Make Sitting Elf Paper:
1. Print out the patterns and color them. Cut them out.
Free Instant Digital Download - ![]()
2. Fold up the legs and fold the arms down over the body. Form the body into a cone shape and tape at the back. Tape on the head.
3. This little elf would look great on the top of Christmas packages. You can place a gift tag behind it's arms. Print out the smaller patterns to use as a gift tag.
©2007, Digital by Design, Inc. - See Copyright Information
Reindeer Bell Ornament Craft for Kids
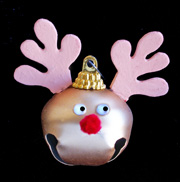
What you will need:
Bell Ornaments, Googly Eyes, Tiny Red Pompoms, Tan Foam Sheets, Scissors, and Glue
How to Make Reindeer Bell Ornament:
1. Cut out antler shapes from foam sheets and glue them to the top of the ornament.
2. Glue on the googly eyes, and pompom to finish.
©2007, Digital by Design, Inc. - See Copyright Information
Marshmallow Reindeer Craft for Kids
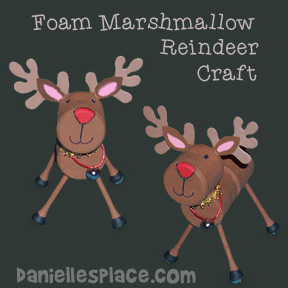
What you will need:
Golf Tees for the legs (Buy at any department store)
Brown, Red, and Black Acrylic Paint
Glue, Magic Markers, Ribbon, Jingle Bell and Decorative Trim
How to Make Marshmallow Reindeer Craft:

1. Glue two marshmallows together for the body. Glue the head to the body as shown in the diagram.
2. Stick four golf tees in the body for legs. Paint the body and legs brown. Paint the hooves black.
3. Cut ears and a tail from brown fun foam and glue them to the head as shown. Cut antlers from tan fun foam and glue behind the ears.
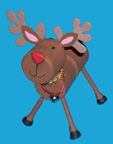
4. Use a permanent black marker to draw on the face. Paint the nose red.
5. Tie a ribbon with a bell on it around the deer's neck. Add a gold trimmed collar.
©2006, Digital by Design, Inc. - See Copyright Information
Wet-Felted Christmas Ornaments
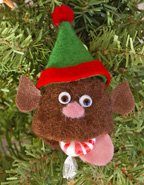
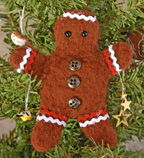
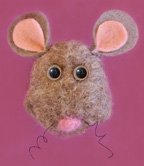
These little creatures are great for Christmas Bazaars and Craft Fairs. They are very easy to make and are inexpensive. You can find directions to these on the Yarn and Felt Page. Just click on the pictures below.
M&M's Christmas Poem
Add the following poem to a bag of M&M's with a picture of the wise men.
More Than Colors
These special little candies,
Come in colors bright and fun.
There’s more than color to be found;
A story of God’s Son.
The M’s turn into W’s,
If you turn them upside down.
A few more turns and E and 3’s
Are waiting to be found.
M is for the manger,
Where Mary laid her precious boy.
Little did the world know,
This baby would bring great joy.
The W is for the Wise men,
Who followed a bright star.
The star revealed a king was born,
They came but, oh, so far.
In Bethlehem they found Him,
Just as they had been told.
3 is for the gifts they brought;
Frankincense, myrrh and gold
W is also for their worship,
As they bowed before their King,
Salvation is the promise given,
There’s nothing we can bring.
Faith alone is how we come
He died to set us free.
E is for eternity,
God’s gift to you and me.
Barbara Hooks' Version
M&M Poem with Layered M&M Cookie Recipe Gift
I just wanted to let you know that I used this poem along with a layered jar M&M cookie recipe that I got off the Internet. Go to https://organizedchristmas.com/article71.html. I sent it home with all of our Cubbies Mom's. (AWANA) I sent the poem with a thank you for being committed to bringing their kids to cubbies. A lot of these families are not involved in our church and it worked as a great outreach. THANKS! You have done a great job at this site and on The Resource Room as well. Merry Christmas! Nicki Jones
I placed the poem on a nice card stock paper with red font. I then stapled the small size bags of M & M's to the card and gave each child at our church one the Sunday before Christmas. I gave them a little Bible lesson beforehand to tie it all together, asking them questions like what letters are on an M & M candy, what do you think that stood for? I never thought I would be reminded of Christmas by seeing an M& M, but I am now. It's something I think I will use for years to come to remind myself and others the reason for Christmas. Bonnie Beecham
©2006, Digital by Design, Inc. - See Copyright Information
Christmas Crafts and Activities on Other Pages
Christmas Crafts Page 1, Page 2, Page 3, Page 4, Page 5
Bible Themes - Christmas Crafts - Page 1, Page 2 Page 3


