Prayer Bible Crafts and Activities
Bible Craft about Prayer for Children's Ministry
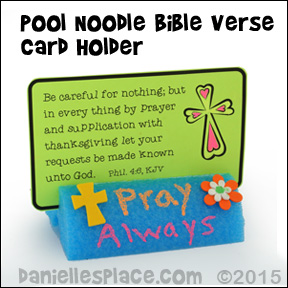
Bible Verse or Prayer Reminder Card Holder Craft
What you will need:
Serrated Knife (Bread Knife)
Card Stock
Colored Pencils
Glue
What to do:
1. Before class use a ruler to mark off four-inch sections on the pool noodle.
2. Cut the pool noodle at each mark with a serrated knife making cylinder shapes. Then cut the cylinder shapes in half, lengthwise to make the holders.
3. Cut a slit at the rounded top of the holder lengthwise across the center of the cylinder about 1/2" deep. Use this slit to hold Bible verse card.
4. Print out the Bible verse cards onto card stock.
5. In class have your children decorate the holders with liquid chalk markers and foam shapes, and place the Bible verse card in to holder.
No Tape, No Staples Prayer Chains
This chain can be used to teach children about the importance of prayer. Make two chains, one for prayer requests and one for prayers answered. Have your children write their prayer requests and the date on the front of the hearts and link them together under a piece of paper that says "Prayer Requests". Start another chain for prayers answered.
When a prayer has been answered remove the link from the "Prayer Requests" chain, write the date it was answered, and put it on the "Prayers Answered" chain. Your children will begin to see how God answers their prayers.
What you will need:
Different Colors of Construction Paper or Typing Paper, Scissors, Pen
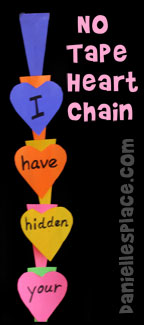
How to Make:
1. Print out the pattern.
2. Cut out the pattern and trace it onto another sheet of paper. Cut on the solid lines. (Save time by cutting 4 to 5 links at a time by layering the paper.)
3. Cut open the "Y" shaped lines in the center of the link being careful not to cut all the way through. To make cutting the slit easier, fold down the handle so that the lines overlap trying not to crease the paper to much. Cut through the paper, unfold, and finish cutting the line.
4. To add a new link just slide the bottom heart of the chain behind and through the slit on the new link.
You can also use this craft as a memorization tool. Have your children write one word of the Bible verse on each heart and then chain them together in order.
©2013, Digital by Design, Inc. -* See Copyright Information
Four Kinds of Prayer Cup Puppet Sunday School Craft
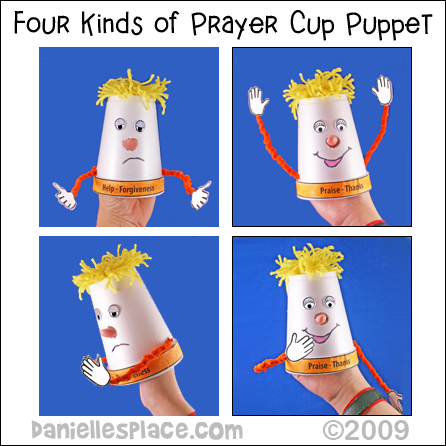
What you will need: 16 oz Foam Cups, Printer Paper, Yarn, Pipe Cleaners, Large 3/4" Buttons with Four Holes, Googly Eyes, Markers, Scissors and Glue
How to make the cup puppet:
1. Before class print out the four different kinds of prayer strip and the hand patterns onto colorful paper.
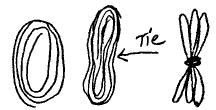
2. Make puppet hair by winding yarn around your four fingers about 25 times. Pull it off your fingers keeping the yarn in the same shape and tie the yarn together in the middle with another piece of yarn. Cut the looped ends to make a pompom.
3. In class have your children glue the word strip around the rim of the glass and the hair to the bottom of the cup.
4. Draw a sad face on one side of the cup and a happy face on the other. You can use googly eyes or eye stickers if you have them.
5. Use a pencil to draw a hole for the nose. Make it large enough for a child's finger to fit through. Punch the nose out by poking the pencil through the foam.
6. To make the arms place buttons inside the cup where the arm should be attached. Stick one end of a pipe cleaner through one of the button holes and the foam of the cup from the inside to the outside of the cup. Stick the other end of the pipe cleaner through the opposite hole from the inside to outside of the cup. Pull the pipe cleaner through so that both sides are even on the out side. Do the same thing with another pipe cleaner with the other two holes. (The button will keep the pipe cleaners from being pulled through the foam cup.)
7. Wind the ends of the pipe cleaners together to make the arm. Glue a hand to the end of the pipe cleaner and another hand on the other side of the hand to cover the end of the pipe cleaner.
8. Have your children move the arms to represent each type of prayer. The hand is placed in front of the mouth with the thumb up and then moved out from the face to represent thanks. This is how you say, "Thank you." in sign language.
©2009, Digital by Design, Inc. -* See Copyright Information
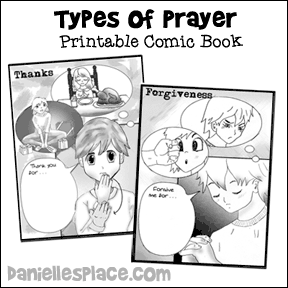
Types of Prayer Fill-In Comic Book for Sunday School
This comic book style activity includes four pages and a cover page with pictures of four different kinds of prayer including: forgiveness, praise, thanks, and asking for help.
Children look at the pictures in the comic book and decide what the children in the pictures might be praying about then fill in the speech balloons.
©2007, Digital by Design, Inc. -* See Copyright Information
Philippians 4:6 - Bible Verse Review Activity Sheet

Children Match the icons to figure out the Bible verse. Each icon represents a different word.
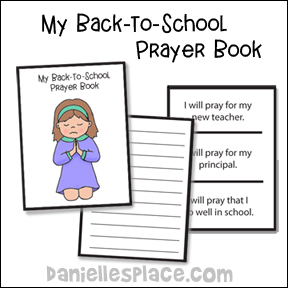
Back-to-School Prayer Book
This craft goes along with the Bible lesson "Back to School with a Leap" on The Resource Room.
The lesson uses the book "Froggy Goes to School" with frog-themed games and crafts.
In this lesson children learn that we need to be prepared for school so that we will be successful. Not only do we need the right clothes and supplies, but we need to prepare our hearts and minds.
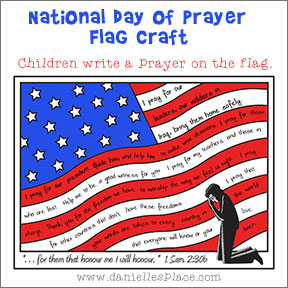
National Day of Prayer Sunday School Craft
United States Flag Craft - The National Day of Prayer is on May 3rd.
2. Color the flag and then write your prayer on the stripes of the flag.
©2007, Digital by Design, Inc. -* See Copyright Information
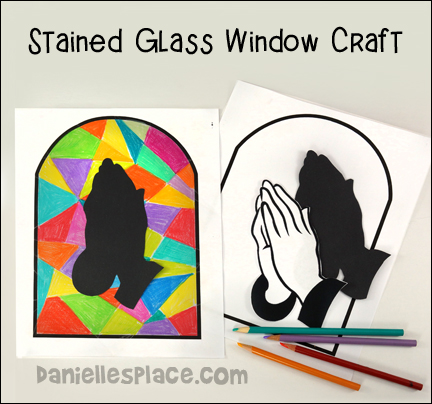
Praying Hands Picture Sunday School Craft
Use this craft when you are studying about prayer. The Lord's Prayer or the Prayer of Jabez or any other prayer can be written on the hands with gel pens.
What you will need: Black Construction Paper, Colored Pencils, Paper, Scissors and Glue
How to make the praying hands picture:
1. Before class print out the patterns of the praying hands and the stained glass window.
2. Before class use the praying hands pattern as a template to cut shapes from black paper.
3. Show your children how to fold the stained glass window sheet at odd angles and then unfold and fold it again until they have a paper with lots of irregular shapes.
4. Tell them to color in the shapes with different colors of colored pencils to make a stained glass window.
5. Older children can use light-colored pencils to write a Bible verse about prayer on the praying hands.
©2007, Digital by Design, Inc. -* See Copyright Information
Coloring Sheets for the Lord's Prayer for Sunday School
Teach Us To Pray Web Site has lots of printable coloring pages on the Lord's Prayer and other activities to teach children the Lord's Prayer.
Prayer Tower Sunday School Activity
I teach Pre-K and kindergarten and one thing I have found hard is to keep their little minds on the prayer being said. A great thing to do is to use blocks to build a prayer tower. Each child takes a block and stacks it on the tower. As they stack it they say what they would like to pray about. This is fun for them, but most importantly, it helps them think of whom they would like to pray for. This idea was sent in by Kay Hershberger
©2007, Digital by Design, Inc. -* See Copyright Information
The Lord's Prayer Sunday School Lesson
This Lesson series includes craft and activities for each verse of the prayer.
Don't Worry About Anything
You don't have to worry because God is just a prayer away. God will always listen to your prayers, and he cares about you and loves you.
This lesson was written for younger children. They learn how important it is to pray using Jesus and Daniel as examples.
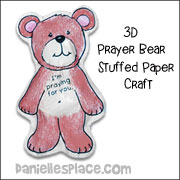
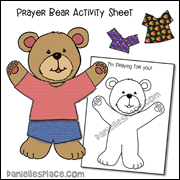
Prayer Bear Bible Lesson
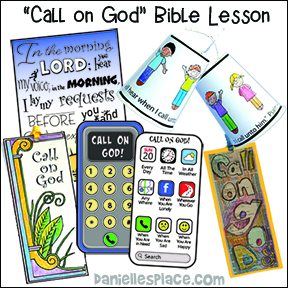
"Call on God" Bible Lesson
Also see "Call on God" Bible Lesson
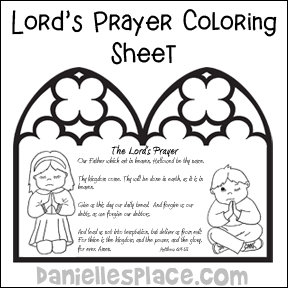
The Lord's Prayer Coloring Sheet For Sunday School
Just print out the pattern and have your children color the picture.
Cut out the window shapes and fold the paper in half. Spread out the sides so that the picture stands up.
©2007, Digital by Design, Inc. -* See Copyright Information
Bible Lessons and Crafts About Prayer for Sunday School
1. The Lords Prayer - How Jesus Taught His Disciples to Pray
By Vicki Wiley

This lesson is taught using plastic cross containers and color Sandy Candy.
Each child is given a plastic cross frame. You can buy Plastic Sand Art Crosses (Pack of 12 Crosses)
Our Father
who is in Heaven - The first thing Jesus said was, "Our Father
in heaven", Some Bible Translations say "Our Father, who
ART in heaven." That means our Father who is in heaven.
Let's put some gold into our tube to remind us of heaven. The Bible
tells us that the streets of heaven are made of gold, so the gold
will remind us of heaven and how we should start our prayer.
"May your
kingdom come" - (Pass around the purple "Sandy Candy")
Jesus is the King and we use purple to stand for royalty. The kingdom
that Jesus is talking about is now in heaven, but at the end of
the world it will also be on earth. When you see the purple, you
can remember the kingdom of God. For the complete lesson click on
the link above.
The Lord's Prayer - Bible Lesson on The Resource Room for Children Grades 2 - 5
The aim of this Lesson is to help students understand prayer as a means of talking to God, to look at and understand the model prayer Jesus gave us. Following are some ideas from the lesson:
1. Display a variety of baking ingredients and a recipe for bread. Include ingredients that would not go into a bread recipe. Discuss what would happen if we didn't use a recipe as beginning bakers. Then have the students decide which of the ingredients belong in the recipe. Explain that Jesus gave us an example of a prayer to use as our guide when we pray. If time permits, students could make the bread. Otherwise, the leader could make the bread at home and bring it back when the "daily bread" portion of the prayer is discussed.
2."Thy Kingdom Come" - Make a Christian Flag - Go to Fbcfay.com web site for a picture and the history of the flag.
3. "Give us this day our daily bread" - Decorate a napkin and place in a bread basket. Encourage your students to make bread at home to place in their baskets and give them to a neighbor.
©2009, Digital by Design, Inc. -* See Copyright Information

