Dinosaur Crafts and Learning Activities for Kids
How to Make Crafts and Activities Relating to Dinosaurs
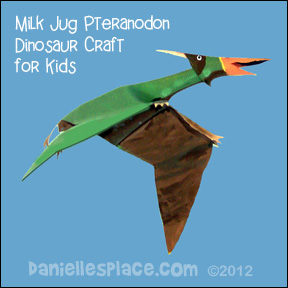
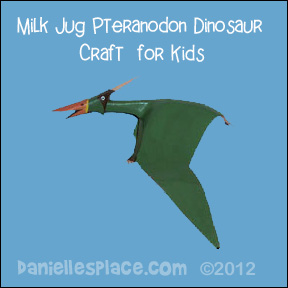
Milk Jug Pteranodon Dinosaur Craft for Kids
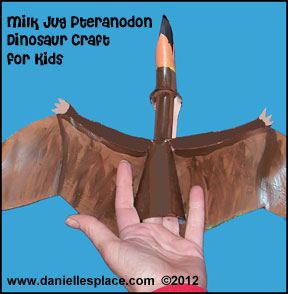
What you will need:
Two Plastic Milk Jugs
Sharp Pointy Scissors
Tape
Dry Erase Marker
Printer Paper
Fine Sand Paper
Hot Melt Glue Gun
Low Temp. Glue Sticks
Acrylic Paint
1. Carefully peel off the labels on the front of the milk jugs. Wash out the insides of the jugs and let them dry.
2. Print out the pteranodon wing pattern and cut it out.
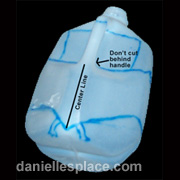
3. Tape the wing pattern on one of the milk jugs so that the straight edge of the wing matches up with the line running down from the center of the handle of the jug as shown in the diagram at the left.
4. Use a dry erase marker to trace around the wing pattern and feet.
5. Turn the pattern over and match it up to the center line again to make the other wing. Trace around it again. The handle of the milk carton is the pteranodon's neck. The wings should go behind the milk jug handle or the bottom of the neck.
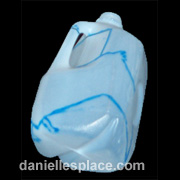
6. Draw the rectangle shape above the wings as shown in the diagram to the left. The rectangle should connect under the top of the handle as shown in the diagram.
7. Cut the pteranodon out, but don't cut all the way through where the top of the wings meets the neck. Cut all the way through the top of the handle and all the way through under the top of the handle. You should have a rectangle peace on the top of the wings only connected by a 1/4" of an inch at the base of the neck.
8. Fold the rectangle piece back under the pteranodon's body and roll it up so that it forms a cylinder shape under the body as shown in the diagram at the left. Use a glue gun to glue the cylinder in place. A children can stick their fingers in the cylinder to hold the pteranodon.
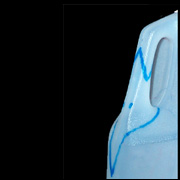
9. The head is made out of the second milk jug. Use the diagram to the right as your guide. The beak of the bird is part of the handle. Cut the lower beak a little shorter than the top beak. Use a glue gun at low temperature to glue the head to the body.
10. Use a paper towel to wipe off the dry erase marker. Use fine sand paper to rough up the entire surface of the pteranodon so that the paint will stick better.
11. Use acrylic paint to paint your pteranodon.
©2006, Digital by Design, Inc. -*See Copyright Information
Milk Jug Tyrannosaurus Rex Skull Craft - Dinosaur Craft for Kids
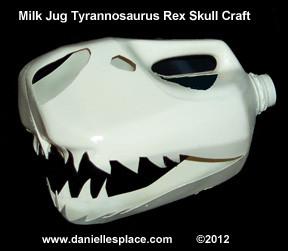
What you will need:
One-gallon Empty Milk Carton
White Paint
Dry Erase Marker
White Spray Paint
How to Make Milk Jug Tyrannosaurus Rex Skull Craft for Kids:
1. Clean and dry your empty milk carton.
2. Use a dry erase marker to mark the areas of the milk carton you want to cut out. Use the picture above for an example.
3. Use small sharp pointy scissors to cut the milk carton.
4. Spray paint the skull with white spray paint.
©2005, Digital by Design, Inc. -*See Copyright Information
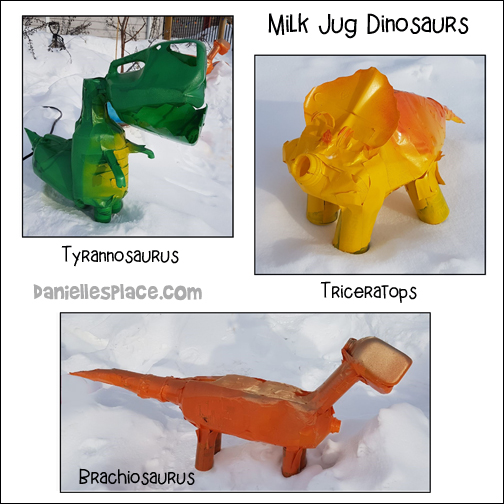
Kelly Cumming made these amazing dinosaurs using the Milk Jug Tyrannosaurus Rex Skull Craft above as inspiration.
Dinosaur Color Sheet for Kids
This color sheet is available on The Resource Room for members only.
Textured Dinosaur and Baby Activity Sheet
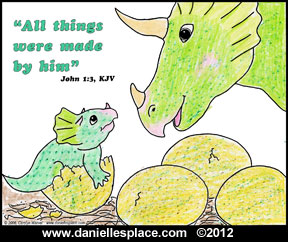
How to Make Textured Dinosaur and Baby Activity Sheet:
1. Print out the dinosaur activity sheet or use other dinosaur pictures.
2. Color the picture with crayons or colored pencils. Then place course sand paper sheets underneath the pictures and rub with the long side of a crayon over the picture where you would like texture. (Remove the paper wrapper from the crayon before rubbing.)
©2005, Digital by Design, Inc. -*See Copyright Information
Rock Tyrannosaurus Craft - Dinosaur Craft for Kids

What you will need:
Rocks in the Shape of Dinosaur Parts
Paint
Black Permanent Markers
Rock Tyrannosaurus Dinosaur Craft for Kids:
1. Go for a hike and collect rocks that will fit together to look like a dinosaur. Bring them home and wash them off and let them dry.
2. Paint the rocks with permanent paint (Apple Barrel Paints work great). Draw in the dinosaurs features with a marker. Set the rocks outside in your garden.
©2005, Digital by Design, Inc. -*See Copyright Information
Dinosaur Claws

What you will need:
Notebook Paper or Typing Paper
How to Make Origami Claw:
1. Fold left corner of paper down to meet the right side of paper.
2. Fold the top right corner of the paper to meet the bottom right corner of the paper.
3. Fold the left side of paper in to make a square.
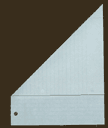
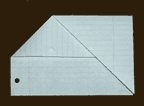
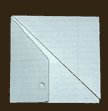
4. Fold the left, bottom corner up to meet the right, top corner to make a triangle.
5. Fold in the right side of the triangle from the right, top corner and about 1 1/2" from bottom corner.


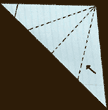
6. Fold the triangle over again and then again to form the claw shape.
7. Tuck the remaining corner down into the triangle you just folded.
8. Stick a finger in the hole on the side of the claw as shown in the picture to place the claw on your finger.


Dinosaur Review Game
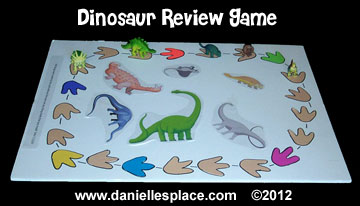
This game can be used to review many different things. You can review dinosaur facts, math facts, spelling words, etc.
What you will need:16" x 20" Piece of Foam Core Board or Cardboard, Six Different Colors of Card Stock, Paper Glue (Rubber Cement), Small Dinosaur Toys, a Die, and a Color Printer
How to Make Dinosaur Review Board Game:
1. Cut about 15 small dinosaur footprints from tan card stock. Cut 6 more dinosaur footprints from 6 different colors of paper. Place the tan prints and the different colored prints around the board in a circle separating the colored prints from each other by placing tan ones in between them. Glue them down with rubber cement.
2. Print out the pictures of dinosaurs and cut them out. Glue the dinosaur pictures to the middle of the board.
3. Cut out large dinosaur footprints, at least 10 prints for each of the colors you used for the small prints on the game board. Write different questions about dinosaurs, math facts, or spelling or vocabulary words on the large dinosaur print shapes.
How to Play:
The object of the game is to collect one of each of the 6 colors of dinosaur prints. To start children place their toy dinosaurs on any of the tan dinosaur prints. They take turns throwing a die and moving their dinosaur in either direction (backwards or forwards) the number of spaces shown on the die. If they land on a colored dinosaur print, and answer a question that is written on one of the same color prints, they get to keep that print. If they already have that color of print, they don't answer a question, and they don't collect another one of the same color. The first child to collect all six different colors of prints wins.
Note: Instead of making a small game board, you can make a large game board on the floor using much larger prints. The children will be the game pieces.
©2005, Digital by Design, Inc. -*See Copyright Information
Links

While most children in Christian families recognize that God made the different animals and plants, they do not think about God creating the dinosaurs. This is no wonder, due to the fact that almost all children's books about dinosaurs teach that dinosaurs lived millions of years ago before man existed which does not follow Biblical teaching.
The topic of dinosaurs is probably used more than anything else to convince young people that evolution is true, and that the process took millions of years. The Great Dinosaur Mystery Web site explains in simple terms why it is obvious that God made the dinosaurs. You can find information about Dinosaurs and where they fit into the Creation Story. This site answers questions about the Great Flood, how different races developed, where in the Bible dinosaurs are mentioned, creation and evolution. You will also find coloring pages with rhymes and teacher notes that will help you explain and teach about the dinosaurs. There is also a teachers resource page with suggested books and videos, craft ideas, room decorations, and teaching tips.
*The following links are sites that may have information that may not coincide with the teachings in the Bible, however, they have some great information and activities and are worth checking out.
*ZoomDinosaurs.com - Here’s a great dinosaur page with lots of printouts, crafts and activities for different ages, and links to other dinosaur pages.

