Musical Instruments Children Can Make 2
How to Make Musical Instruments from Paper Plates and Other Household Items and Recommended Children's Musical Instruments
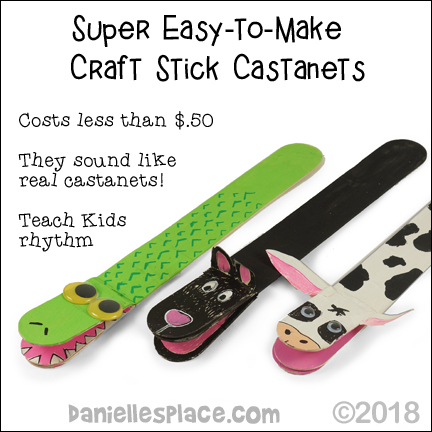
Easy Craft Stick Castanets or Clappers
What you will need:
10" Giant Craft Sticks (You can use the jumbo craft sticks, but they won't be as effective.)
Ruler
Googly Eyes (Optional)
What to do:
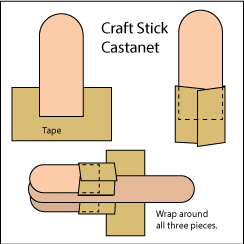
1. Cut 2 1/2" inches off the ends of one giant craft stick.
2. Cut three tape lengths 3-inches long.
3. Wrap pieces of tape around the flat end of the 2 1/2" craft stick so that the tape is one-inch below the end.
4. Line up the 2 1/2" craft pieces at the end of a giant craft stick so that one is on the bottom and one is on the top.
5. Cut another 3-inch piece of tape and wind it around all three craft stick pieces so that it covers the tape hanging from the end of the cut crafts sticks, but not the craft sticks.
6. To finish paint the castanets or clappers with acrylic paint and decorate them with paint markers. Add googly eyes and ears.
Watch how Sophie from Sophie's World makes this craft:
©2018, Digital by Design, Inc. -*See Copyright Information
Paper Bag Maracas
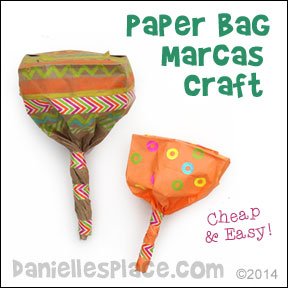
Children of all ages will love making these paper bag maracas. They are super easy and cost only pennies to make. Warning - these maracas are very loud!
What you will need:
Circle Reinforcement Labels (You can white labels and color them with highlighter markers instead.)
Unpopped popcorn, dried beans, small pebbles, rice, or anything you have to place in the bags
Colored Pencils, Crayons, Markers, or Paint
How to Make the Paper Bag Maracas:
1. Decorate the bottom third of a paper lunch bag with markers, crayons, paint, or colored pencils, and add decorative tape or circle page reinforcements.
2. Unfold the decorated paper bag and place another paper bag inside the decorated paper bag to give the maraca strength.
3. Place a tablespoon of rice, popcorn, or anything else you would like to use in the inside bag. (Try different things in each bag and compare the sounds the bags make.)
4. To finish, gather up the sides of the paper bags smoothing them out as you crinkle them up. Spread out the tops of the bags and blow into them to puff out the bottom of the bags. When you have a good shape twist the bottom of the bags to make the handle of the maraca. Use colorful tape such as duct tape or washi tape to decorate the handle and to keep it from unwinding.
©2014, Digital by Design, Inc. -*See Copyright Information
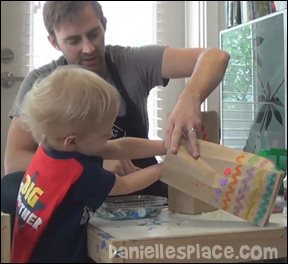

This is a Toddler-tested Craft
Logan loved decorating his paper bag with stickers and paint. He especially liked placing the confetti in the bag to make the rattle sound.
Watch how Logan makes the paper bag maracas with his dad on Logan's Life to see how your child might like to make this craft.
Musical Shaker
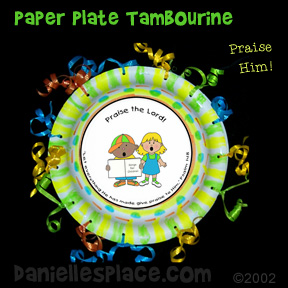
What you will need:
Heavy Duty Paper Plates
Stapler
Ribbon
Glue Sticks
Markers or Crayons
Dried Corn, Rice, or Dried Beans
Hole Punch
How to Make the Paper Plate Shakers:
1. Cut 12" lengths of ribbon and use the edge of your scissors to make them curly.
2. Place a hand full of corn, rice, or dried beans on a paper plate and place another paper plate over the plate, front to front. Staple the plates together. Color the outside of the shakers with markers or crayons.
3. Punch holes all the way around the edge of the shaker thread the ribbons through the holes and tie.
A pattern for this craft that says, "Praise the Lord!" and has the Bible verse, "Let everything he has made praise him." Psalm 148:5 is available on The Resource Room. Go to the "Praise The Lord" Bible lesson for the pattern.
©2002, Digital by Design, Inc. -*See Copyright Information
Gideon's Trumpet

What you will need:
Paper Towel Rolls
Paper or Styrofoam Bowls
Tacky Glue
Aluminum Foil (Not heavy-duty)
(This craft goes with the lesson "Gideon Fights the Mean
Men of Midian" on The Resource Room.)
How to make Gideon's Trumpet:

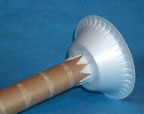
1. Use a pencil to trace the end of a paper towel roll onto the bottom of the paper bowl. (If you don't have paper towel tubes, you can roll up pieces of card stock into tube shapes.) Make a slit all the way across the circle cutting the circle in half. Make another slit the opposite way cutting it in half again. Keep doing this until you have little wedge shapes all the way around the circle.

2. Bend the little wedge shapes out as shown in the picture.
3. Slide a paper towel tube inside the hole, through the inside of the bowl, until it is almost all the way down to the end of the tube. Place a line of glue all the way around the end of the tube and slide the paper bowl the rest of the way down to the end. Press the wedges to the tube to secure.
4. Cut pieces of aluminum foil to fit around the long part of the trumpet. Cut a square piece of aluminum foil for the bowl part of the trumpet. Cut a small circle in the middle. Place the end of the trumpet through the hole in the aluminum and bring the foil all the way up to the bowl and then press the aluminum foil down around the bowl into the inside. Wind a piece of aluminum foil around the handle and secure with tape. Use another piece of aluminum foil to roll up and form a handle. Tape the handle onto the long part or the trumpet.
©2007, Digital by Design, Inc. -*See Copyright Information
Musical Instrument Crafts on Other Pages
Wooden Fiesta Maracas - Pack of 12 - Assorted colors and designs

