Outer Space Crafts and Learning Activities
How to Make Crafts Relating to Outer Space, Space Travel Astronomy and the Planets
Astronaut with Flag on the Moon Craft
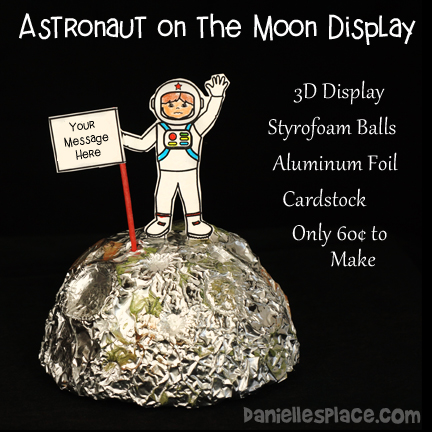
What you will need:
White Glue
Aluminum Foil
Cardstock (Heavy Paper)
Serrated Bread Knife
Objects such as pen caps or pencils to make indents into the aluminum foil.
4.5" Bamboo Skewers or Toothpicks
How to Make the Man on the Moon Display
1. Before class print out the astronaut and flag pattern (Available to members on The Resource Room.) or as an instant digital download) or make your own.
Member's ![]()
Instant Digital Download ![]()
2. Cut four-inch foam balls in half with a serrated knife. (A sharp bread knife works well.)
3. Cut out the astronaut and flag patterns.
4. Cut nine-inch circles from aluminum foil sheets.
5. In class, have your students glue o-rings to their foam half-ball with white glue and then drape the aluminum foil circle over the half-ball and bend it around to the bottom. Have them use their fingers to smooth it down around the o-rings to make shapes that look like craters. They can use pen caps or the ends of pencils or other items to make other landscape shapes on their "moon". Wrinkling up the aluminum foil a little before placing it over the foam ball will give more texture to the "moon".
6. To finish, glue the fag to the skewers or toothpicks and then glue the flag to the astronaut's hand. Glue the astronaut to the moon by folding back the tabs on the bottom of its feet and gluing them to the aluminum foil.
Phases of the Moon Activity Sheet with Mini Moon Phases Book and Moon Facts

Children color the activity sheet, arrange the moon phases pages in order and attach them to the sheet with a brass fastener.
What you will need:
Paper
Brass Fasteners
Colored Pencils
Hole Punch
Scissors
What to do:
1. Before class print out the activity sheet and moon phase sheets.
Member's 
Instant Digital Download -
2. In class have your children color the activity sheet, read the moon facts, and then place the moon phases pages in order to form a book.
3. Attach the pages to the activity sheet.
©2017, Digital by Design, Inc. -*See Copyright Information
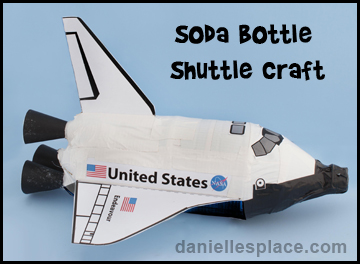
Endeavour Space Shuttle Pop Bottle Craft
What you will need:
2-liter Pop Bottle
White and Black Duck Tape or Paint
110 lb. Card Stock (Heavy Paper)
Glue
How to Make a Space Shuttle:
1. Print out the patterns onto card stock (Heavy Paper) and cut them out.
Member's
Instant Digital Download -
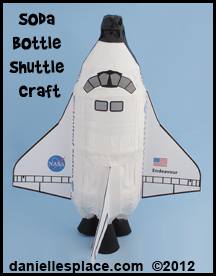
2. Cover the entire bottle with white duck tape or paint it white. Add black tape to the nose and bottom of the shuttle.
3. Fold the tabs back on the dotted lines on the wing patterns. Glue Tab A to the matching strip where it says "Glue Tab A Here" and glue Tab B to the matching strip where it says, "Glue Tab B Here".
4. Glue and then tape the wings to the sides of the shuttle. *Make sure
that one of the bumps at the bottom of the bottle is centered between the two wings. This is where you will attach the rudder and one of the engines.
5. Cut a slit in the tail fin pattern where indicated. Fold Tab C and Tab D forward, and then fold the tail fin in half. The tabs should be sticking out on each side of the tail fin pattern. Glue the pattern closed, and then glue the rudder to the shuttle as close to the bottom of the bottle as possible. Tape over the tabs to secure the tail fin.
6. Glue the windshield and windows to the shuttle as shown in the picture above. Glue the United State's logos to the sides of the shuttle just above the wings.
7. To make the engines roll the patterns into cone shapes and glue the sides together. Glue one engine to bottom of the bottle just below the tail fin. Glue the other two engines, side by side, on the opposite side of the bottle.
©2012, Digital by Design, Inc. -*See Copyright Information
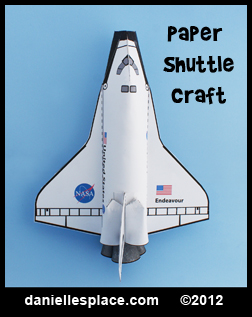
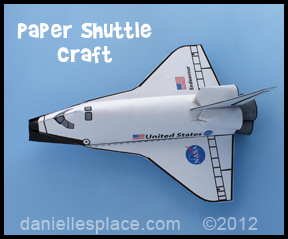
Printable Paper Space Shuttle Craft Pattern
What you will need:
White 110 lb. Card Stock (Heavy Paper)
Elmer's No-Wrinkle Rubber Cement
Low Temperature Glue Gun
Clear Tape
Scissors
How to Make a Paper Space Shuttle:
Print out all the patterns onto 110 lb. card stock.
Member's
Instant Digital Download -
Fuselage
1. Cut off the right and left sides of the pattern at the dark lines. Do not cut the top and bottom off.
*Important - The pattern lines do not go all the way to the edge of the paper because printers can not print at the edge, but you do need this part of the pattern. Just extend the lines all the way to the edge. If you aren't sure where they should be use a ruler and draw them out.
2. Cut the dark line between the two As at the top of the pattern.
3. Cut the lines between the grey and black triangles as indicated on the pattern.
4. Fold back the dotted lines on the sides of the As. Bend the pattern back and into a tube shape so that the two A triangles meet and over lap. Glue them together and tape them to secure them.
*Note - To make folding easier and more accurate score the dotted lines with something sharp. To score them trace the lines with a pointed object such as finger nail file, but do not cut through the paper.
5. Place glue on the grey triangles at the top of the page and bring the black triangles over the grey ones so that they cover them completely.
6. Place glue on the grey line at the left-hand side of the pattern that extends all the way down the side. Bring the other side of the pattern over the grey area to make a long tube.
7. Use a black marker to color the tip of the fuselage black.
Wings
1. Cut out the wings and score the folded line with a pointed object.
2. Fold the tabs back. Place glue on the fuselage in the grey area where it says, "Glue Wing Here". Cover the entire area with glue including the edge of the paper where your printer can not print. Stick the wings to the glue and tape them to secure them.
Tail Fin
1. Cut out the tail fin pattern and cut the small line that separates the two tabs where indicated on the pattern.
2. Fold the tabs up and then fold the tail fin in half and glue it closed, but do not glue that tabs closed. You should have a tab sticking out on each side of the tail fin.
3. Place glue on the tabs and glue the tail fin to the top end of the fuselage. The straighter side should be at the bottom .
Orbital Modules
1. Cut out the orbital modules and cut a slit in between the two As where indicated
2. Fold all the tabs back.
3. Place glue on one of the A tabs and glue the two A tabs together so that one is directly over the other. You will have to roll the pattern slightly to do this.
4. Place glue on the two B tabs and glue them under the side tabs rolling the pattern into a half tube.
5. Place glue on the two side tabs and glue the orbitals onto each side of the rudder so that the open ends are at the bottom of the fuselage.
Engines
1. Cut out the engine patterns, roll them into cone shapes and glue them together overlapping the edges about 1/2".
2. Glue the engines into the bottom of the fuselage using a glue gun. Glue one engine directly below the rudder and the other two side by side behind top engine.
©2007, Digital by Design, Inc. -*See Copyright Information
Space Shuttle Links
Space Shuttle Diagrams - https://spaceflight.nasa.gov/history/shuttle-mir/multimedia/diagrams/shuttle/diagram-shuttle.htm
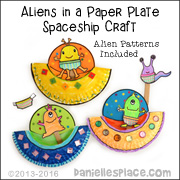
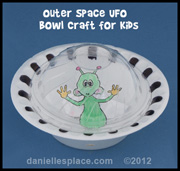
Also See the Alien Crafts and Learning Activities Page
Outer Space Crafts on Other Websites
Visit our Pinterest Board to see other Outer Space Crafts.