Turtle and Tortoise Crafts and Learning Activities
How to Make Turtle or Tortoise Crafts for Kids
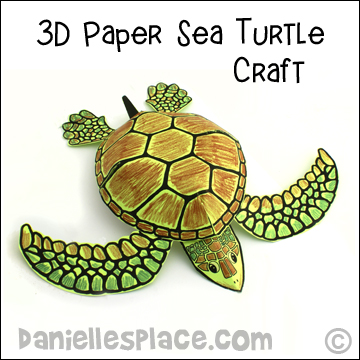
Sea Turtle 3D Paper Craft
What you will need:
Cardstock (Heavy Paper)
Paper Glue
Scissors
Crayons or Markers (PrismaColor Pencils)
How to make:
1. Print out the patterns for the Turtle's Shell, Turtle's Head, Flippers and Tail.
Member's 
Instant Download Pattern - 
Craft tip: Use colored cardstock so you don't have as much to color. Prismacolor colored pencils work great for this project because the lead is soft and covers well without having to press down hard on the paper.
2. Color and then cut out all the body parts.
3. Cut center of the darts on the shell pattern on the side, front and back.
Fold down all the dotted lines on the darts. Glue the darts closed to make the turtles body 3D.
4. To finish glue on the head, fins, feet, and tail.
©2000, Digital by Design, Inc. -*See Copyright Information
Watch our View it and Do it Craft video to see how to make this craft:
Great Learning Resources to go Along with this Craft
Turtle and Tortoise Writing Sheets
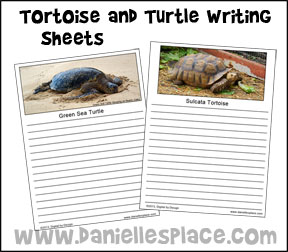
Use these writing sheets with your studies to write facts or stories about tortoises and turtles.
You can also have your children use both writing sheets and compare tortoises to turtles.
These printouts are available to members.
Member's ![]()
©2013, Digital by Design, Inc. -*See Copyright Information
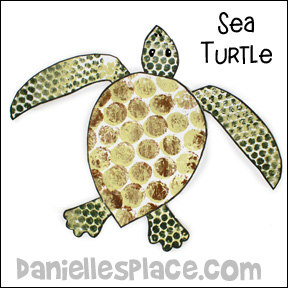
Bubble Wrap Design Sea Turtle Craft for Kids
What you will need:
Plastic Bubble Wrap - both the small and larger bubbles
Acrylic Paint
Paint Roller or Large Paint Brush - at least 1 1/2" wide
Card Stock - heavy paper
Scissors and Glue
How to Make the Sea Turtle Craft:
1. Cut the bubble wrap the same size as your paper.
2. Print out the sea turtle patterns onto card stock. If you do not have a pattern just draw the parts on the paper.
Member's
Instant Download Pattern -
2. Squirt paint into a container and fill your brush or paint roller with paint.
3. Spread the paint over the bumpy side of the bubble wrap.
4. Place the painted side of the bubble wrap on the pattern paper and press down on the bubble wrap to press the paint onto the paper. Use the large-bubble bubble wrap for the turtle's shell pattern and the small-bubble bubble wrap on the feet and head pattern.
5. Slowly peel the bubble wrap off the pattern paper and let the paint dry.
6. You can add another color over the first color after the first colored has dried.
7. When the paint is dry cut out the sea turtle parts and glue them together.
©2012, Digital by Design, Inc. -*See Copyright Information
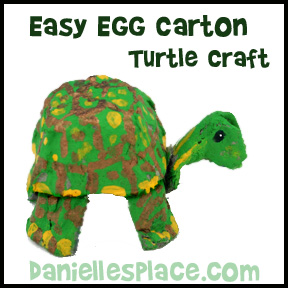
Egg Carton Tortoise Craft
What you will need:
Paper Egg Cartons
Markers
Paint
Glue
Scissors - Use small scissors with very short blades that are good for snipping if you have them. This will make it much easier to cut the egg carton. Fiskars Kids Classic Pointed Tip Scissors work great.
Tiny 3mm Wiggle Eyes - (Optional)
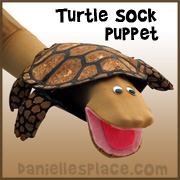
Paper Plate Snapping Turtle Craft with Moving Mouth

Discover a fun and engaging educational craft that captivates children's interest while teaching them about the fascinating world of turtles and the essential differences between turtles and tortoises! Start by encouraging your kids to explore various types of turtles online, and let them choose one that sparks their curiosity to bring to life with a creative paper plate project.
This hands-on activity not only allows them to match the intricate details, like the shape and color of the shell, but also fosters their creativity and critical thinking skills. Once they've crafted their unique turtles, invite the children to present their creations to the class. As they share intriguing facts about their chosen turtle species, they’ll gain confidence and communication skills. Plus, the interactive element of opening and closing the turtle's mouth to showcase its distinctive features will truly engage their classmates. This craft is more than just a fun project; it’s an opportunity for learning, creativity, and camaraderie! Don’t miss out on this enriching experience for your children!
To make this craft you will need:
Two 9-inch Paper Plates, Two 6-inch Paper Plates, Card Stock (Heavy Paper), Brass Fasteners, Googly Eyes, Paint, Scissors, and a Hole Punch
Member's ![]()
Free Digital Download ![]()
©2013, Digital by Design, Inc. - *See Copyright Information
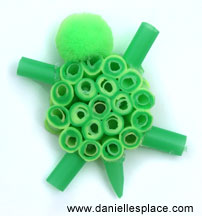
Drinking Straw Turtle Craft
What you need:
Plastic Drinking Straws - Experiment with different sizes and color combinations. The straws will get darker when you melt them and may change color slightly.
Small Bottle Cap
Iron
Waxed Paper or Parchment Paper
Tacky Glue, Scissors and a Ruler
How to Make Drinking Straw Perler Bead Crafts:
1. Use a ruler to measure the length of the inside of the bottle cap and add 1/4". Cut your straws into pieces to make perler beads using your measurement. Try to keep them all the same length as much as possible.
2. Pour a small amount of white glue to cover the bottom of the bottle cap. Let it dry a little before starting so that it is sticky.
3. Place the cut up pieces of drinking straws (Perler beads) into the cap. Fill in your design with other beads. Make sure all the beads are touching each other. To make it easier, place a straw bead on the end of a paint brush. Hold onto the bead with your thumb while you place the end of the paint brush where you want the bead. Then let the bead fall down the end of the paint brush and press it down onto the tape. Hold down your design while you remove the paint brush. If you have two different widths of straw beads you can place the skinner straw beads inside the larger ones.
4. Once all your beads are in place heat up your iron. The cotton setting works well. Place a piece of waxed paper or parchment paper over your design just to cover all the beads. Place the iron evenly on top of your design and let it set until the beads start to melt. You don't have to press down. You can lift the iron to check your progress. When all the bead are melted together remove the iron. Let the beads cool and you will be able to pull away the paper easily. Pull the design out of the cap and wash off the glue.
You may want to melt the beads together a little on the other side of your design.
5. Cut short lengths of straws for the legs and tail and glue them to the design. Glue a pompom on for the head.
©2012, Digital by Design, Inc. - See Copyright Information
Turtle Crafts and Learning Activities on Other Pages