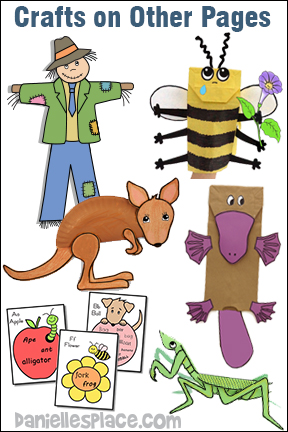
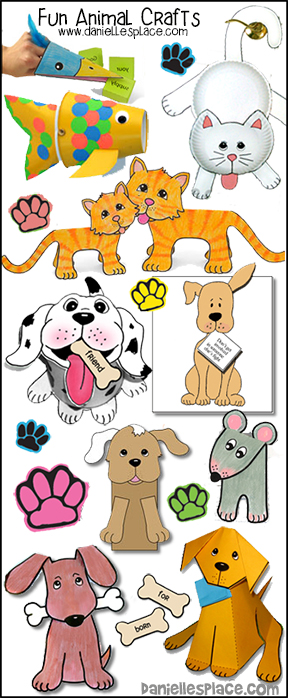
Under-the-Sea Crafts 2
How to Make Crafts and Learning Activities with Fish and Sea Creature Themes
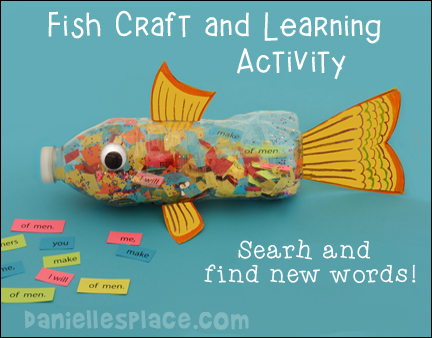
Water Bottle Fish Craft and Learning Activity
Use this craft with any fish or under-the-sea theme to reinforce your lesson or books. Have your children write words that they didn't recognize on small squares of card stock and place them in the water bottle as you read the story. When you are done reading or studying, have your child make the water bottle fish. When the child shakes the bottle words will appear. Have him say any words that are visible. Keep playing until he knows all the words.
What you will need:
Empty Water Bottles - (Make sure they are dry.)
Card Stock - Colorful Assortment
Glitter, Sequins, Gems, and Confetti
Aleene's Tacky Glue
Colored Pencil and Scissors
How to Make the Fish Water Bottle Craft:
1. Before class cut up tissue paper into tiny squares. Place glitter, sequins, gems, and confetti, on large paper plates.
2. In class have your children place tissue paper squares, glitter, sequins, gems, and confetti and word squares in their water bottles and then place the caps on the bottles.
4. Give them paper to draw fins. Have them cut out the fins and glue or tape them to the bottle.
5. To finish glue on googly eyes.
Watch a View it and Do it!" Video on Youtube on how to make this craft:
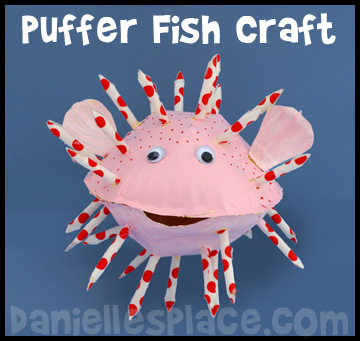
Puffer Fish Paper Plate Craft
What you will need:
Two 6-inch Paper Plates
Kikkerland Polka Dot Paper Straws-Red
How to Make the Paper Plate Puffer Fish Craft:
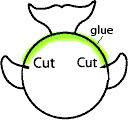
1. To make the body place two 6-inch plates together, top to top. Cut three slits evenly spaced about two-inches long around the outside of the paper plate (See diagram).
Member's ![]()
2. Separate the paper plates. Glue the sides of the slits on each paper plate together overlapping them about one inch at the edge making darts. Cut a mouth shape from one of the paper plates and then glue the two paper plates together to make the body.
3. Cut wing shapes from the sides of another paper plate and glue them to the body.
4. Paint the body and wings.
5. Cut the polka dot straws into two-inch lengths. Cut one end of each straw section into a point. Glue the pointed end closed and glue the straight end to the puffer fish body.
6. To finish glue one wiggle eyes.
©2013, Digital by Design, Inc. -*See Copyright Information
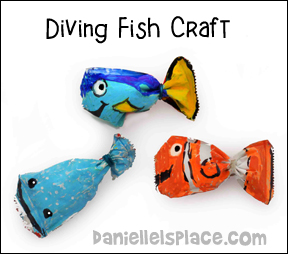
Diving Fish Craft and Science Learning Activity
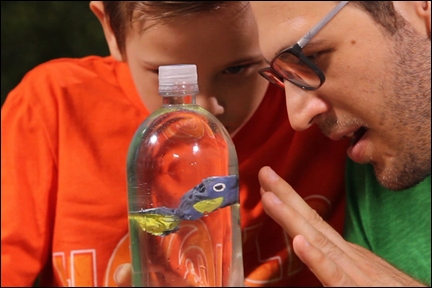
Older children will love making these tiny fish that dive to the bottom and then float back to the top of their container. They will enjoy discovering how to make the fish swim and learn the scientific concept behind air pressure and how it affects the fishes ability to dive and float.
Watch "Training Dory: DIY Finding Dory Craft for Kids" Video on Youtube from Best of Orlando Website to find out how to make the fish from ketchup packages, and discover the secret behind their ability to dive and float. "Best of Orlando" offers great deals on shows, attractions and tours in Orlando.
We had a lot of fun making this craft, but we did make it a little different than the directions on the video.
Instead of using acrylic paint and a paint brush, we used Uni-posca Paint Marker Pens. They have a marker tip and made it easier than a paintbrush to paint in the small details. Just make sure you let the paint dry completely before adding a new color over top or next to the previous color.
We didn't use the Modge Podge finish or the tape because we found that it really wasn't
necessary. We just folded the head of the fish back and used a rubber band for the tail.
We did paint a few fish and found out later that they didn't float. As recommended in the video, test out the fish and make sure they float before you paint them. Apparently, all ketchup packages aren't created equal.
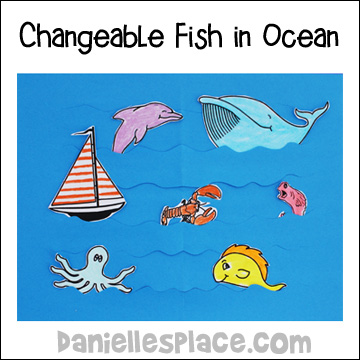
Changeable Fish in Water Picture
Danielle loved this project so much that she had me make a seashore all the way around the edge of the picture. She picked out turtles, and birds, and frogs to put on the shore. She even had one of the shore birds standing up.
What you will need:
Two Pieces of Blue Construction Paper
Pictures of Fish
Glue
Crayons or Markers
Scissors with a Wave Pattern (Optional)
Scissors
How to make:
1. To make the water fold one paper in half. Cut slits about 3/4 of an inch apart using the wave pattern scissors down the length of the paper starting at the fold. Do not cut all the way to the end. When you open up the paper you should have slits across the length of the paper all in a row. Now glue the paper to just another piece of blue paper around the edges. The children should be able to stick the fish and boat inside the slits.
2. Print out the sea creature pictures. Have your children color the pictures and cut them out. If you have children that can draw fairly well, have them draw their own fish and boat. For younger children you may want to have the fish and boat pictures already cut out. Just have them color the pictures and place them in the waves.
Member's ![]()
Free Digital Download ![]()
(I thought that this was a cute little thing for my children to do. I thought that this would look more life like if you glued some sand (gathered from a beach or local park) to the bottom of the page and perhaps some tiny seashells you can purchase or find at the beach. Thank you for all your great ideas Jennifer
©2000, Digital by Design, Inc. -*See Copyright Information
Math Fun with X-ray Fish
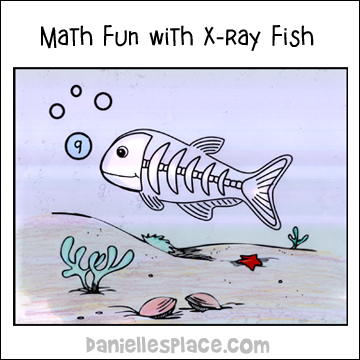
Children help the X-Ray find the answer to math problems by moving the X-ray fish picture over another sheet of paper with numbers printed on it until the correct number appears in the bubble. .
How to Make this Math Game:
1. Draw a picture of a fish with bubbles and a seascape or use clip art. Color the sea floor with crayons.
2. Cut out the large bubble in front of the fish's mouth.
3. This next step is optional. Place the picture on top of a piece of paper towel. Use a Q-tip or brush to cover the picture with oil. Don't cover the bones with oil. Wipe the excess oil off the picture. This will make the picture a little see through which will help your child find the numbers easier.
4. Decide which math facts your child needs to review. Write the problems out or use flash cards. Then write the solutions to the problems in the center of a blue sheet of paper. Show your child one flash card at a time and tell him to help the x-ray fish find the answer by moving the paper over the answer sheet until the number appears in the bubble. If the child finds the correct number, give him a fishy cracker or a couple of crackers (Use the colored fish). When you have finished reviewing, have your child make a graph showing how many of each fish he has collected.
A pattern for this craft is available on the ABC, I Believe Lessons in the "X" lesson.
©2007, Digital by Design, Inc. -*See Copyright Information
Whale Paper Plate Craft

What you will need:
Dinner-sized Paper Plates,Paint, Googly Eyes, Hot Melt Glue or Stapler and Scissors
What to do:
1. Print out the fish fin fatterns and cut them out.
Member's ![]()
Watch a "View it and Do it" Video to see how to make this craft:

2. Place the fin patterns on a paper plate as shown in the diagram, trace the patterns, and cut them out. (Turn the side fin over and trace it a second time to make the opposite side fin.)
3. Glue the tail to the top of one of the paper plates so that the fins are curving downwards. (This paper plate will be the top of the fish.)
4. Glue the two side fins to the same paper plate on the sides of the plates as shown in the diagram below.
5. Cut a slit at the edge of the paper plate just behind both fins as shown in the diagram.
6. Glue the paper plate with the fins on it to the other paper plate starting at the back of one side fin and ending at the back of the other side fin (Green in the diagram below).
7. Bring the top paper plate over top of the bottom paper plate at the fins. Glue it together at the overlapping area. This will make the mouth open.
8. Fold the bottom part of the top fin over about a 1/4" from the bottom. Glue it to the top of the fish.
9. Stuff the fish with some crinkled up scrap paper. Have your children paint the whale craft. Let dry.
10. Glue on some googly eyes.
©2003 - 2007, Digital by Design, Inc. -*See Copyright Information
"Searching for Treasure" Math Game
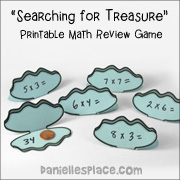
This game can be used with children of all ages. Just write the math problems your child is reviewing on the outside of the oysters. Hide a small treat behind one or more of the oysters. Your child then points to one of the oysters, answers the equation, and opens it up to see if he is correct and maybe find a treasure.
Go to the Educational Math Crafts and Activities Page for direction to this game.
©2000, Digital by Design, Inc. -*See Copyright Information