Valentine's Day Crafts for Kids - Page 4
Cheap and Easy Valentine's Day Crafts and Games for Children
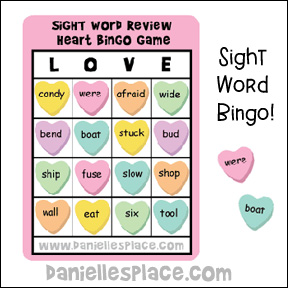
Sight Word Review Heart Bingo Game
What you will need:
Printing Paper or Card Stock
Markers such as Buttons or Chips
What to do:
1. Write your student's sight words on the cards in random order. Make each card different mixing up the words.
Member's ![]()
2. Make a set of word cards to match the words on the Bingo. You will need to make four cards for each word using the letters L, O, V or E for each letter.
How to Play:
1. Place all the word cards in a bowl or bag and mix them up.
2. Pull one card out and read the word and the corresponding letter.
3. Children will search under that letter for the word. They will only have to look at four words because there are only four words under each letter - L, O, V, or E. If a child has that word under the letter, he should place a marker over the word.
4. The child who gets four markers in a row first wins.
©2013 - Digital by Design, Inc. - See Copyright Information
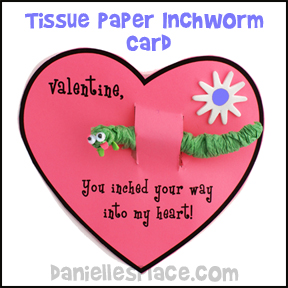
"You Inched Your Way Into My Heart" Inchworm Printable Valentine's Day Card Craft for Kids
What you will need:
Pink Cardstock (Heavy Paper)
Lime Green Tissue Paper (The kind you use to wrap presents)
Foam Flower Shapes or other decorative items
Pink and Green Craft Foam
Scissors
Glue
Large Paint Brush or Pencil (about 1 cm wide)
How to Make this Valentine Card:
1. Draw a large heart on a pink sheet of paper and write, "Valentine, you inched your way into my heart." as shown in the picture.
Member's ![]()
2. Cut two slits about one inch long about one inch apart in the middle of the heart.
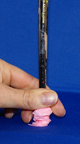
3. To make the worm cut tissue paper into a 7.5" x 7.5" square.
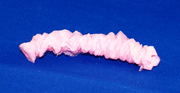
4. Roll the tissue paper around the paint brush or pencil. Wet the exposed edge with your tongue or damp sponge and press it to the rolled tissue to secure. Do not make it too wet.
5. Scrunch the tissue paper down the paint brush to the end so that it is all scrunched up into about one inch at the bottom of the brush just like you would to get the paper off a drinking straw.
6. Glue tiny eyes and a mouth and feet cut from craft foam onto one end of the tissue paper worm. Insert the worm into the heart.
©2010 - Digital by Design, Inc. - See Copyright Information
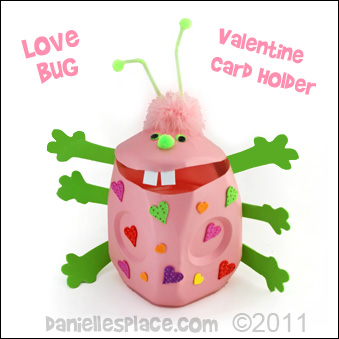
Valentine Box Card Holder Love Bug Made from a Milk Jug
What you will need:
Plastic Gallon Milk Jug
Craft Foam or Card Stock
Spray Paint made for Plastic or Acrylic Paint, or Plastic Primer Spray Paint to use with other types of spray paint or Acrylic Patio Paint.
Scissors with a Sharp Point
Valentine Stickers or Craft Foam Heart Shapes
Low Temp. Glue Gun
Large Googly Eyes
Pompoms for the Nose and Antennae
Feather Boa and Straws
How to make:
1. To remove the label from the milk jug fill the jug with hot water and let it stand for a few minutes. Do not get the label wet or it will just fall apart. Carefully peel off the label from all four corners. Then wash and dry the milk jug.
2. Cut a slit at the top of the jug to make the mouth. Cut the handle in the back in half so you will be able to bend back the top of the jug and open the mouth. Cut about an inch of the handle off and tape the leftover parts together to keep the mouth open. Spray paint the jug with spray paint made for plastic, or use a plastic primer spray paint before using regular spray paint. To get rid of the ink numbers on the top of the jug spray a little bit of spray paint on the numbers. The spray paint will dissolve the ink. When you see the ink start to run, wipe off the paint.
3. Cut arm and leg shapes from craft foam and glue them to the jug.
Member's ![]()
4. Glue on eyes, pompom nose, and part of a feather boa around lid of the jug for hair. Use straws or pipe cleaners for the antenna.
5. To finish glue on heart craft foam shapes.
©2011 - Digital by Design, Inc. - See Copyright Information
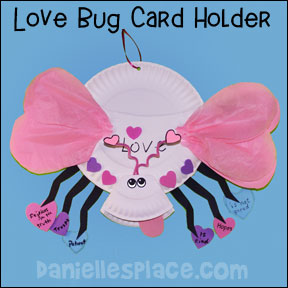
Love Bug Valentines Day Card Holder Craft for Kids
What you will need:
Dinner-sized and Snack-sized Paper Plates
Fun Foam Hearts (or cut from Construction Paper)
Tissue Paper
Chenille Stems (Pipe Cleaners)
Hole Punch
Paper
How to Make the Love Bug Valentines Day Card Holder:
1. To make the body of the love bug cut one dinner-sized paper plate in half. Glue one half of the plate to another diner-sized paper plate to make a pocket to hold the Valentine's Day cards.
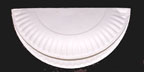
2. To make the head of the love bug fold a snack-sized paper plate almost in half as shown above.
3. Fold back the two upper corners to make the face shape as shown in the picture below. Fold a pipe cleaner in half and tape it to the back of the head for the antennae. Glue hearts to the end of the antennae. Glue the head to the large paper plate pocket.
Member's ![]()
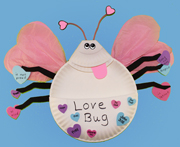
4. Draw eyes on the head. Cut legs from black construction paper and glue them to the bug's body.
5. Cut wing shapes from tissue paper and glue them to the body.
6. Cut out a tongue from pink paper and glue it inside the mouth.
7. You can also glue heart shapes with love phrases written on them on to each of the bug's legs
8. Use a hole punch to punch a hole at the top of the bug and tie a ribbon to the hole to hang the love big card holder.
©2009 - Digital by Design, Inc. - See Copyright Information
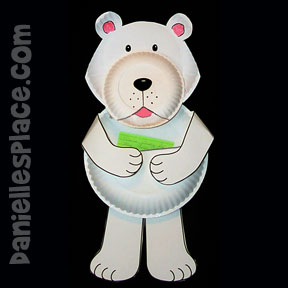
Paper Plate Valentine's Day Bear Craft

What you will need:
Two Dinner-sized Paper Plates
One Snack-sized Paper Plate
Card Stock
Markers
Scissors
Glue
Tissue Paper
Green Pipe Cleaners
How to make:
Member's ![]()
Free Digital Download ![]()
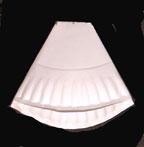
1. Glue two dinner-sized together, top-to-top to make the body.
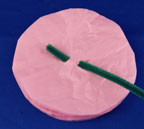
2. To make the head use the head pattern to cut a V-shape in a snack-sized paper plate. Glue the cut edges together to make a cone shape. Draw a nose at the point. Add two eyes and a mouth. Cut ear shapes from card stock and glue to the head. Glue the head to the body as shown in the picture above.
3. Print out the arms and leg patterns onto card stock and cut them out. Glue them to the body as shown in the picture above. Glue the arms to the back of the bear and then fold them over to the front.
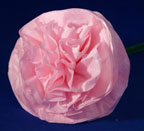
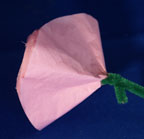
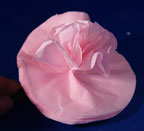
4. To make the flower cut tissue paper into 4-inch circles. Stack about ten circles on top of each other, poke two holes in the center of the circles, and thread a green pipe cleaner through the holes. Wrap the end of the pipe cleaner around the pipe cleaner at the base of the flower. Carefully scrunch up each layer to the middle of the flower one by one until all the layers are scrunched up to the center of the flower. Pinch the scrunched up layers together as you work.
You can also use precut tissue paper circles from S&S Worldwide to make the flowers.
©2009 - Digital by Design, Inc. - See Copyright Information
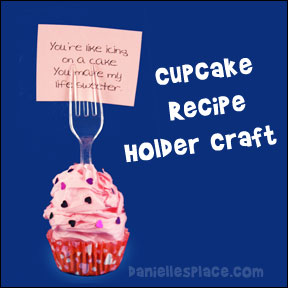
"You're Like Icing on a Cake" Valentine's Day Cupcake Note Holder or Recipe Card Holder Craft for Kids
What you will need:
Plaster of Paris (About 3/4 cup for each cupcake)
Cupcake Wrappers
Plastic Forks
Tissue Paper
Paint
Fiberfil
Tiny Pompoms or other Decorative Items, and/or Brightly Colored Paper, Paper Punch
How to Make the Cupcake Note Holder:
Tissue Paper Cupcake
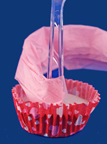
1. To make the tissue paper cupcake at the left, place cupcake wrappers in cupcake tins. Mix plaster of Paris in a plastic cup with a plastic spoon. Mix 1/2 cup of plaster for each cupcake. Add just enough water to make a mixture about the thickness of pancake batter. Spoon the mixture into the cupcake wrapper. The plaster should only fill out 3/4 of the wrapper.
Let the plaster dry for a minute or two and then stick a fork in the middle so that the tines are sticking up. If the spoon doesn't stand up, you can use clothespins to keep it steady until the plaster dries. (Note: Throw away the plastic cup and spoon when you are finished. Never try to rinse the plaster down the sink.)
2. When the plaster has set remove it from the tins. Press on the bottom of the tins to pop them out.
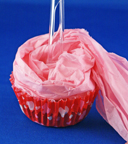
3. To make the icing part of the cupcake, cut two, 5" by 26" sheets of tissue paper. Place them on top of each other and scrunch the tissue together long ways. Scrunch one end together and tape it to the bottom of the fork near the plaster and loosely wind it around the fork. Keep winding it so that you fill in the top of the cupcake or cover the plaster. Twist the tissue as you wrap it. Glue the twisted tissue paper to the plaster. When the plaster is covered start winding the tissue paper up and around the fork closer and closer to the fork as you go. When you reach the top tuck the end of the paper in the center. Glue the tissue together to get the layers to stick together.
4. To finish glue sequins or other decorative items on top.
5. Write a note on a small sheet of paper that says, "You're like icing on a cake. You make my life sweeter", and stick it between the tines of the fork.
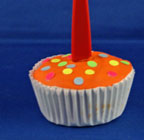
Painted Plaster Cupcake
1. Follow the directions above but use one cup of plaster for each cupcake. Add just enough water to make a thick paste. Spoon the mixture into the cupcake wrapper. The plaster should be like stiff egg whites. Pile it up over the top of the wrapper. If it gets sticky just wet a spoon or your fingers to smooth it out. Let the plaster dry for a minute or two and then stick a fork in the middle.
2. When the plaster has set remove it from the tins. Press on the bottom of the tins to pop them out.
3. Paint the top of the cupcakes and then sprinkle confetti on top of the wet paint. To make confetti punch bright colored paper with a hole punch. You can also wait until the paint dries and add other decorative items to the top.
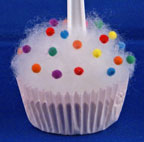
Fiberfil Cupcake
1. Follow the directions for the tissue paper cupcake above. Instead of using tissue paper glue fiberfil to the top of the cupcakes and then glue tiny 3/16" pompoms or other decorative items to the top.
Beaded Icing Cupcakes
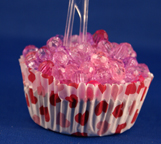
1. Follow the directions for the tissue paper cupcake above. But instead of using tissue paper glue faceted beads to the top of the cupcakes.
©2009 - Digital by Design, Inc. - See Copyright Information
Puppy Love Valentine's Day Card Craft for Kids
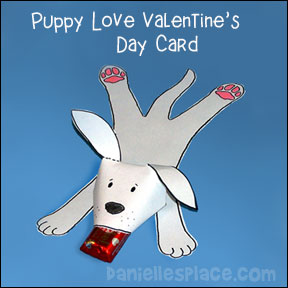
This little puppy has a chocolate candy bar in his mouth to share with a friend. All you need is card stock, glue, colored pencils and, of course, chocolate candy bars.
Member's ![]()
©2006 - Digital by Design, Inc. - See Copyright Information
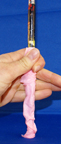
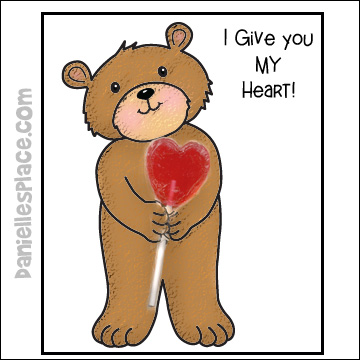
"I Give You My Heart!" Valentine's Day Card Craft for Kids
What you will need:
Card Stock (Heavy Paper)
Crayons, Colored Pencils or Markers
Heart Suckers
Scissors
How to make:
1. Draw a picture of a bear or other animal so it looks like it is holding a sucker or use the pattern (Available to members or as an instant download).
Member's 
Instant Digital Download
2. Write "I Give You My Heart!" on the side. Punch a hole at the top of the hands and at the bottom. Insert a heart sucker into the holes so that it looks like the bear is holding the sucker.
©2005 - Digital by Design, Inc. - See Copyright Information
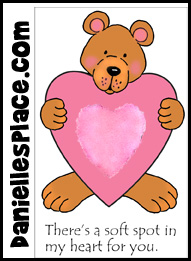
"There's a Soft Spot in My Heart For You" Valentine's Day Card Craft for Kids
What you will need:
Card Stock (thick paper)
Crayons or Markers
Soft Material
How to make:
1. Fold a piece of paper in half to make a card. On the front cover draw a picture of an animal holding a heart or use the pattern.
Member's ![]()
2. Cut out a smaller heart from soft material such as fake fur or felt and glue it onto the larger heart.
3. On the bottom of the write, "There's a soft spot in my heart for you." and in the inside of the card write a Valentine's message.
©2005 - Digital by Design, Inc. - See Copyright Information
Hugging Mice Folding Valentines Day Card Craft
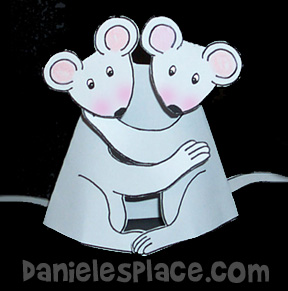
This craft goes with the Bible lesson "Good Friends are Giving".
This pattern is available to members only. Just follow the link above. Print out the pattern onto gray card stock, color the ears and cheeks with a pink colored pencil, and cut out.
Member's ![]()
Fold up the tails, fold down the heads, and fold the bodies so that they are hugging.
Write a Valentine's message on the inside. You can write something like, "Mice are nice and so are you."
©2006 - Digital by Design, Inc. - See Copyright Information
Printable Valentine's Day Cards
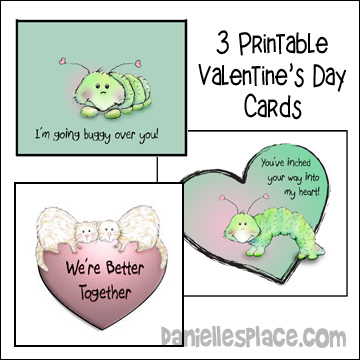
Three printable Valentine's Day cards including:
"I'm Going Buggy Over You!"
"You've Inched Your Way Into My Heart"
Ferret "We're Better Together" Printable Valentine's Day Card
Member's ![]()
"I Saved One for You" Valentine's Day Card

Children color the picture and then cut slits around the hands and insert a candy heart. Pattern comes in both color and black and white.
Member's ![]()
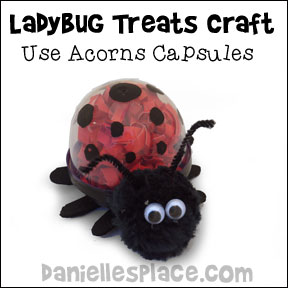
Love Bug Candy Holder Valentine's Day Craft for Kids
What you will need:
Large Containers from Gumball Machines, (You shouldn’t have to buy the toy that go in these containers. You can find these containers on the floor underneath gum balls machines or on top of the machines.)
Black Paint or a Permanent Black Marker
Red Hot Heart Candies
Wiggly Eyes
Black Pipe Cleaners
6 - 3/4” Wooden Ovals
2 Red Heart Beads with the Holes 1” Black Pompom at the Top and Bottom
Glue Gun, Heart Punch, and Black Construction Paper
How to make:
1. Fill the container with the red heart candies and put the lid on.
2. Paint or use a permanent marker to make the lid of the container black. Paint the 6 wooden ovals black to match.
3. When the wooden pieces are dry glue them to the top of the lid to make the bugs feet.
4. Glue the black pompom onto the lid to form the head as shown in the picture. Cut short lengths of black pipe cleaners for the antenna and glue them to the head. Put dabs of glue at the top of the antenna and insert the end of the pipe cleaners into the red heart beads.
5. Punch black hearts from the black construction paper and glue them to the top of the bugs back.
©2003 - Digital by Design, Inc. - See Copyright Information
Paper Plate Valentine Card Holder Bear
Use this cute little bear to hold all your valentine cards.
What you will need:
Three Dinner-sized Paper Plates
Two 6-inch Paper Plates
Card Stock (Heavy Paper)
Crayons and Markers
How to make:
1.Cut out the head shape with ears from a large paper plate. Cut the muzzle shape from a small paper plate. (Patterns for this craft are available to members only on The Resource Room.) Glue another 6-inch paper plate to the back of the muzzle shaped paper plate, rim to rim as shown in the picture. Glue the muzzle onto the head. Draw in eyes, mouth, ears, and nose as shown in the picture.
2. To make the body cut one dinner-sized paper plate in half and glue one half of the plate to another full paper plate, rim to rim. The half paper plate will form a pocket in which valentines can be stored.
3. Cut legs and arms from card stock and glue them to the body as shown in the picture. (Patterns for the arms and legs are available to members only on The Resource Room.) To finish glue the head to the body.
Member's ![]()
©2008 - Digital by Design, Inc. - See Copyright Information