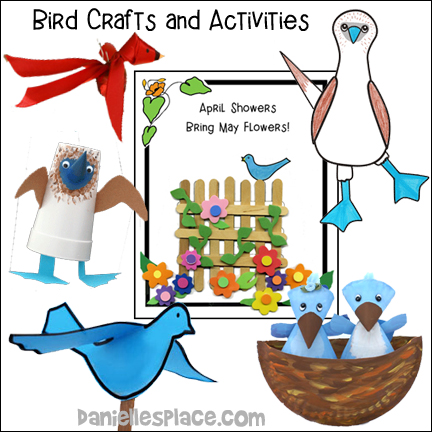
Bird Crafts and Learning Activities for Children
How to Make Bird Crafts and Learning Activities
Paper Plate Birds in a Nest Craft for Kids

What you will need:
Small lunch-size paper plates for the Birds, Dinner-size paper plates for the nest, Paint, Glue Gun or Stapler, Feathers, Eyes
How to make the bird craft:
1. Fold a small paper plate in half and cut it in half.
2. To make the head roll one half of the plate into a cone shape overlapping the sides about 1/3 of the plate. Glue the cut side closed.
3. To make the body roll the other half of the paper plate into a cone shape overlapping the side only about one inch at the edge. Glue the cone closed on the cut edge. Fold the tip of the cone down about 1/2" and glue the head to the folded tip.
4. Cut wings and feet from another paper plate and glue them to the body as shown in the picture.
5. Paint the paper plate birds and glue on eyes. To finish glue feathers to the top of the heads.
6. To make the nest fold a large paper plate in half and cut it in half. Glue the plates together to form the nest shape. Cut the front part of the nest a little lower than the back, and then paint the nest.
Copyright 2010, Digital by Design, Inc. - See Copyright Information
Learning Activities for this Craft
1. Act out "Are You my Mother" using the paper plate bird craft above. Make a larger bird for the mother bird using dinner-sized plates. Pretend the little bird falls out of the nest and travels around your house looking for its mother.
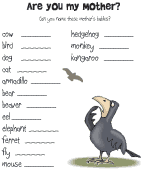
3. Do you know the Names of These Mother's Babies? - Go to Enchanted Learning and look at the list of animals and the names of their babies. Ask your child if he or she knows the names of the babies. (A printout for this activity is available to members.)
Member's ![]()

2. Read "The Best Nest " by P.D. Eastman or Watch It on YouTube.
3. Help Bird's Build Their Nests - Help your child collect things birds might use to build their nests such as yarn, dog hair from a dog brush, feathers, lint from the dryer, stuffing from an old pillow, and string. Make a list of all the items and place them in a container that you can place outside near a bird feeder in the spring when birds begin to build their nests.
Keep watch on the container to see if any birds are interested in the items. Check it every few days against the list you made to see if anything has been used by the birds.
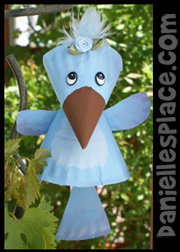
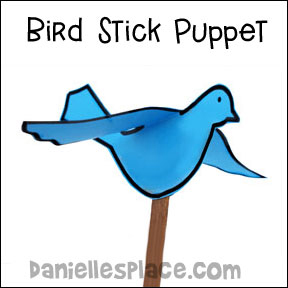
Bird Puppet Craft
What you will need:
Paint Stir Sticks (You can usually get these free from paint stores) or Jumbo Craft Sticks
Construction Paper
Low Temp Glue or Paper Glue
Crayons or Markers
How to make:
1. Make a copy of the bird pattern. Cut out the bird and use it as a pattern to trace onto different colors of construction paper. Cut two birds per child. If you are using paint sticks enlarge the patterns to double their size. If you are using the large craft sticks, use the patterns as they are.
Member's ![]()
Free Digital Download ![]()
2. Glue the birds back to back onto the craft sticks or paint stir sticks with hot melt glue or rubber cement. Do not glue the wings together. Fold the wings down to the side of the bird so that it looks like it is flying.
3. Draw a face on and color the bird
Copyright 2000, Digital by Design, Inc. - See Copyright Information
Bird on a Fence Activity Sheet
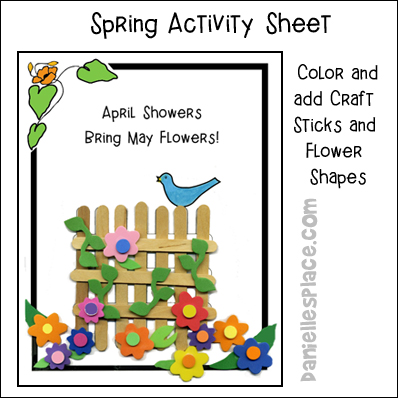
What you will need:
Paper, Craft Sticks, Craft Foam Flower Shapes or Silk Flowers. (You can buy silk flowers at secondhand store. Just pull off all the flowers and discard the rest.
How to make:
1. Print out the pattern and make copies. Color the picture and then glue on craft sticks over the fence pattern and then glue on fun foam flower shapes or silk flowers. Make up a saying or use a popular verse to write at the top of the picture.
Member's ![]()
Instant Digital Download - ![]()
Copyright 2000, Digital by Design, Inc. - See Copyright Information
Blue-footed Booby Crafts
Blue-footed Booby Cup Marionette Craft and STEAM Activity
Blue Footed Boobies are unique birds that use their blue feet in a mating dance. Have your students research Blue-footed Boobies on the web. Watch the Blue-footed Booby mating ritual and then have your children make the Booby Marionettes and try to mimic the Booby dance.
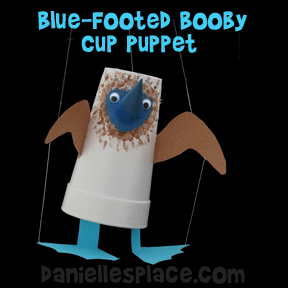
What you will need:
String or Heavy Duty Thread
Blue and Brown Acrylic Paint
Low Temperature Glue Gun
White, or Brown and Blue Card Stock (Heavy Paper)
Tape
Hole Punch
How to Make the Blue-footed Booby Marionette:
1. Print out the pattern onto card stock (heavy paper). Cut out the patterns and use them as templates to cut the shapes from card stock or colored the paper. (A printable pattern is available to members.)
Member's ![]()
2. Study pictures of the blue footed booby and then paint your cup and patterns to match the pictures.
3. To make the beak cut on the solid lines and glue it into a cone shape. Fold in all the tabs. Glue the beak to the cup by the tabs.
4. To make the feet fold the rectangle shape in half and glue the top of the two feet to each side of the folded rectangle piece. Punch holes in both sides with a hole punch. Fold the feet at the top to about a 45 degree angle.
5. Punch a small hole in the middle of the bottom of the paper cup. Cut a piece of yarn or string about two feet long. Poke one end of the string through the hole to the inside of the cup. Put your hand inside the cup and pull the string down through the cup.
6. Tie a big knot about six inches from the end of the string. Pull up on the string from the outside of the cup to bring the knot up against the bottom of the cup, make sure it won't come out. If you can't tie a big enough knot you can tie something to the string like a button or piece of cardboard.
7. Tie the end of the string to the feet placing the string through both holes, tying it in the middle.
8. Tie the other end of the string to the middle of a craft stick about six inches from the bottom of the cup.
9. Glue on the wings and eyes.
10. Tie string to both ends of the craft stick and then tape the string to the wings and feet.
11. Move the ends of the craft stick up and down to move the feet.
Copyright 2013, Digital by Design, Inc. - See Copyright Information
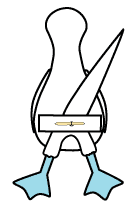
Dancing Blue-footed Booby Paper Craft for Kids
The tail and feet of this blue-footed booby move so children can make the Booby look like it is dancing.
STEAM Activity - Research Blue-footed Boobies on the web with your children. After studying the birds, hide any pictures, and then ask them to describe the birds. Show them pictures of the birds again. Were they accurate? Did they leave anything out of their description? Have your students color their Booby patterns to look like Boobies. This hands-on activity will help children to be more observant and to retain their knowledge longer.
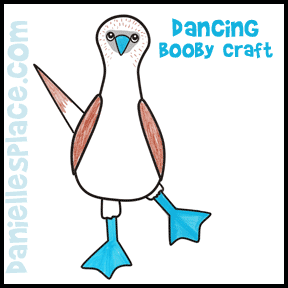
Blue-footed boobies dance around showing off their brightly colored feet hoping to attack a mate. Read about these amazing birds and then have your children make their own dancing boobies!
Check out the National Geographic Web site for more information about these birds.
Attach the feet and tail to the rectangle shape using a brass brad. Then glue the rectangle to the back of the booby body at the sides.
The printable pattern for this craft is available to members.
Member's ![]()
Copyright 2013, Digital by Design, Inc. - See Copyright Information
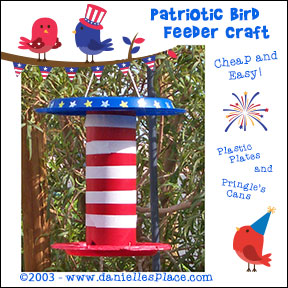
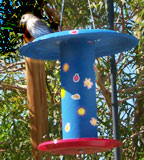
Bird Feeder Craft - STEAM Activity
Turn this craft into a STEAM activity. Have your children experiment with different designs, sizes of plates, colors, sizes of seed holes, etc. After observing birds using their feeders, have your students report on how their feeders performed, and what they might change to make them better. You can also have them keep a list of the types of birds that visit their bird feeders. Some questions to ask: Can you make this bird feeder easier to use? What happens when you change the design? Can you make it easier to assemble? Do birds prefer one design or color over another?
What you will need:
6 3/4 oz. Pringle's Potato Chip Can with Lid
7" Plastic Chinet Plate
9" Plastic Chinet plate
1" Bolt with Nut
2" Bolt with Nut
Drill with Matching Drill Bits
Acrylic Paint and Stickers (Optional)
String for Hanging
Watch a "View it and Do it" Craft Video to See How to Make this Craft:
How to Make the Pringle's Can Bird Feeder:
1. Paint the Pringle's can any color you would like and let dry. Decorate it with stickers.
2. Cut three or four small holes about 3/4" by 1/2" around the bottom edge of the can using a knife. These holes are where the birdseed comes out.
3. Drill two small holes in the top of the can just below the edge of the plastic lid on opposite sides. These will be used to hang the bird feeder.
4. Drill a hole through the small plate and the bottom of the can. (The drill bit should match the size of your bolt.) Match up the small plate with the hole in the bottom of the can and stick the 2-inch bolt through the hole in the paper plate and the hole in the bottom of the can. Screw on the nut from the inside of the can. You may have to find someone with small hands to do this for you.
5. Remove the lid from the can and place it upside down on the middle of the big paper plate. Drill a hole through the middle of the plastic lid and the plate. Stick the 1-inch bolt through the plate and then the lid and screw on the nut. Drill two holes on opposite sides off the lid in the plate.
6. Stick one end of a piece of string through one of the holes in the top of the Pringle's can, over and through the can to the other hole and through the hole.
Place the lid with the plate on the can. Now bring both ends of the string up through the holes you punched in the plastic plate. Tie the string ends together at the top.
7. To fill the bird feeder just pull off the lid and let it dangle to the side.
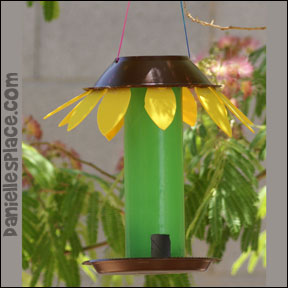
The sunflower bird feeder to the right was made using the same technique, except that a brown plastic bowl was used for the top and yellow fun foam petal shapes were glued to the bowl to make the flower head.
Copyright 2009, Digital by Design, Inc. - See Copyright Information
Felted Blue Bird Craft
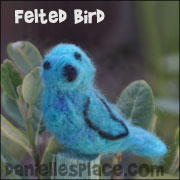
This cute little blue bird was made from wool roving (unspun wool) using a needle felting technique. Wool is wound into a teardrop and a ball shape and then poked repeatedly with a felting needle to condense the wool and sculpt it into the desired shape.
You can find directions for this craft and more on the Felting Crafts Page.
Red Bird or Cardinal Crafts
Red Bird Card and Paper Craft
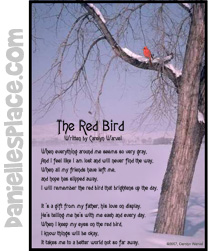
"Remember the Red Bird"
Written by Carolyn Warvel
When everything around me seems so very gray,
And I feel like I am lost and will never find the way,
When all my friends have left me, and hope has slipped away.
I will remember the red bird that brightens up the day.
It’s a gift from my father, his love on display.
He’s telling me he’s with me each and every day.
When I keep my eyes on the red bird, I know things will be okay.
It takes me to a better world not so far away.
Copyright 2007, Digital by Design, Inc. - See Copyright Information
What you will need:
High-resolution printer paper, matching card stock, red printer paper, orange paper, scissors, and paper glue.
How to make:
1. Print out the poem onto high-resolution printer paper, cut it out and glue it to a folded piece of card stock with paper glue. Cut the card stock so all the sides are even.
Member's ![]()
Free Digital Download ![]()
2. Make a bell red bird craft to go along with this card. Go to the Christmas Craft Page 2 for directions:
Copyright 2009, Digital by Design, Inc. - See Copyright Information
Cardinal or Bird Paper Plate Craft for Children

What you will need
Glue
Two Regular-sized andOne Snack-sized Paper Plate
Acrylic paint
Scissors
How to Make the Cardinal Paper Plate Craft:
1. Turn the large paper plate over and fold down one edge towards you to make the wing. Cut a slit at one end of the fold so that the end of the wing stands out slightly.
2. To make the head roll the snack-sized plate into a cone shape overlapping the edges slightly. Glue the edges together. Pinch the sides of the open part of the cone together to form the cardinal's crest. Glue the sides together. Glue the head to the body.
3. Cut the tail and feet from another paper plate and glue to the back of the body.
4. To finish paint the cardinal with acrylic paint.
Copyright 2012, Digital by Design, Inc. - See Copyright Information
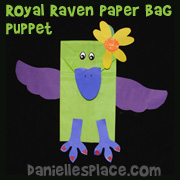
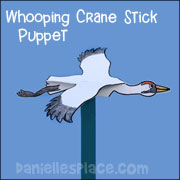
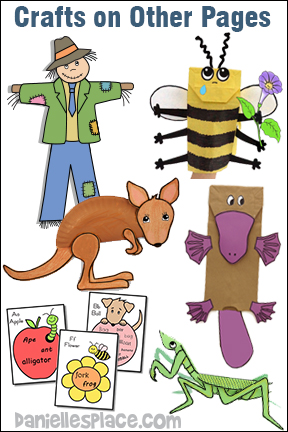
More Bird Crafts on Page 2