Thanksgiving Crafts
Thanksgiving Crafts for Sunday School About the Pilgrims
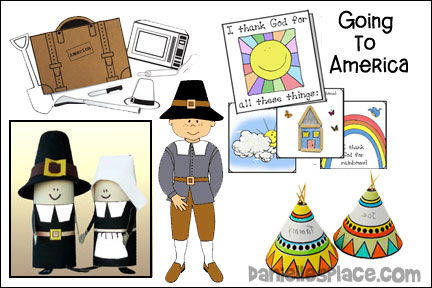
"Going to America" Sunday School Lesson for Children
In this lesson children learn about the pilgrims and how God helped them get to America where they were free to worship God as they thought they should.
The teacher tells a fictional story about a little boy who travels to America with his family.
(A Complete Lesson with crafts, activities and songs are available on The Resource Room and as an instant digital download.)
Member's  ($23.95 per year membership)
$3.95 Instant Downloadable Pattern - 
 - Includes everything on this page - KJV and NIV patterns.
Pilgrim Suitcase Craft and Activity
Children pick different items they think they would like to take on a trip to America if they were pilgrims.
Some of the items on the sheet such as a vacuum cleaner and a microwave didn't exist, so the children have to decide which ones the pilgrims would have taken and which ones they wouldn't have.
(Patterns for this craft and activity are available to members on The Resource Room and as an instant download with the Bible lesson "Going to America" above.)
"I Thank God For . . ." Thanksgiving Book Activity
Member's
Instant Download Pattern $2.00 - Also available as an instant download with the Bible lesson "Going to America" above.)
Cover - Print out the cover onto yellow card stock. Have the children use 3D glue
Hands - Have the children place their hands in paint and then press them on the page or trace around their hands.
Friends - Cut out simple people shapes from different colors of construction paper (or buy them at your local teacher supply store). Have the children pick out some and glue them to the page. Help them write names of their friends on or near the people.
Mouth - Use bright red lip gloss that you apply with your fingers. Have the children put some lip gloss on their lips after they have washed their hands and then kiss the paper on the face shape. Have them finish drawing in their face and hair. If you know someone who sells Avon, you could try and get the tiny little sample lipsticks. Make sure the children know not to share them. If you don't have either of these, you can get some really red suckers and have the children get them wet and then slide them all over their lips
Home - Have the children glue on the larger toothpicks (they come in different colors too) to outline the house shape and then fill in with toothpicks
Clouds - Have children glue cotton on the cloud shapes.
Family - I am also doing a booklet for my preschool class (ages 2-4). For the "family" page , I had sent home a note to the parents asking for a snapshot of their family. I am going to take it to Kinkos and photocopy all the family photos with a color copier. I will have the children glue the original photo in their booklets and with the copies we will cut out each individual family member and make a family tree craft. Kim Brown earned a free week added to her subscription for sending in this idea. We would love to hear your ideas too.
Rainbows - Children can color, paint, or use dotters to make a rainbow.
Church - Before class use the shape patterns at the bottom of the page to cut shapes from different colors of construction paper. Have the children glue the shapes to the church in the correct place.
Food - Have the children cut food pictures from magazines and glue them to the page, glue dry food such as cereal, rice, beans, noodles, etc. to the page, or use fruit stampers.
We made the "I thank God for all These Things" booklet in my Kindergarten Class. On the " I thank God for rainbows" page we used Koolaid powder and water to paint the rainbow -- cherry for red, lime for green, lemonade for yellow, etc. You can also use Jello mix. The kids love it and it smells GREAT! Amy
We made the "I am Thankful for" booklet at Thanksgiving in our Sunday school this year. The children liked the idea of making a book. On the page "I am Thankful for my hands" we traced one of the children's hands, and on the "I am thankful for food" we had cut out pictures of food to glue on. These ideas added a bit of variety to the booklet rather than just drawing and coloring each page. Pamela
Theresa used this craft for one of her interactive prayer stations on gratitude and the ten lepers. Check out Still Waters website for more information on how to use hand-on activities to encourage young children to pray.
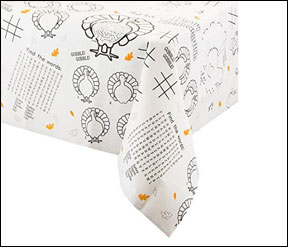
Thanksgiving Mystery Message Activity Sheet

To discover the message children circle the letters above every item that the pilgrims might have had, and cross out all the items that they wouldn't have had. The mystery message is: "God is with you", which is part of the Bible verse.
(The pattern for this activity sheet is available to members on The Resource Room and as an instant download with the Bible lesson "Going to America" above.)
"I Made a Little Turkey" Thanksgiving Activity Sheet
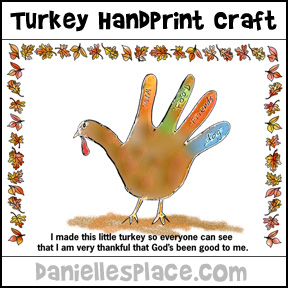
Trace your children's hands in the middle of a piece of paper. Have them color them to look like turkeys. Write the following poem at the bottom of the page. "I made a little turkey so everyone can see that I am very thankful that God's been so good to me." ©2007, Carolyn Warvel.
(The pattern for this activity sheet is available to members on The Resource Room and as an instant download with the Bible lesson "Going to America" above.)
Have your children write things they are thankful for on the turkey's feathers or around the turkey.
Thanksgiving Prayer Place Mat
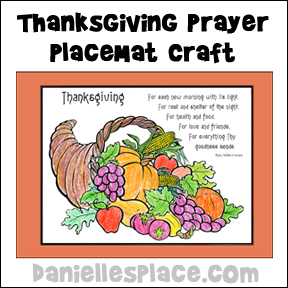
Print out the pattern onto printer paper, have your children color the picture and then glue it to a piece of construction paper. If possible, laminate the pictures so they can use it as a place mat.
The poem on the mat reads:
For each new morning with its light,
For rest and shelter of the night,
For health and food,
For love and friends,
For everything Thy
goodness sends.
Ralph Waldo Emerson
(Patterns for this Craft are Available to Members on The Resource Room and as an instant download with the Bible lesson "Going to America" above.)
Boy and Girl Pilgrim Decorations
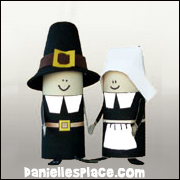
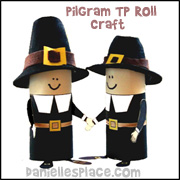
(Patterns for this Craft are Available to Members on The Resource Room and as an instant download with the Bible lesson "Going to America" above.)
©2000, Digital by Design, Inc. - See Copyright Information
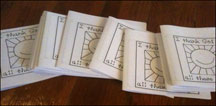
Peach Pit Pilgrim Game
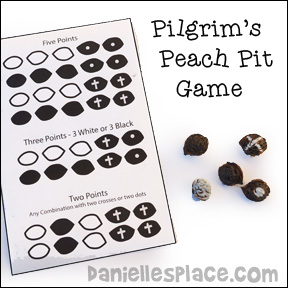
Tell your children that pilgrim children couldn't take many toys on the Mayflower with them because there wasn't room for them, but they learned how to make their own games and toys. Here is a game similar to what the pilgrims might have played. You will need 5 peach, plum, or apricot pits. Note: You can also use this game as a craft activity by letting your children make their own set of playing pieces.
Preparation - On two of the pits paint a white dot on one side and a white cross on the other. (Liquid Chalk Markers work great!) Color around the dots and crosses with a black marker.
On the other three pits paint one side black and one side white. Place the game pieces in a basket.
Print out the scoring sheet. Make more than one set of pits and scoring sheets if you have more than five children in your class. (Patterns for this activity are Available to Members on The Resource Room and as an instant download with the Bible lesson "Going to America" above.)
In class place your children into groups of five or less and give each group a set of peach pits and a scoring sheet. Each child takes a turn shaking the basket and emptying it out on the floor or table. Children receive points as listed below:
5 Points: 2 dots and 3 white sides, or 2 dots and 3 black sides up, or 2 crosses with 3 white sides up or 3 black sides up.
3 Points: 1 moon and 1 star and 3 white sides up or 1 moon and 1 star and 3 black sides up.
2 Points: 2 dots up or 2 crosses up with any combination of black and white sides up.
If you have younger children, you can make the game much simpler by using 3 moons and star pits. Give 3 points for 3 moons or 3 stars facing up. Give 2 points for 2 moons or 2 stars facing up.
Consider playing other games the pilgrims played: horseshoe pitching, three legged sack race, stilts, London Bridges, jump rope, and marbles.
"Dress the Pilgrim" Game
Before class prepare a boy and girl pilgrim outfit.(Below) Make a hat, a collar, two shoe buckles and a belt for the boys, and a bonnet, collar, apron, two shoe buckles or two white cuffs for the girls.
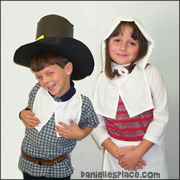
In class divide the children in to teams, girls against boys. Pick one boy and one girl to be the pilgrims. Prepare some questions from the lesson and previous lessons you have taught. Take turns asking each team the questions. If a team answers correctly, the team members get to dress their pilgrim. Let the child who answered the question pick an item and put it on the pilgrim. Keep playing until one of the pilgrims is completely dressed.
Pilgrim's Hat Directions
1. Cut a long strip of black poster board long enough to fit around a child's head and about 7" tall.
2. Staple the piece into a tube shape. Make sure it is big enough.
3. Place the tube in the middle of a piece of poster board so that one of the open ends is resting on the poster board.
4. Trace around the outside edge making a circle. Don't worry about it being perfect. Actually it would be better if it is a little oblong since that it the shape of a child's head.
5. Draw a bigger circle around that circle to make a brim.
6. Take your scissors and poke a hole in the middle of both circles. Cut wedge shapes starting from the center out to the first circle line. Do not cut the wedges off. It should look like you are cutting a pie except that the pieces are still attached to the smaller circle.
7. Fold up all the wedges and place the tube part of the hat in the center of the rim so that the wedges are on the outside of the tube all the way around. Cut the points off the wedges and glue of tape them to the hat.
8. To cover the wedges make a brown band and glue it around the hat. Add a buckle.
Girl's Pilgrim Hat
You can make the girl's pilgrim hat our of white material or a paper grocery bag.
1. Cut the bottom off the grocery bag so that it is about eight inches high.
2. Cut one of the short sides out. Fold back the edges of the side that you just cut, about two inches. Do this two times.
3. Paint the hat white and staple or glue on some ties.
Pilgrim's Collars
You can make collar shapes out of paper or material.
Shoe Buckles
To make buckles just cut squares of yellow construction paper and color in a black square in the middle. Put tape on the back and just have the children tape the buckle to the child's shoe.
©2000, Digital by Design, Inc. - See Copyright Information
Make Pilgrim Hats Out of Marshmallows, Chocolate, and Cookies
Kellog's has a cute snack that goes well with the "Going to American" lesson. They are little pilgrim hats made by dipping a marshmallow into melted chocolate and placing it on top of a chocolate cookie and them piping a yellow frosting buckle.
Thanksgiving Crafts on Other Pages
Comments for "Going to America" Sunday School Lesson
I teach 3-5 year olds in my Sunday school class. We did the craft that you use a paper bag and stuff it with newspaper. Before class I printed Bible verses on paper and cut them out and I let my kids stuff their turkey with Bible verses and wrote a poem letting the parents know that this wasn't an ordinary turkey it was stuffed with a special message inside. The children loved this craft. Carrie Stewart
The suitcase craft is wonderful. I've been on the Internet and couldn't find any "Pilgrim things" The one thing we did was make a picture of a pilgrim hat using paper. We cut out the hat shape from black paper, added band cut from tan or gray paper, and a yellow buckle. We glued these on and then covered both sides with contact paper. We attached elastic to fit around the children's heads. They loved wearing them. Thanks for all your good help.
"What Would You Take?" Game - Divide the kids into teams. Chose the oldest person on each team to be the writer, and give the teams one minute to write down what they would take with them if they moved. (They wrote: clothes, toys, water, food, etc.) Have the teams share what they wrote on their papers.
Make a Thanksgiving Horn of Plenty - Make a horn of plenty out of sugar ice cream cones. Use the following ingredients:
1. Pretzels - Arms folded in prayer. Explain to your children that the horn
of plenty was going to be filled with items that would be delicious
to eat, but that we also want to make this activity a time of
prayer.
2. Candy Corn - Represents five kernels of corn. We should be thankful for the food God provides.
3. M&M's - Representing the sweet things in our life that we need
to be thankful for.
4. Marshmallows - Represent the winter that the pilgrims had to go
through. We have winters in our lives too. Thank God for the things
that are hard in our lives: Divorce, being picked on, etc. ) Discuss
how God wants us to be thankful in all things, not just the sweet
things/times.
5. Runts - Represent the fruit of the spirit.
Thankful Mayflower Picture -The kids colored the picture of the Mayflower after enlarging it, and wrote things they were thankful for on the Mayflower.
I did the "Going to America" lesson with my children's church 3 & 4 year old class. I used the "God is always with You" Pilgrim suitcase during my lesson along with the pictures of items. They really enjoyed trying to decide what the pilgrims took with them on their trip, but they had a hard time understanding that this took place a long time ago and that they did not have electricity for the power tools. After the lesson I let them make their own suitcases. To help them remember what items the pilgrims would have taken with them on their trip I used green and red poster board and they glued the items they would take to the green paper and the items not to take on the red paper (This way they knew green was for yes and red was for no.). And instead of gluing the pictures to the inside of the suitcase the poster board made the pictures very sturdy and allowed them to be able to take them in and out of the suitcase without tearing them. I use your lessons a lot in my class and the children have always enjoyed them. Thank you for sharing your creative ideas. Rebecca
I did the Pilgrims lesson last week. We changed the pilgrim suitcase a little. I precut, not exactly, but around the shape of each item on the three printable pages. I made sure there was enough for each child to have one of each if they chose. I had each item divided into its own stack. I gave each child a 'suitcase'. I sat in front of them and pulled out one stack of items at a time. We discussed if the pilgrims would have taken each item. If not, why, and if so, what would they have used it for. I emphasized how much they had to leave behind through discussion of these items, including their families. It helped the children realize how much the pilgrims didn't have that we do have now. I also explained how important candles were and how they made them from wax. We lit one candle and turned out the lights to let them see how dark it was in a home with just candles. We discussed the dirt floors and how women in years past would sweep the floor smooth then mark designs on it kind of like carpet to make it pretty. We discussed how they started fires with no matches and how the bread and cheese molded on their way there. We discussed why they could not drink the water in the ocean. And, of course, we discussed the Bible and why they gave up so much to leave their family and country to go to such a hard life. These are just a few. Then I allowed them to pick from the pictures what they would take and glue them in their suitcases. Some took one of each and some were very selective. The older children seemed to really grasp the sacrifices they made, and the little ones just enjoyed gluing. Thanks for another great lesson! Narita
I made girl pilgrim hats out of blue print paper cut into 24"
wide x 18" long pcs. I folded back approximately 3" of the width
to make the edge of the hat. I then hole punched each side and inserted
a piece of string to tie them on the girls. In the back I folded
the top down and crossed each side over and taped together. These
turned out really cute. I made boys pilgrim hats out of
a piece of black construction paper cut into a large square and
I stapled on strips of black construction paper on each side to
make a band to go around each boy's head. I cut out a yellow buckle
and glued it on the front center to look like a buckle. I stapled these
to fit the kid's heads. I let the kids chose which one they wanted
to wear.
 We made the Thankful books. The kids loved doing these! Even
the 2-year-old liked this! They sprinkled the glitter on the glue
of the cover. I outlined everything and let them do the glitter.
These made up really pretty and a lot of the parents were commenting
on them when they picked the kids up. Next we did the hand prints
of each child. I painted each kids hand one at a time and they liked
that! Then we did the rainbow sheet and the kids painted the rainbows
with watercolors. For the food page I had some fruit shaped stampers
and the kids put paint on them and stamped the pages. I found some
friend stickers and we put stickers on the friends page, They put
cotton balls on the cloud page. I love this book and would recommend
everyone trying it! I put out one page at a time and when everyone
finished it we moved to the next page. At the end I stapled all
pages together like a book and wrote the kids names on the front
for them to take home. This kept the kids entertained and not bored
by having a variety of things to do which they love.
We made the Thankful books. The kids loved doing these! Even
the 2-year-old liked this! They sprinkled the glitter on the glue
of the cover. I outlined everything and let them do the glitter.
These made up really pretty and a lot of the parents were commenting
on them when they picked the kids up. Next we did the hand prints
of each child. I painted each kids hand one at a time and they liked
that! Then we did the rainbow sheet and the kids painted the rainbows
with watercolors. For the food page I had some fruit shaped stampers
and the kids put paint on them and stamped the pages. I found some
friend stickers and we put stickers on the friends page, They put
cotton balls on the cloud page. I love this book and would recommend
everyone trying it! I put out one page at a time and when everyone
finished it we moved to the next page. At the end I stapled all
pages together like a book and wrote the kids names on the front
for them to take home. This kept the kids entertained and not bored
by having a variety of things to do which they love.
I made the Pilgrim Suitcases out of enclosed manila folders
and cut one handle into the top. I gave the kids each a red and
green sheet of construction paper. I had cut out one set of items
for the kids per suitcase and I held up one item at a time and the
kids found that item in their bag and we discussed if the pilgrims
would of taken it on their trip and then they colored the item and
glued it to green construction paper if they would of taken it and
to red if they would not of taken it. I really don't think the kids
understood a lot about back then, but they had the suitcase as a
visual of what they would of taken and would not of to take home
and look at over and over again.
I read over the story about Will and we had a turkey hunt. I
enlarged and hid thirty turkeys all over the room. I used the turkey
off of the color sheet of Will with the Turkey and printed them
on gold colored paper.
We made the "I am Thankful for" booklet at Thanksgiving in our Sunday
school this year. The children like the idea of making a book. On
the page I am Thankful for my hands we traced one of the children's
hands, and on the I am thankful for food we had cut out pictures
of food to glue on. These ideas added a bit of variety to the booklet
rather than just drawing and coloring each page. Pamela
I did the lesson last week Going to America with my three year old Children's Church class and they loved the story about Will. Thanks for all the great ideas. Stacey
I did the Lesson on the Pilgrims for the past two weeks in my 6 & 7 year old Sunday School Class. We compared the Pilgrims of that time to us as Christian pilgrims. The lesson was wonderful. For the craft, we made a Mayflower that sailed from England to Plymouth Rock on a piece of yarn. Then on the sails of the boat we glued our memory verses on. I love all of the lessons that I have used for my class. Jamie
Today I did the lesson "Going to America" with my class of 4 to 7 year olds. We colored and glued the Teepee's but didn't use the toothpicks because I was afraid someone might get hurt. I printed each child a copy of the Mayflower to take home. I made treat bags with marshmallows, Runts, Life Savers, pretzels, Teddy Grahams, candy corn and goldfish. (I even put a half sheet of paper in each bag explaining what everything represented so the parent's could reinforce the lesson.) I explained how each of them represented things we need to be thankful for. I also made the suitcase from a colored file folder and cut out the pictures. I stopped during the lesson and let each child pick something that the Pilgrim's would have taken on their trip. We discussed how hard it would have been to leave lots of things behind especially grandparents. I think the older children learned something new and all of them learned the true meaning of what Thanksgiving was all about. Thank You for the wonderful lesson.
My preschool Sunday school class recently did the "Going To America" lesson. After the lesson, the children were eager to talk about what kinds of foods the Indians taught the Pilgrims to plant and harvest. One response was "A Happy Meal", which of course got a laugh. The children then colored a turkey coloring sheet. The children made a cornucopia place card to sit at their Thanksgiving dinner table with their names on it as well as Indian and Pilgrim finger puppets. Ella
Last week we did the "Going to America" lesson with our 4-8 year olds. We cut out pictures for the lesson and made a felt board which helps to keep the little ones attention better. They enjoyed the lesson and we talked about the different foods and items that they brought over. We have found that using the felt board with the lessons is a GREAT teaching tool!! Stacy