Easter Bible Crafts for Sunday School Page 2
How to Make Easter Crafts for Sunday School and Bible School
"He Lives! Pool Noodle Easter Craft for Kids

Children will love creating this popular Calvary scene display for their Easter celebration! This engaging craft activity provides a meaningful way to explore the joy of Christ's resurrection. To get started, children color the "He Lives!" card and cross patterns, and insert them into the slits cut into a pool noodle. As a finishing touch, they can enhance their display by attaching craft foam flower stickers.
This hands-on activity not only nurtures artistic expression but also reinforces the meaningful significance of Easter. Get ready to create something truly memorable!
The printable patterns for this craft are available to members on The Resource Room and as an instant digital download in both color and black and white.
Supplies needed - Pool Noodles, Serrated Knife (Bread Knife), Card Stock (Heavy Paper), Colored Pencils, Glue, and Flower Foam Stickers
Instant Download - ![]() - Includes patterns in Color and in Black and White.
- Includes patterns in Color and in Black and White.
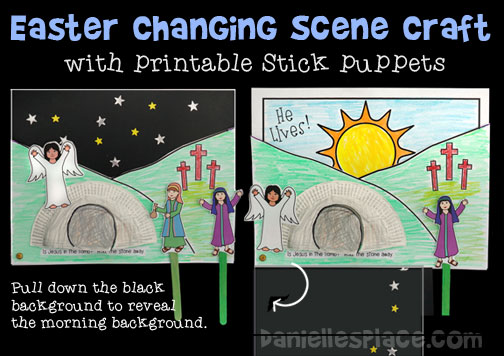
Resurrection Interactive Easter Story Craft with Stick Puppets
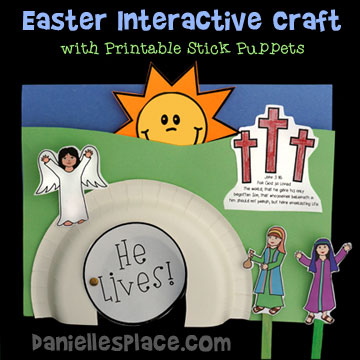
This Easter display can be used as a craft and as a Bible lesson review. Print out the stick puppets and attach them to craft sticks or paint sticks. Prepare the the tomb and calvary scenes (see below) and then have your children reenact the Easter story using the stick puppets.
Included with this craft are patterns for the stone over the tomb, angel, two women bringing spices, two happy women, two disciples, Jesus, two guards, three crosses with John 3:16 Bible verse, and the sun pattern.
To make this craft you will need green, blue and white paper, craft sticks, colored printer, glue, large paper plate, brass brad, and scissors.
The foreground picture says, "Is Jesus in the tomb? Roll the stone away!
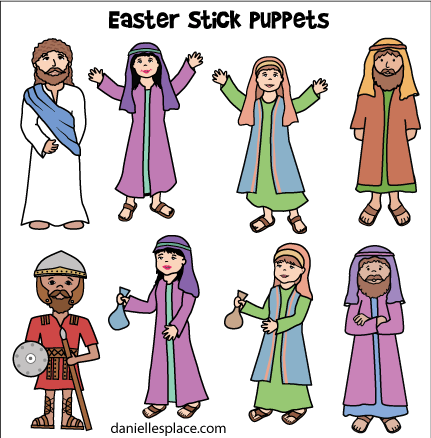
Instant Download Pattern -  Includes 12 pages: the Easter Interactive Patterns, Easter Changing Scene Patterns, and the Small Easter Stick Puppets
Large Easter Stick Puppets
Use the Easter Stick Puppet to review your Easter lesson. This stick puppets are larger than the ones pictured above. Each puppet is about five inches tall.
Instant Download Pattern - ![]() Jesus, two disciples, two women with spices facing left, two women with spices facing right, two happy women, angels facing right, angels facing left, two guards, scared guards, crosses and sun.
Jesus, two disciples, two women with spices facing left, two women with spices facing right, two happy women, angels facing right, angels facing left, two guards, scared guards, crosses and sun.
He is Risen Paper Plate Bible Craft
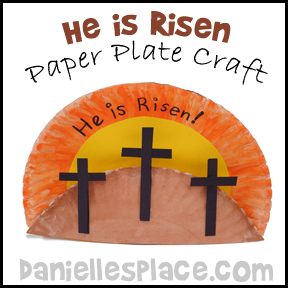
Here’s a simple and enjoyable Easter craft that requires minimal preparation. All you need is one paper plate and some brown paper. Children will have fun painting the paper plate to create a scene at Calvary, complete with a bright sun in the background. To finish the scene, they can glue paper crosses onto the "hill," symbolizing the price Jesus paid for our sins so that we might have eternal life.
What you will need:
Paper Plates
Water Color Paint and Paint Brushes or Crayons
Black Card Stock or Construction Paper (You can also use 4 1/2" Craft Sticks and 2 1/2" Mini Craft Sticks)
Yellow Paper (Optional)
Scissors
Low Temperature Glue Gun with Glue Sticks, Glue, and Magic Marker or Sharpie Marker
How to Make the Easter Paper Plate Craft:
1. Cut the bottom three inches off of a paper plate. Measure three inches up from the very bottom of the plate and draw a line straight across the plate from side to side.
2. Glue the two sections of paper plate together top to top so that the cut edges are at the bottom.
3. Cut a six-inch circle from yellow paper and glue it to the center of the plate. Fold back the bottom part of the circle so that it comes out the back of the plate. This will help the piece stand up. Instead of using yellow paper, you can just paint the inside circle.
4. Paint the paper plates and write "He is Risen!" at the top with a magic Marker.
5. Cut cross shapes from black card stock or construction paper and glue them to the front paper plate.
©2013, Digital by Design - See Copyright Information
I just wanted to thank you for all the incredible activities that you offer and all the ideas for the children's ministry. It has been really helpful to prepare my lesson for each week! You're a blessing for God's kingdom. You're blessing a lot of teachers like me that have to deal with many things at the time and find incredible solutions and ideas for the children's ministry every week! Thank you for your work! God Bless you abundantly! Thanks! Venessa, 4/20/2010
Flower Stick Puppet to Tell the Easter Story

Are you searching for a creative and engaging way to share the Easter story with young children? Look no further! Introducing adorable flower stick puppets is a delightful method to bring this incredible narrative to life. This activity not only captivates their attention but also transforms into a fun craft project where students can collaborate to put on an exciting puppet show.
Creating these stick puppets is simple and enjoyable. All you need are Chenille stems or green drinking straws paired with colorful cardstock flower designs. Set the stage with a striking black background to enhance the visuals. Designate one child as the narrator while others bring the puppets to life. To elevate the experience, add enchanting background music! Capture the magic by recording the puppet skit, and after the performance, share the playback with your students for a memorable celebration of creativity and storytelling. Don't miss out on this fantastic opportunity to inspire and engage young minds!
Faith-based Empty Easter Egg Craft with Poem
This craft goes along with the free Bible lesson "A Very Special Egg"
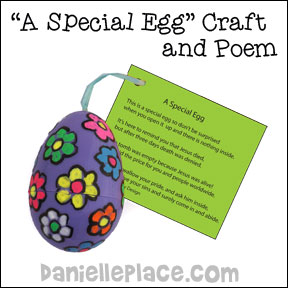
Celebrate the powerful message of Christ's resurrection with our adorable Easter egg craft! This engaging activity invites children to unleash their creativity as they decorate plastic eggs with vibrant chalk markers. Each egg is paired with a heartfelt poem that beautifully illustrates the significance of the empty egg, reflecting the empty tomb where Jesus was laid. Not only is this a delightful craft that children will love, but it also serves as a meaningful way to share the good news and connect with your community. Join us in spreading joy and faith this Easter!
A Special Egg Poem - "This is a special egg so don't be surprised when you open it up and there is nothing inside. It's here to remind you that Jesus died, but after three days death was denied . . ."
Supplies needed: Liquid Chalk Markers or Stickers, Large Plastic Eggs with Holes at the Top, Very Thin Ribbon, Colorful Cardstock, Hole Punch
Thank you for all the work you do for all of us. My Children's neighborhood outreach ministry is doing so well and much of it is because of the things I've been able to get from your website. PRAISE the Lord and YOU. Donna, 3/29/2010
Your web site is fabulous and I am soooo glad that I subscribed to it. It enhances my already planned out Sunday School lesson and gives me more options and my class is having a wonderful time. I have a lot of young children as I have e-mailed you in my letters before. It is very difficult sometimes to keep their attention long enough to tell a story but with the extra things I get from your site, it is working better. Vicki 3/29/2010 Thank you for all the work you do for all of us. My Children's neighborhood outreach ministry is doing so well and much of it is because of the things I've been able to get from your website. PRAISE the Lord and YOU, Donna - 3/18/2010
I've taught Bible classes for almost 30 years. Even though I always added my own ideas, I had gotten really tired of the purchased curriculum our church used. I found your material online several years ago and finally asked our education director last year for permission to use it instead. You've rejuvenated me as a teacher and my students love the lessons. The crafts are more work than the punch-outs in the purchased curriculum but so much better! Our church has a good support group for us teachers that make it much easier for us. We have wonderful volunteers who work each week in our Teachers' Workroom. I make copies of your craft/game/visual pages and give to them at least two weeks before I plan to teach the lesson. They have the material ready for my students tell me they really enjoy getting your crafts ready for the students.
Easter Bible Crafts on Other Pages
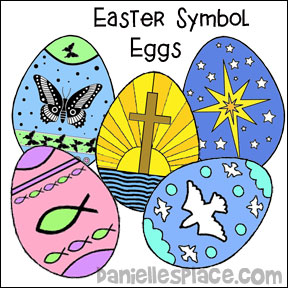
Easter Symbol Egss Craft - Easter Crafts Page 5

