Armor of God Bible Crafts and Activities For Sunday School
Armor of God Bible Crafts and Activities for Children's Ministry
Armor of God Coloring and Activity Sheets
You can use the first coloring sheet several different ways. Use the soldier picture with the complete armor and have the children color the entire picture with all the armor, use the soldier picture with separate armor pieces and have the children color and glue on a different piece of armor each lesson, or use the soldier picture with just the belt missing for the Belt of Truth lesson and have your children glue on just the belt.
Member's ![]()
Instant Digital Download ![]()
Armor of God Complete Lesson for Older Children
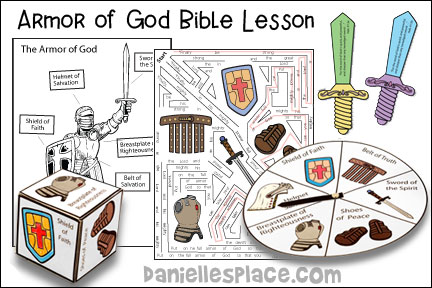
In this Bible lesson children compare the armor Goliath wore to the spiritual armor David wore. They learn that we have to fight battles every day, but we can use God's promised to help us fight our battles. Go to The Armor of God Bible Lesson Page for more details.
- Armor of God Printable Match Game
- Armor of God Printable Games
- Ephesians 6:13-17, NIV – Rebus Bible Verse Sheet
- Aluminum Foil Armor of God Game
- Ephesians 6: NIV Maze Sheet
- Armor of God Coloring Sheet or Activity Sheet
- Sword Bible Verse Discussion Activity
Armor of God - Belt of Truth Bible Lesson for Children

A Complete Bible lesson with Games, Bible Crafts and Learning Activities. See The Belt of Truth Bible Lesson for Children Page.
- Belt of Truth Bible Verse Match Up Game
- Belt of Truth Relay Game
- Pin the Belt on the Soldier - Armor of God
- Belt of Truth Bible Verse Review Activity
- Armor of God Belt Costume
- Cut and Paste Belt Activity Sheet
Armor of God - Breastplate of Righteousness - Bible Lesson for Children's Ministry
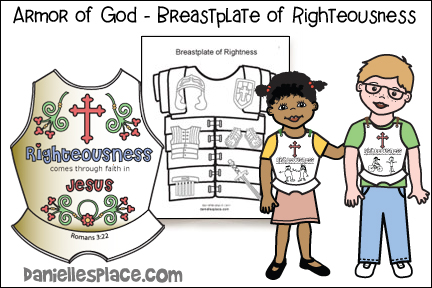
A complete Bible lesson about the Belt of Truth with Bible Crafts, Bible Verse Review Activities and Games to Reinforce the Bible Lesson. Go to The Armor of God Breastplate of Righteousness Bible Lesson Page for more information.
- Breastplate of Righteousness Armor of God Coloring Sheet
- Breastplate of Righteousness Costume Craft
- Play "Find the Breastplate" Game
- Armor of God Breastplate - Made from a Grocery Bag
- Armor of God Songs
Armor of God - Shoes of Peace Bible Lesson for Children
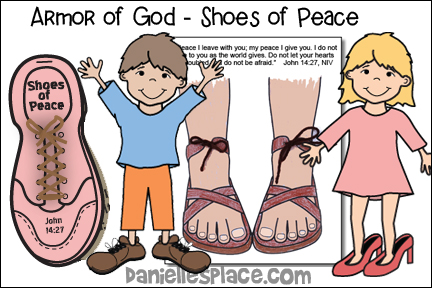
Shoes of Peace Bible Lesson - The shoes of peace will help us to stand firm and not run from trouble. We receive peace and confidence in Christ through the gospel. Go to The Armor of God - Shoes of Peace Bible Lesson for more information.
- Shoes of Peace Coloring Sheet
- Bible Verse Review Booklet Craft and Activity
- John 14:27 Cube Bible Verse Review Game
- Shoes of Peace Relay Race
- Touch and Feel Game with the Feet
- Whose Shoes are These? Game
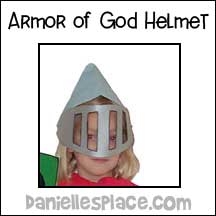
Armor of God - Helmet of Salvation Bible Lesson for Children's Ministry
In this lesson children learn that just as we put on a helmet to protect our heads we should put on the helmet of Salvation every morning to remind ourselves who we are in Christ Jesus and what he has done for us. Go to The Armor of God - Helmet of Salvation Bible Lesson Page for more information.
- Color a “Helmet of God picture” with a Visor
- Helmet from Newspaper and Poster Board
- Put on the Helmet of God Sticky Note Bible Verse Game
- Types of Helmets Game
- Play “Pass the Helmet”
- Match the Helmets Bible Verse Review Activity Sheet
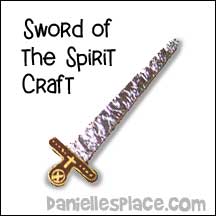
Armor of God - Sword of the Spirit Crafts and Activities
In this lesson children learn that God’s words are powerful. They are our ultimate weapon against Satan’s lies and schemes. They guide us like a lamp in the darkness. They teach us the truth so we will learn to hate wrong. They have the power to save us from sin. They give life and freedom, comfort, and give hope. Go to The Sword of the Spirit Bible Lesson Page for more information.
- Books-of-the-Bible Sword of the Spirit Bookmark
- Bible Verse Sword Bookmarks
- Armor of God Aluminum Foil Sword
- Sword of the Spirit - Hebrews 4:12 Bible Verse Coloring Sheet
- Label the Soldier Activity Sheet
Armor of God Shield of Faith Bible Crafts for Sunday School
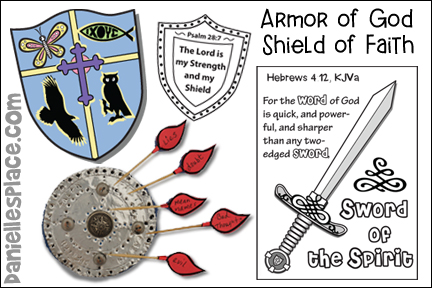
Children learn that faith in God protects us from the doubt and fear that Satan puts in our hearts. They learn how they can have more faith. See The Armor of God - Shield of Faith Bible lesson Page for more information.
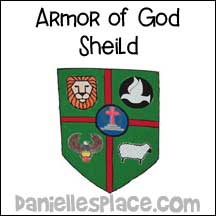
- Coat of Arms Bible Craft
- “Faith Shields” Activity
- Shield of Faith Match Game
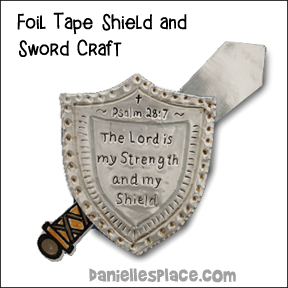
- Shield of Faith and Sword Foil Tape Bible Craft
- Shield with Fiery Darts Craft and Learning Activity
- March to a Military Chant
- Shield of Faith Game
Copyright 2013, Digital by Design, Inc - See Copyright Information.
I visit your site weekly. I always find ideas to use with my Bible preschool class. I especially enjoyed the scripture armor lessons. The lessons are so easy to adapt to the age of the children who are in my class. Sometimes I have drop in siblings and the lessons seem to keep their interest too. I' m using the Palm Sunday lesson too. Keep up the good work. I recommend your site to all my friends. Thanks, Melonie
Foam Core Board Shield
What you will need:
Foam Core Board or Cardboard
Paint
Tape
What to do:
1. Cut a shield shape from half a sheet of foam core board or cardboard.
2. Paint the shield with child-safe paint.
3. Add a coat of arms if you would like.
4. Cut a strip of cardboard and glue to the back for a handle.
I purchased 14” cardboard cake rounds and the children painted them with metallic paint for shields. The children wrote “Shield of Faith” on the front when they were dry. The cake boards were inexpensive and a lot less prep time for me. I used duct tape for the handle by pressing the flat ends of the tape to the board then pressing the middle part of the tape together. Elaine
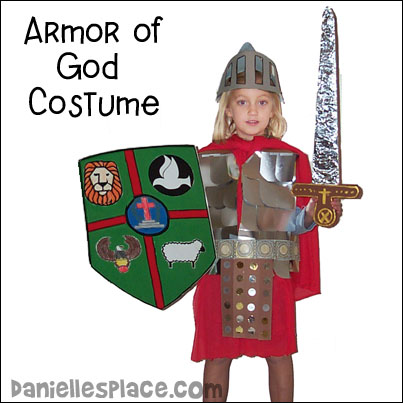
Armor of God Outfit
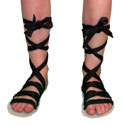
Make Soldier Shoes
What you will need: Scraps of Old Floor Linoleum, Stretchy Material that Doesn't Fray such as Spandex, (You won't need very much, about 2" - 3" for each child. So you can make 18 sets of straps from a yard of material) Hole Punch, and Scissors
What to do:
1. Flatten out the linoleum on the floor so that the bottom side of the linoleum is facing up. Trace the children's feet and cut them out. Linoleum is fairly easy to cut so you shouldn't need special scissors.
2. Mark six holes about 1/2" to 3/4" depending on the size of the shoe along each side of the sole starting at about where the base of the toe would be. Punch holes in the linoleum sole with a hole punch. I used a leather punch.
3. Cut strips of material so that the stretch of the material is along the length of the material. Spandex stretches both ways so you won't have to worry about which way to cut it. I cut 1" strips across the whole width of the material. I think it was 45" wide and used the whole length. Cut both ends to a point as shown in the picture.
4. Start threading the strip through the holes at the toe so that the material goes from side to side over the top of the shoe. The brown on the diagram is the material on the top of the shoe. The pink shows how the material looks on the bottom of the shoe. Use the diagram to thread the rest of the shoe. When you get to the last holes place the child's foot in the shoe loosening it if you have to. Bring the material strips up in front of the child's foot crossing them over and then behind the heal of their feet winding it around their legs until you run out of material and then tie it at the top. (If you don't want to use material, you can use 3/4" elastic instead.)
This craft comes from the "Armor of God - Shoes" Bible Lesson on The Resource Room where you will find even more crafts, games and learning activities for Sunday School.
What you will need:
Newspapers
Silver/gold Poster Board
Brass Brads
Silver Paint
Tape
How to make:
1. Cut out a visor from silver poster board as shown in the picture. A pattern for the visor is available to members of Danielle's Place and The Resource Room. Cut out the slats in the middle. Use the pattern to trace the shape onto silver poster board. The silver poster board is actually silver and gold. One side is silver and one is gold. Poke a hole at each end of the visor.
Member's ![]()
2. To make the hat part of the helmet place two or three pieces of newspaper on top of each other and fold them in half on the natural fold with the fold on your left. Fold the top half down over the bottom half. The new fold should be at the top. Fold the top two corners in so that they meet in the middle. See diagram # 1.
3. Fold up the bottom edge so that it meets the bottom edge of the triangles you just made. But only fold up 4 layers of newspaper. The other layers will be folded up on the back. See diagram # 2.
4. Fold up the bottom edge of the newspaper again so that it is folded at the bottom edge of the triangles. See diagram # 3.
5. Turn the hat over and do the same thing to the other side.
6. Fold the points that stick out back and over each other. Punch a hole in the folded-over triangles. This is where you will attach the visor. Tape it down.
7. Put your hand up inside the triangle and spread it out.
8. Paint the hat silver or a metal color.
9. Attach the visor to the hat with brads so that it can be lifted up and down.
I used the instructions for the newspaper hats, but used heavy duty aluminum foil instead. I used the wide foil. The face guard was cut from silver poster board using the pattern on the web site and attached with paper brads. Elaine
Copyright 2005, Digital by Design, Inc - See Copyright Information.
Tunic and Cape
The tunic and cape were made from a piece of stretchy red material that cost $1.00 a yard at Wal-mart. I used one yard for the tunic and one for the cape. To make the cape I just cut a square piece of material and tied two corners together around the neck. To make the tunic I just folded a rectangle piece in half and cut a neck hole in the middle of the folded end. Put it over the child's head and use a length of material to tie it around the child's waist.
I cut the shoes from fun foam and used curling ribbon for the laces. It was precious to see the children wearing their shoes as they left church. Elaine
Copyright 2005, Digital by Design, Inc - See Copyright Information.
Songs for the Armor of God Theme
March to a Military Chant - Start by counting one, two, three, four, one, two, three, four, etc. until all the children are marching at the same pace. Act like a drill sergeant. Tell them to stand tall, face forward, lift their feet up high, and look proud to be in the Lord's army. Then tell them to repeat after you the following lines. Once they get the rhythm and words, you can have them march in a circle.
We Are Christians
Written by Carolyn Warvel
Do not copy this song and place it on another web site, blog, pdf. file etc.
We are Christians passing by. (We are Christians passing by.)
We will hold our heads up high. (We will hold our heads up high.)
We don't steal and we don't lie. (We don't steal and we don't lie.)
"Stand for the truth" is our cry. (Stand for truth is our cry.)
God is God of earth and sky. (God is God of earth and sky.)
On God's words we can rely. (On God's words we can rely.)
For our sins, we know he died. (For our sins, we know he died.)
We'll stick with him by and by. (We'll stick with him by and by.)
©Copyright 2005, Carolyn Warvel
This chant comes from The Resource Room from the Armor of God Lessons.
Armor of God Aluminum Foil Sword
What you will need:
Foam Core Board (You can find this in the same place you buy poster board.) or Card Board
Exacto Knife
Ruler
Pencil
Scissors
Heavy Duty Aluminum Foil
Tape
Brown, Gold, and Other Colors of Paint
How to make:
1. Cut out the blade shape from the foam core board twenty inches long, three inches across at the bottom, and one inch at the top. Round off the top point.
2. Cut out a handle from foam core board using an Exacto knife and use it to cut two more handle shapes from the foam core board. Glue one handle shape to one side the blade at the bottom. Glue the other to the other side. Cut the third shape apart so that you can slide the pieces in between the other two handle pieces glued to the sword. Place glue on each side of the pieces and insert them between the two pieces you glued onto the blade. Use sand paper if you would like to make the edges smooth.
Member's ![]()
Free Digital Download ![]()
3. Paint the handle brown like wood and add some decorations.
4. Wrap a piece of aluminum foil around the blade and tape it on.


