Salvation Bible Crafts and Activities For Sunday School
How to Make Crafts and Activities Relating to Bible Salvation
Bible Do-A-Dot Activity Sheets with Salvation Message and Bible Verses
"Salvation 1, 2, 3" includes seven printable pages that work great with Do-A-Dot markers. Each page includes a number 1 - 7, with part of the salvation message and a corresponding Bible verse. Use these to introduce children to the salvation message. Let your children color each sheet with dotters, crayons, or colored pencils as you discuss each Bible verse.
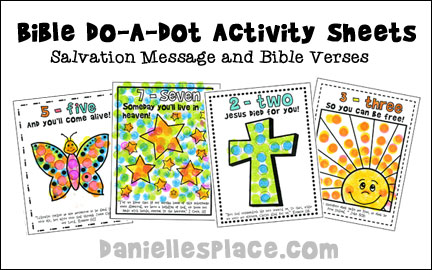
These activity sheets were designed to be used with Do-A-Dot Art Markers, but crayons and colored pencils also work well. Dotters are a great alternative to water color paints because they are a lot less messy. Children can use them like stampers or make wide strokes by running the sponge across their papers. Overlapping the dots create new colors and effects. They are non-toxic and clean up easily with water. Children of all ages enjoy experimenting with them.
Cover Page - Salvation 1, 2, 3
1 - One - God sent his only son - John 3:16
2 - Two - Jesus died for you! - Romans 5:8
3 - Three - So you can be free! - John 8:36
4 - Four - Open the door - John 14:1
5 - Five - And you'll come alive! - Romans 6:11
6 - Six - Because Jesus is the fix - John 14:6
7 -Seven - Someday you'll live in heaven - 2 Corinthians 5:1
Member's 
Instant Download Pattern - 8 Sheets for $2.00 - 

©2014, Digital by Design, Inc. - See Copyright Information
Caterpillar Changing to a Butterfly Craft Stick Craft
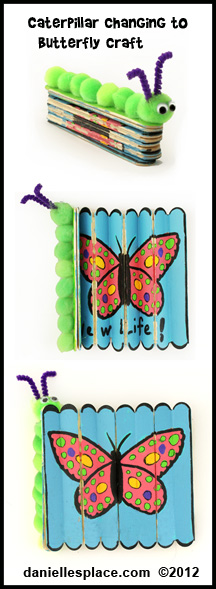
The craft sticks are taped together so that when they are pushed together from the sides they fold up into a compact stack of sticks.
What you will need:
Woodsies Mini Jumbo Craft Sticks -4.5" - Use good quality craft sticks that lay flat. The 5/8" work perfect with the one-inch tape.
*You can use the Woodsies Jumbo Craft Sticks with the 1.5 Inch - 3M Scotch Masking Tape for a bigger Canvas.
3M Scotch Masking Tape, 1-Inch - Other brands will work, but this tape works great! It is the exact color of the craft sticks. (Staple's Tape works better with the washable markers, but it is lighter than the stick and more transparent and doesn't cover the stick as well.)
Pom Poms
Acrylic Paint, Permanent Markers, Crayons, or Colored Pencils (The washable markers don't work well because they smear.)
How to Make the Caterpillar:
1. To make the caterpillar glue pompoms onto one of the craft sticks. Glue on googly eyes and Chenille stems for the antennae.
How to Make the Folding Craft Stick Canvas:
1. If you are using the mini-jumbo craft sticks, cut the one-inch masking into 4-inch pieces.
2. Place two sticks together, side by side, and tape them together covering both the sticks with the tape.
3. Turn the two sticks over so that they are diagonal to you.
4. Place another craft stick next to and below the two sticks that you taped together. Use another piece of tape to tape the bottom two sticks together.
5. Turn all three sticks over diagonally and place another stick at the bottom of the row and tape the last two sticks together. Keep going until you have a whole row of sticks.
6. You can also cover the first and last stick in the row by placing tape over the stick and then folding it back over the stick. It is easier to write on the tape than the craft stick. The ink soaks into the sticks and blurs.
7. Draw a butterfly design on the craft stick canvas with a pencil. If you make a mistake, you can erase it. When you are happy with your design paint it with the acrylic paint. When the acrylic paint is dry use a black marker to outline your shapes and write the words.
8. To finish fold up the craft stick canvas and then glue the caterpillar onto the top of the butterfly craft stick picture.
View a Video on Youtube showing how to make this craft.
©2012, Digital by Design, Inc.- See Copyright Information - Bloggers, if you use this craft idea or an adaptation, you must link back to this page for complete directions. If you use this technique, let us know and we will put a link to your blog.
Caterpillar Changing to a Butterfly Craft Stick Craft for Kids - #2
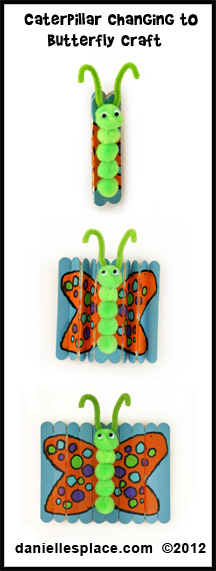
This craft is basically the same as the above craft except the crafts sticks unfold from the middle forming the wings.
1. First make the caterpillar by taping two sticks together on the front and back of the sticks. Glue the pompoms on the the center of the two sticks. Add the eyes and Chenille stem antenna.
2. To make the wings tape a craft stick to each side of the caterpillar craft sticks placing the tape on what will be the back of the butterfly. (See the directions above.)
3. Then turn the butterfly over and tape two more craft sticks to the first two. The tape will be on the opposite side of the first set of taped craft sticks.
4. Keep adding craft sticks to each side alternating the tape until the wings are long enough.
5. Draw wings onto the craft sticks with a pencil. If you make a mistake you can erase. Once you have the design you would like, paint the craft sticks.
6. When they are dry outline your design with a black marker, and then fan fold the wings to the back of the pompom body.
View a Video on Youtube showing how to make this craft.
©2012, Digital by Design, Inc.- See Copyright Information - Bloggers, if you use this craft idea or an adaptation, you must link back to this page for the complete directions. Let us know if you use it, and we will put a link to your blog.
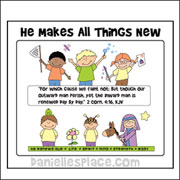
"New Creation Butterfly"
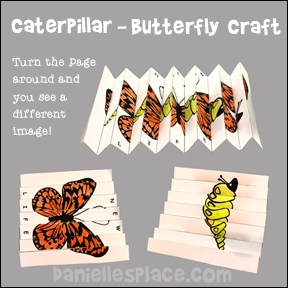
Children color the pattern and then fan-fold it.
The picture looks like a caterpillar when you view it from one direction and a butterfly from the opposite direction.
The words "New Life" appears on the butterfly side.
A Complete Lesson with this craft and other activities is available to members on the Resource Room.
Member's 
Free Instant Download ![]()
Copyright 2000, Digital by Design, Inc.- See Copyright Information
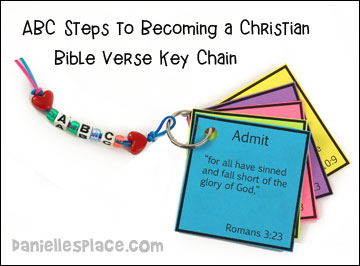
ABC Steps of Becoming a Christian Bible Verse Key Chain
What you will need:
Card Stock in Different Colors One-inch Rings
How to Make the ABC Key Chain:
1. Print out the Bible verse patterns onto different colors of card stock. (The pattern contains pages for two keychains)
Member's
Instant Digital Download (Available in KJV and NIV) - Includes six verses for each craft, two sets per page, and a cover pattern.
2. Cut the cards apart and punch a hole in the top left corner.
3. Attach the card pages to the ring.
4. Cut a piece of string about twelve inches long. Loop the string around the ring or clip. Tie a knot near the clip. String on a heart, the letter A, a bead, the letter B, a bead, the letter C, and then another heart. Lace both ends of the string through the beads at the same time. Tie a knot at the end and cut off the excess string.
Guessing Game
Write the following words on separate pieces of paper: broom, window cleaner, vacuum cleaner, duster, toothpaste, shampoo, soap, washing machine, eraser, air freshener.
Have the children take turns acting out the different words and guessing what they are. When all the words have been guessed, ask the class what all the words have in common. They all clean, remove, or cover up dirt or stains. Explain that Jesus does the same things with our sins. When we confess our sins he forgives them and washes them away.
Salvation Verses Matchup Game
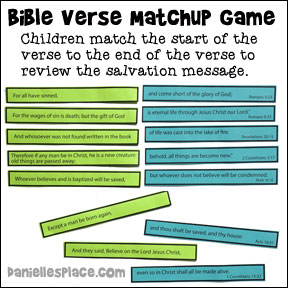
Children match up the beginning of the verses to the ends of the verses to make complete verses.
This game can be adjusted to children of different levels. To make the game easier print out the beginning Bible verse sheets and the ending Bible verse sheets onto different colors of card stock. You can also use half of the verses instead of all of them to make the game easier. Bible references are on the verse sheets so if children are having a hard time finding the matching verses, they can use their Bibles to help them.
Member's (Printable patterns available in KJV and NIV.)
Copyright 2000, Digital by Design, Inc.- See Copyright Information
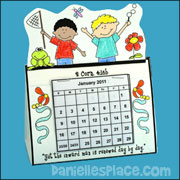
All Things New - New Year's Crafts
The following crafts are available on The Resource Room and go with the lesson "All Things New".
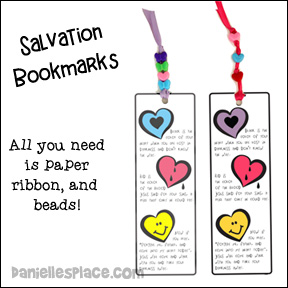
Salvation Bookmarks
"Black is the color of your heart when you are lost in darkness and don't know the way. Red is the color of the blood Jesus shed for your sins, a price that only he could pay. Now if you pray, "Forgive me, Father, and come into my heart today. Jesus will come and walk with you and take your darkness away." Carolyn Warvel
What you will need:
Card Stock
Crayons or Markers
Red, Black and White Heart Beads
Ribbon
Clear Contact Paper
What to do:
1. Print out the pattern and cut the bookmarks apart.
Member's ![]()
Instant Digital Download $2.00 ![]()
2. In class have the children color the bookmarks and then place contact paper over top of both sides. * On the back you can have the children write salvation bible verses or draw a picture.
3. Punch a hole in the top. Fold an 18" length of ribbon in half. Insert the folded end into the hole and bring the other two ends through the loop and pull them through.
4. String on the three beads tying a knot in between each bead.
Copyright 2000, Digital by Design, Inc. - See Copyright Information
Sand Art Salvation Message and Craft
You could also use Sand Art Candy (Pack of 24)
Here's a fun way to present the Salvation message.
Each child is given a plastic cross
frame and sand. You can buy Cross Sand Art Craft Kits (Package of 12 kits) from Amazon.com. These include a card that explains what each color represents in the salvation message.
Children pour different colors of Sandy Candy into tubes as each part of the salvation message is taught. They can take the cross home to remind them of the lesson. As they pour the different color tell them what each color represents. Lesson Here.
John 3:16 Bible Verse Review Activities
See the John 3:16 Bible Verse Review Activities Page