Adam and Eve Bible Crafts and Games for Children
Adam and Eve Sunday School Lesson for Preschool and Elementary Children. Bible crafts and Bible games relating to Adam and Eve including: Spiral Snake with Bible Verse, Activity Sheets, Garden of Eden Display, and a Tree and Snake Craft
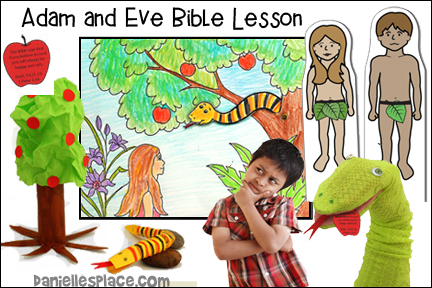
The following crafts and activities come from the Bible lesson "Adam and Eve" on The Resource Room. This lesson is available to members and as an instant digital download.
Instant Digital Download - Complete Bible Lesson - KJV ![]()
Instant Digital Download - Complete Bible Lesson - NIV ![]()
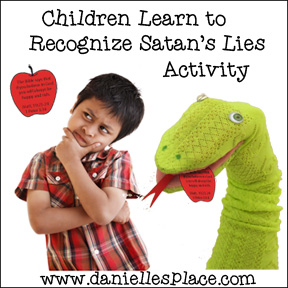
Recognizing Satan's Lies Children's Activity
This activity goes with the Adam and Eve Lesson on The Resource Room. In this activity children learn how to recognize Satan's Lies.
The teacher uses a snake puppet to hand a child an apple that has a lie that Satan often tells children written on it.
The teacher or child reads the apple and then decides if it is a lie. The child should then say whether or not Satan has ever told him the lie, and then explain why it is a lie.
If the child cannot explain why it is a lie, he can look up the Bible verse relating to the lie.
There is one or more Bible verses on each apple.
Instant Digital Download - Complete Bible Lesson - KJV ![]()
Instant Digital Download - Complete Bible Lesson - NIV ![]()
Learn how to make the Snake Puppet on our Puppet Crafts Page.
Children can also make their own apple booklet to take home. Include blank apple pages so children can write other lies Satan tells them in their booklets.
©2015, Digital by Design - See Copyright Information
Adam and Eve Cereal Box Puppet Stage
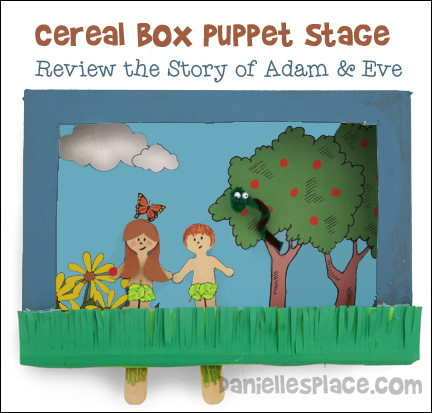
What you will need:
14.5 oz Cereal Boxes that Measure Approximately 10 3/4" x 7 1/2", People-Shaped Craft Sticks, Chenille Stems, Tiny Wiggle Eyes, Scissors, Ruler, Construction Paper, Paint, Paper Glue (Rubber Cement), Colored Pencils and Markers
How to Make the Cereal Box Puppet Stage
1. Flatten the box by carefully opening the top and bottom flaps.
2. Before class prepare the cereal boxes. Place the box so that it is lengthwise. Measure one inch down from the top and one inch in from the sides, and 1 1/2" up from the bottom. Use your ruler to draw the lines. Cut out the middle rectangle.
3. Cut a slit at the bottom of the stage about 1/2" high and the length of the box minus an inch on both sides. This slit will be used to insert the puppets.
4. Print out the stage background pattern. Cut out around the edges and glue it inside the box with rubber cement. You can draw your own background and then glue it to the inside of the box. Punch a hole in the back of the box where the branch of the tree is. This hole will be used to insert the Chenille stem snake.
Instant Digital Download - Complete Bible Lesson - KJV ![]()
Instant Digital Download - Complete Bible Lesson - NIV ![]()
5. To make the snake wind two Chenille stems together and fold down the end for the head. Glue tiny wiggle eyes onto the head.
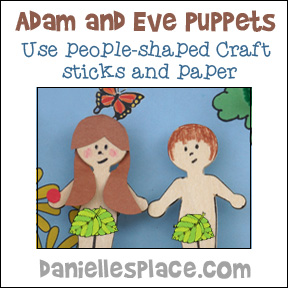
6. Use colored pencils and markers to draw in the face and hair features on the puppets. Cut hair from colored paper for the Eve puppet. Eve's hair was made in two parts. The long part was glued to the back of the head and then the hair that hangs down was brought to the front. The bangs are a separate piece that is glued to the front of the head.
7. Glue leaves on the puppets to cover their private parts.
Have your students use the puppets and puppet stage to retell the story of Adam and Eve.
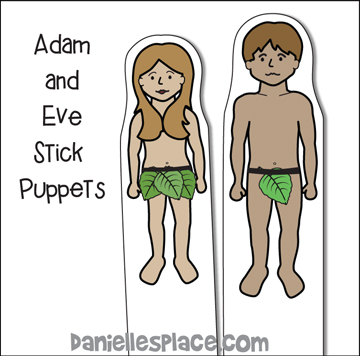
If you don't want to buy wood stick puppets, you can use these printable stick puppets. Print them out on card stock and glue craft sticks to the back. These cute puppets are available in both color and black and white patterns.
Instant Digital Download - Complete Bible Lesson - KJV ![]()
Instant Digital Download - Complete Bible Lesson - NIV ![]()
©2015, Digital by Design - See Copyright Information
I LOVE it! I have seen this site on pinterest for years and decided to pay the fee and join. I wish I had done this YEARS ago! What a time-saving and valuable resource. Thank you for your responsiveness – especially the day before Easter! Blessings, Beth
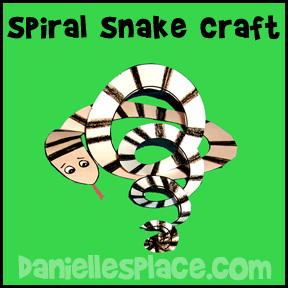
Make a Spiral Snake with Bible Verse
Have your children cut out spirals from typing paper and color them to look like snakes, and then write the Bible verse on the back of the snake.
Instant Digital Download - Complete Bible Lesson - KJV ![]()
Instant Digital Download - Complete Bible Lesson - NIV ![]()
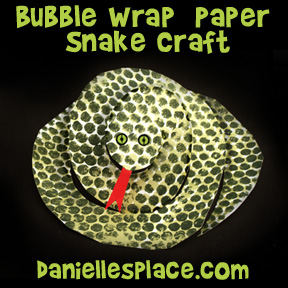
Children make snakes using bubble wrap for the snakes scales. Then write the Bible verse on the back of the snake. (Go to the Snake Crafts and Learning Activities Page for directions for this craft.)
The Consequences of Sin Object Lesson Using Craft Sticks and the Exploding Cobra Weave
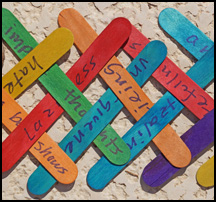
Craft Stick Snake
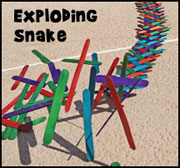
Exploding Snake Activity
What you will need:
Jumbo Crafts Sticks and Markers
First check out this Youtube video on how to make a mini cobra weave using craft sticks. Practice putting it together until you have mastered it. In class explain to your children that all sin has consequences. It doesn't matter if it is a little white lie or murder. All sin keeps us from God. Have your children think of sins that we may commit daily or may make excuses for, such as watching television shows that aren't pleasing to God, swearing, lying, cheating, etc., and then have them write the sins on the craft sticks. Weave all the craft sticks together to make a snake. Tell them that sin can be disastrous to our lives. When we commit one sin it makes it easier to comment even more until pretty soon they take over our lives. Remove one of the sticks so that the "Snake" explodes to emphasize your point.
Garden of Eden Color and Activity Sheet
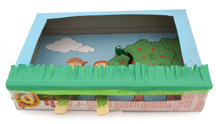
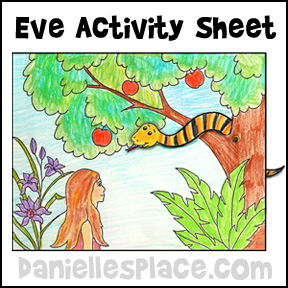
Children color the picture and insert a snake through a slot in the picture so that they can make the snake move and talk to Eve. You can also use the activity sheet as a coloring sheet and have your children draw in the snake.
Instant Download Pattern $2.00
©2013, Digital by Design - See Copyright Information
Instant Digital Download - Complete Bible Lesson - KJV ![]()
Instant Digital Download - Complete Bible Lesson - NIV ![]()
Work On a Bulletin Board Display
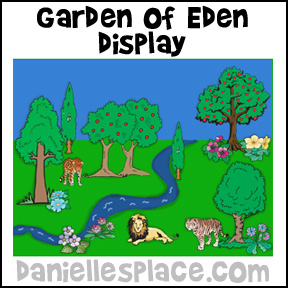
Have children make trees, a river, and flowers from construction paper. Help them find pictures of animals in magazines, and tape them to a bulletin board to make a picture of what they think the Garden of Eden might have looked like. Use the Bible References in the story to read about the Garden of Eden.
Use a felt board and pictures of trees, flowers, and animals to tell the story of Adam and Eve.
The Adam and Eve lesson on The Resource Room also has picture you can print out and use on a felt board or bulletin board.
Instant Digital Download - Complete Bible Lesson - KJV ![]()
Instant Digital Download - Complete Bible Lesson - NIV ![]()
Glue felt on the back of the pictures or use pieces of sticky-backed Velcro (Use the hook part, not the fuzzy part.)
Make a felt board by stapling or gluing pieces of blue and green felt onto a corkboard. If you don't want to take the time to make a felt board, you can just have your children tape the pictures on to a bulletin board.
©2013, Digital by Design - See Copyright Information
I am just so "blown away" (in a good way) by your website. The resources that are available are unbelievable. I use the ideas for our children's church program. I am not a creative person, but certainly can take ideas from creative people and put them to good use. I thank you sincerely for all the work that I know has gone into your resources and pray God will bless, in an awesome way, you and your family and anyone associated with your ministry! Sandy Turner
Adam and Eve Bible Games for Preschool and Elementary Children
The following Activity Ideas come from the Adam and Eve Lesson. You can find a complete lesson on The Resource Room
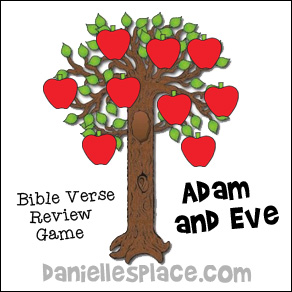
Play a Bible Verse Review Game
Before class cut out apple shapes from red construction paper or card stock. Write the word "Christ" on the back of one of the apples. Tape the apples to a large tree display. Amazon.com has a nice bulletin board display tree that comes with fifty green leaves. I have used a bulletin board tree for several lessons including: Amos Wasn't Famous, Zacchaeus, and Jesus Never Changes.
You can also decorate it in the fall with colorful leaves and write, "We're Falling For Jesus". Click on the link below to find this display.
If you don't have a bulletin board tree, you can just lay the apples on the floor and have your children sit in a circle around the apples.
Write the Bible verse on the board and go over it several times leaving out the word "Christ". "For as in Adam all die, even so in ____ shall all be made alive." 1 Corinthians 15:22
Tell your children that because of Adam's sin we all die, but because of someone else, we shall all be made alive. Let's see if we can find the missing word that belongs in this Bible verse.
Have your children take turns picking an apple that they think might have the missing word written on it. Turn over the apples for them to see if there is something written on it. Keep playing until a child has found the word. You can make the game easier by removing the apples that have already been picked or harder by leaving all the apples on the tree.
©2013, Digital by Design - See Copyright Information
Tree and Paper Snake Craft
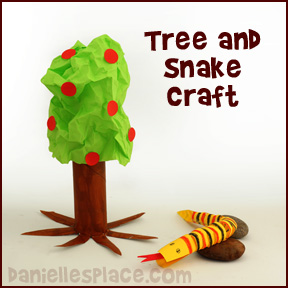
Elementary children will enjoy making and playing with the craft! Use it to act out the story of Adam and Eve.
What you will need:
Paper Towel Tube
Green Paper Gift Bags or Green Tissue Paper
Brown Paint or Crayons - Acrylic or Water Color Paint Will Work
Glue
How to Make the Tree Craft:
1. Cut 1/2" wide slits about three inches long all the way around one end of the paper towel tube to make the roots of the tree.
2. Paint or color the paper tube trunk brown.
3. To make the top of the tree wrinkle up a green gift bag. Put one hand inside the bag, and pull the bottom of the bag down through the center of the bag about three inches. Place the bag over the top end of the paper towel trunk and glue the inside, bottom of the bag to the tube.
Note - If you don't have a green lunch bag, you can use green tissue paper. Just cut a large sheet of tissue into four, 9"-squares (Fold the sheet in half and then in half again and cut on the fold lines).
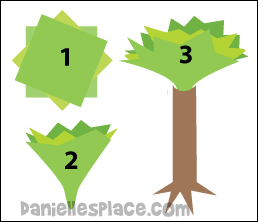
(#1)Place the cut squares on top of each as shown in the diagram
(#2) Place your pointer finger in the center of the pile. Use your other hand to press the sides of the pile up over your pointer finger. Pull the pile off your finger crinkling the center into a tube shape
(#3) Place some glue on the end of the paper towel tube and insert the tissue paper into the center of the tube
4. Stick dot stickers on the tree for fruit.
©2013, Digital by Design - See Copyright Information
Hello, I teach 4 year olds at church. I had great difficulty finding appropriate lessons for them on the internet until I found your site. I have used several of your lessons and the crafts that go with them. I love them and my children do too. They seem to understand them pretty well. THANK YOU!!!! Cindy
Paper Snake Craft

1. To make the paper snake roll a sheet of paper into a tight tube long ways. (This will make the paper easier to roll once it is cut into a smaller shape.
2. Unroll the paper and cut it into a 3 1/2" wide by 11" triangle. Color the shape to look like a snake.
3. Roll the cut paper into a snake shape so that the head end is a little wider than the tail end. Tape the tube together all the way down the length.
4. Fold the snake shape in half so that the taped side is at the fold (The belly of the snake).
5. Cut a wedge shape at the wider end for the mouth, and cut the shorter end into a tail shape as shown in the picture.
6. Cut small slits all the way down the length of the tube about 1/4" apart so that the slits cut through the tube leaving only about 1/4" of paper that isn't cut at the bottom. This will make your snake bendable.
Instant Digital Download - Complete Bible Lesson - KJV ![]()
Instant Digital Download - Complete Bible Lesson - NIV ![]()
©2013, Digital by Design - See Copyright Information
Work on a Bible Verse Activity Sheet
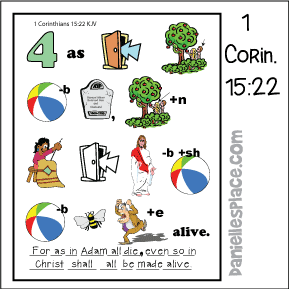
1. Before class print out the activity sheets and make copies. (Printable patterns available to members in both KJV and NIV in both color and black and white.
Instant Digital Download - Complete Bible Lesson - KJV ![]()
Instant Digital Download - Complete Bible Lesson - NIV ![]()
2. In class hand out the sheets and explain that each picture represents a word from the Bible verse. Tell them to figure out which words the pictures represent and write them at the bottom of the sheet. There is one space for each word. Once your children have filled in the blanks the best they can, have them look up the verse in their Bible to see if they filled it out correctly.
Adam and Eve Bible Verse Activity Sheet
Children use the process of elimination to cross out parts of the Bible verse to reveal four names and explain how each character is related to the story of Adam and Eve. This activity sheet is available in KJV only and is appropriate for children 10 and older.
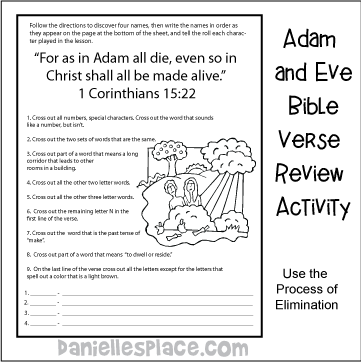
1. Before class print out the activity sheet.
Instant Digital Download - Complete Bible Lesson - KJV ![]()
2. In class hand out the sheets and have your children read the instructions and cross out the appropriate letters on the Bible verse. Once they have answered all the questions, four names from the Bible story will be revealed.

